COPYRIGHT WARNING:
All pictures and texts in this web page are the property of nomaallim.com. Any use of any part of those contents without the written consent of nomaallim.com shall be subject to legal procedures as per international and local laws in the concerned country. Using the name "nomaallim" or "nomaallim com" or "nomaallim.com" in the text describing the unauthorized copied content shall not constitute an exception and shall be sanctioned in accordance to the effective laws and proceedings.
All pictures and texts in this web page are the property of nomaallim.com. Any use of any part of those contents without the written consent of nomaallim.com shall be subject to legal procedures as per international and local laws in the concerned country. Using the name "nomaallim" or "nomaallim com" or "nomaallim.com" in the text describing the unauthorized copied content shall not constitute an exception and shall be sanctioned in accordance to the effective laws and proceedings.
|
CONTEXT:
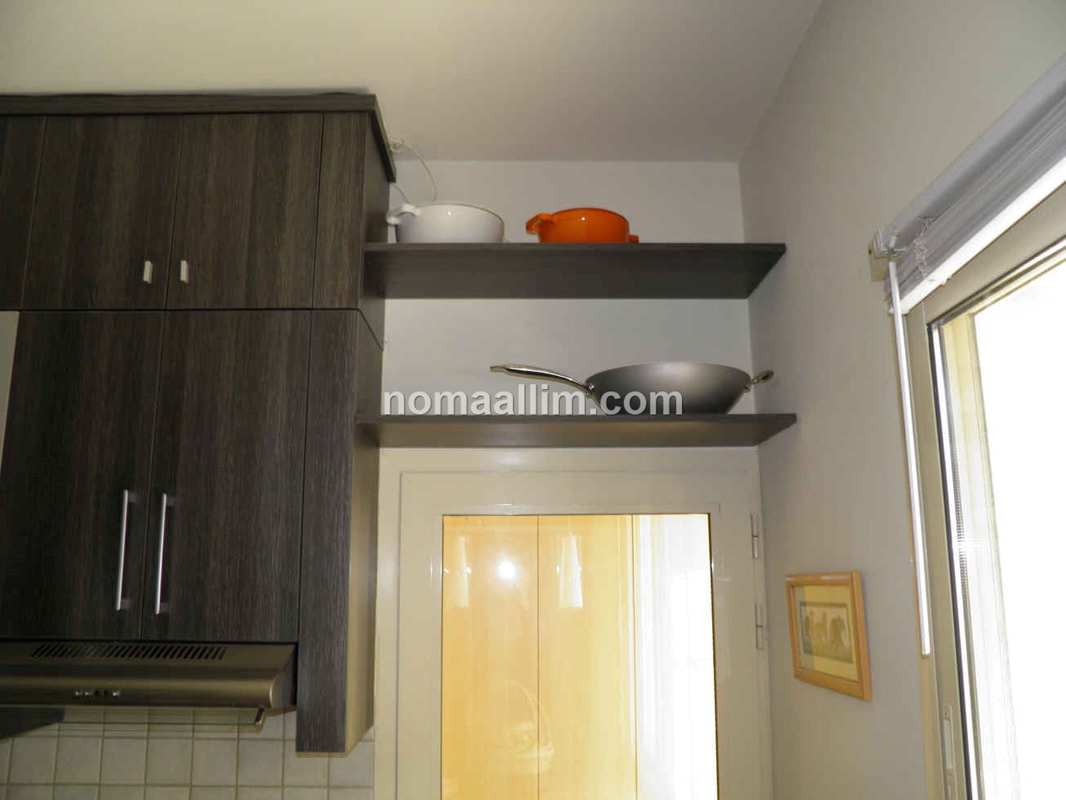
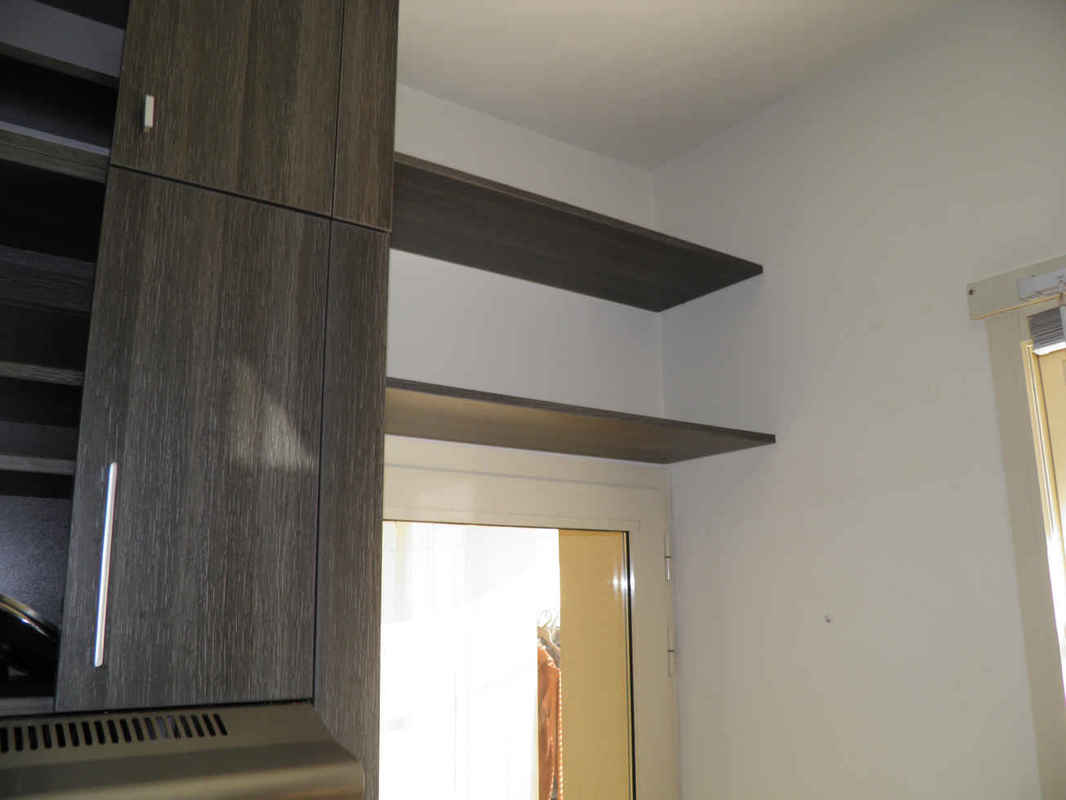
One of your kitchen cabinets is close to a wall meaning separated by an approximate distance of 80 to 90 cm or less. You gain considerable storage space by extending it to the wall using a couple of shelves. The shelves cost very little and need little time to be mounted. Their fixing screws are completely invisible. |
|
DISCLAIMER:
Our pictorials are of informative nature and do illustrate works carried out by ourselves at our own premises for our own use and satisfaction.
Readers who envisage to carry out similar works inspired by the below method shall do this at their own risks and liability.
Our pictorials are of informative nature and do illustrate works carried out by ourselves at our own premises for our own use and satisfaction.
Readers who envisage to carry out similar works inspired by the below method shall do this at their own risks and liability.
Ordering the shelves and buying the necessary accessories
Take the measurement of the available space in more than one place and between both back and front of the cabinet and the opposite wall.
Order shelves that are 2 mm shorter than the smallest of the measurements and that are banded on each side touching a wall plus the one to the front. This means only the side to be fixed to the cabinet remains without a band.
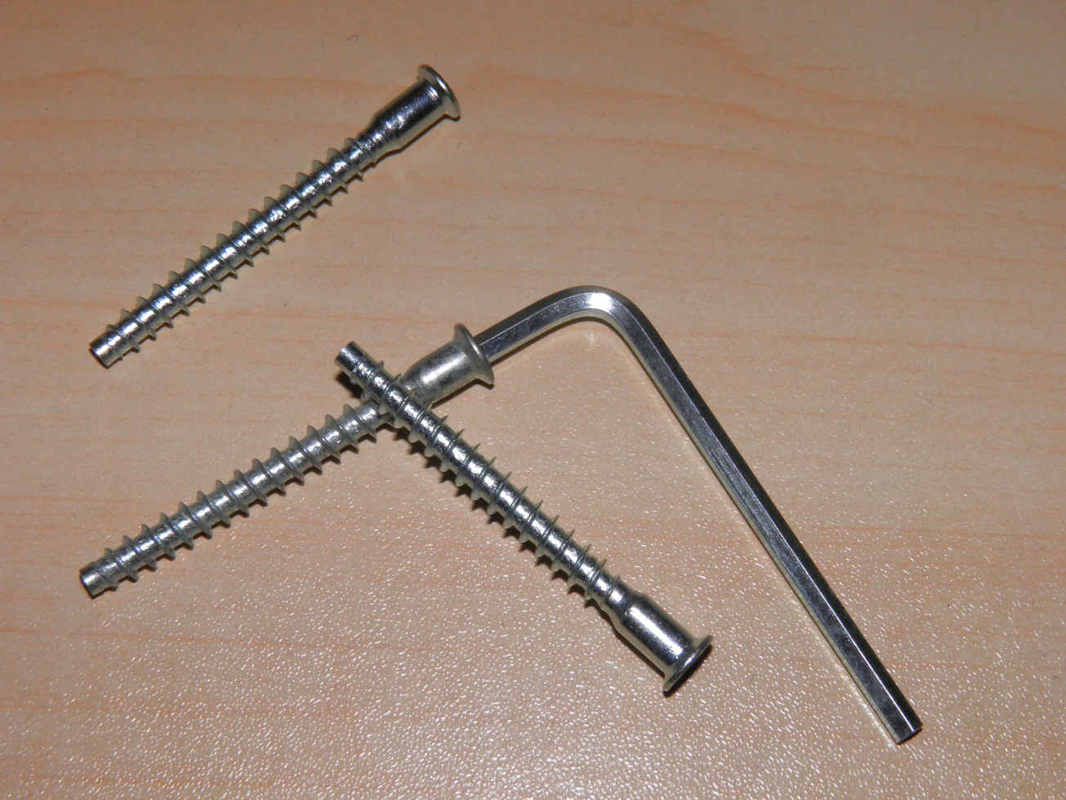
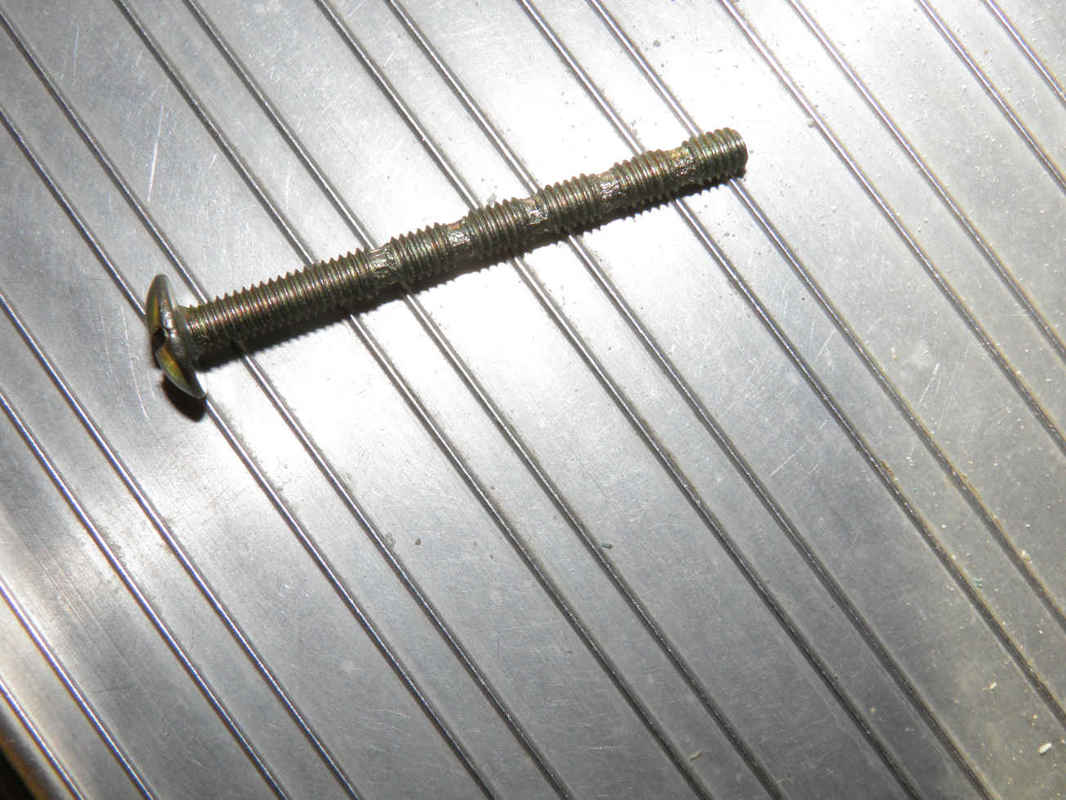
The shelves shall be fixed by the means of assembly screws to the cabinet side (middle) and handle fixing screws (right) to the wall side.
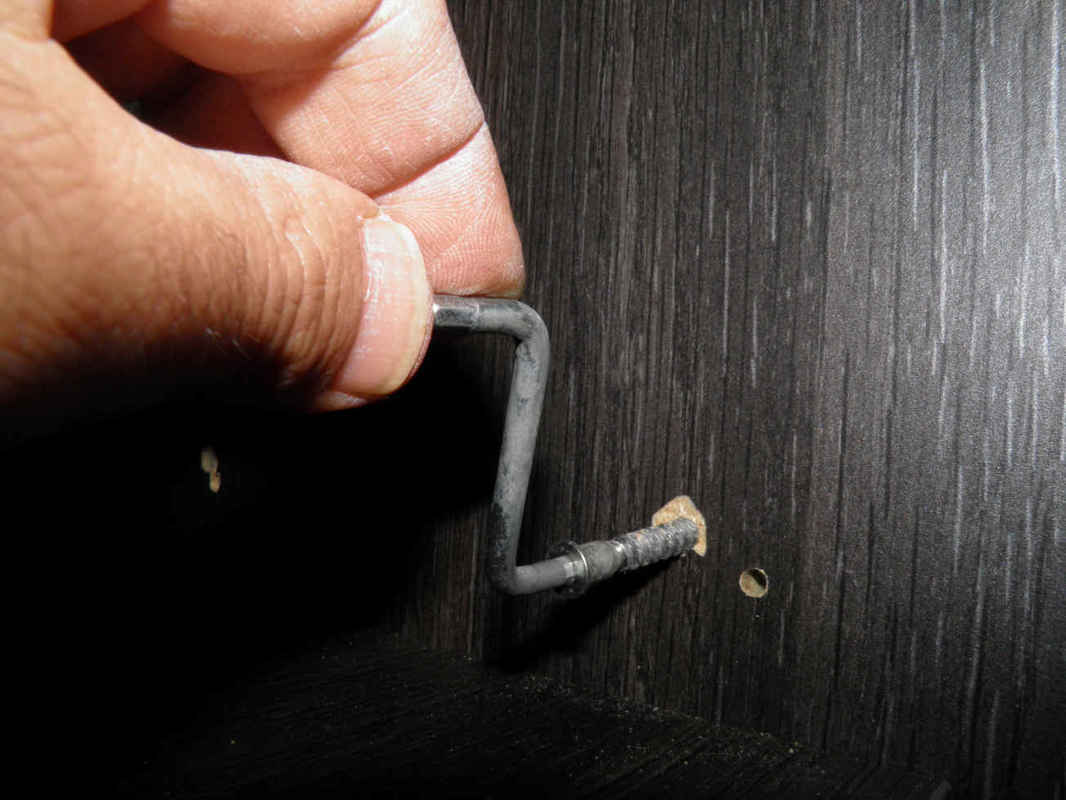
The choice of the 4 mm handle fixing screws shown in the right picture is due to the fact they are suitable for 6 mm wall plugs, long enough to safely support the shelf, bend easily to accommodate the uneven gaps between shelves and walls and can be easily cut since the head has to be removed as shown further below.
Order shelves that are 2 mm shorter than the smallest of the measurements and that are banded on each side touching a wall plus the one to the front. This means only the side to be fixed to the cabinet remains without a band.
The shelves shall be fixed by the means of assembly screws to the cabinet side (middle) and handle fixing screws (right) to the wall side.
The choice of the 4 mm handle fixing screws shown in the right picture is due to the fact they are suitable for 6 mm wall plugs, long enough to safely support the shelf, bend easily to accommodate the uneven gaps between shelves and walls and can be easily cut since the head has to be removed as shown further below.

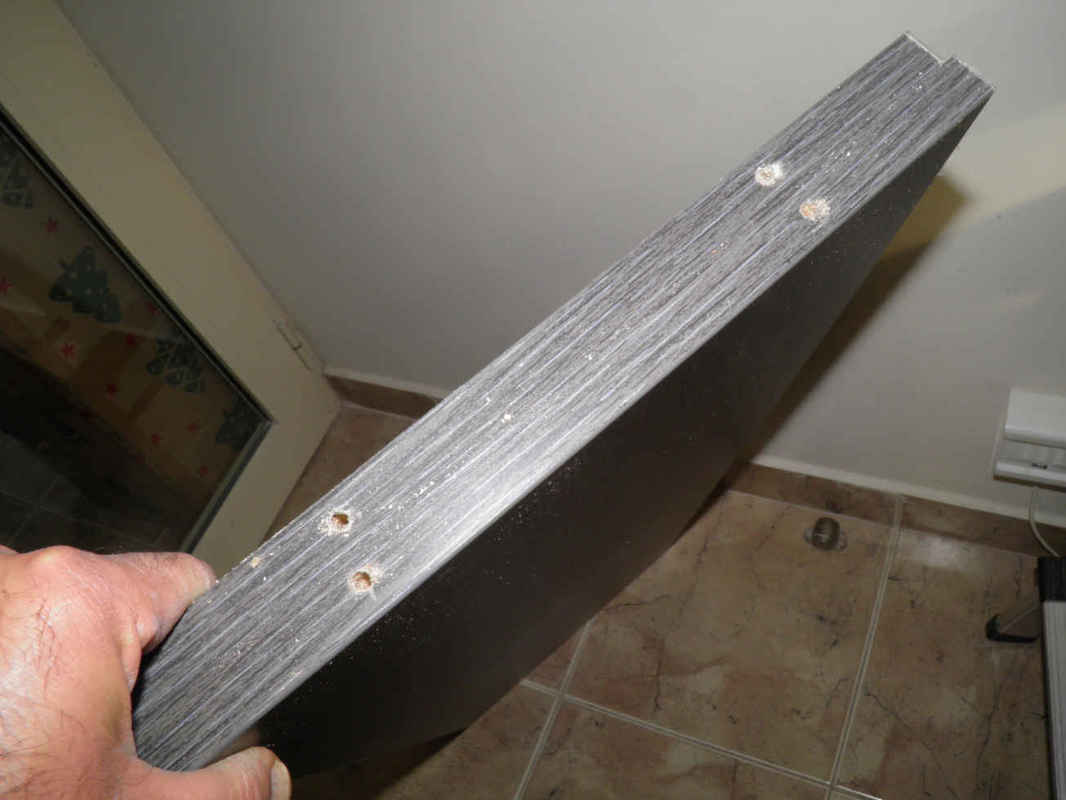
Drilling the shelves, cabinet and wall
Drill the shelves with the appropriate bit.
In this particular case, a 4.5 mm bit is adequate for both sides.
In this particular case, a 4.5 mm bit is adequate for both sides.
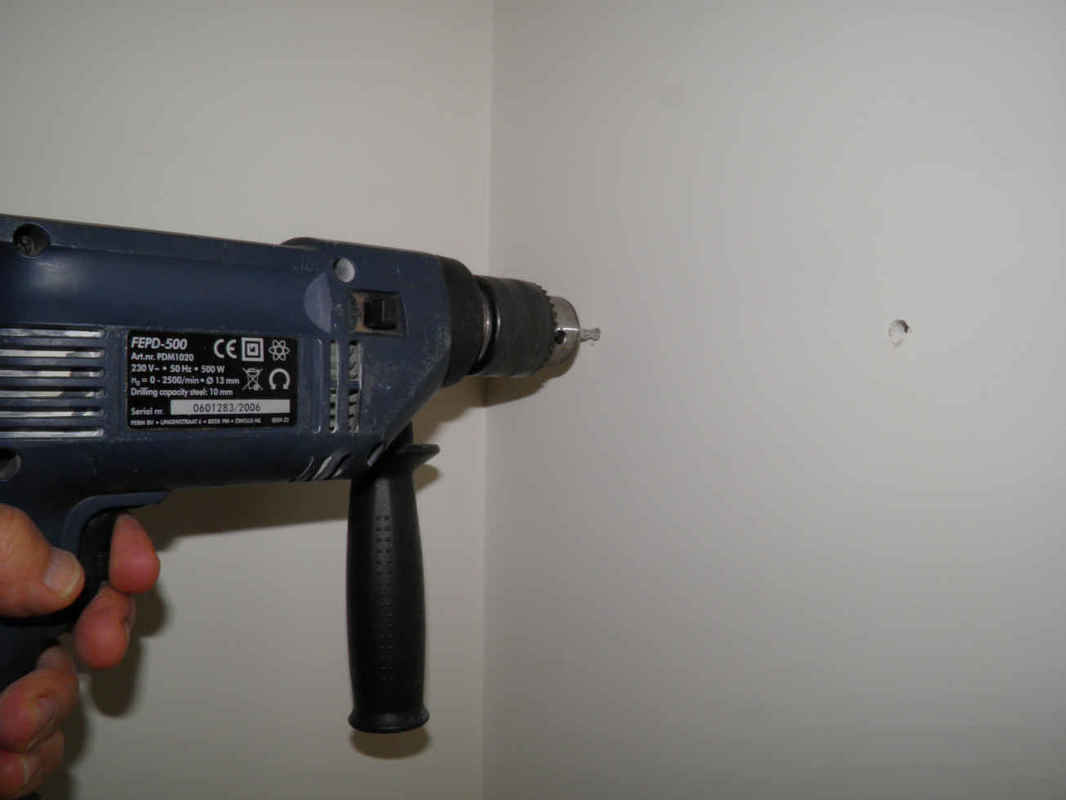
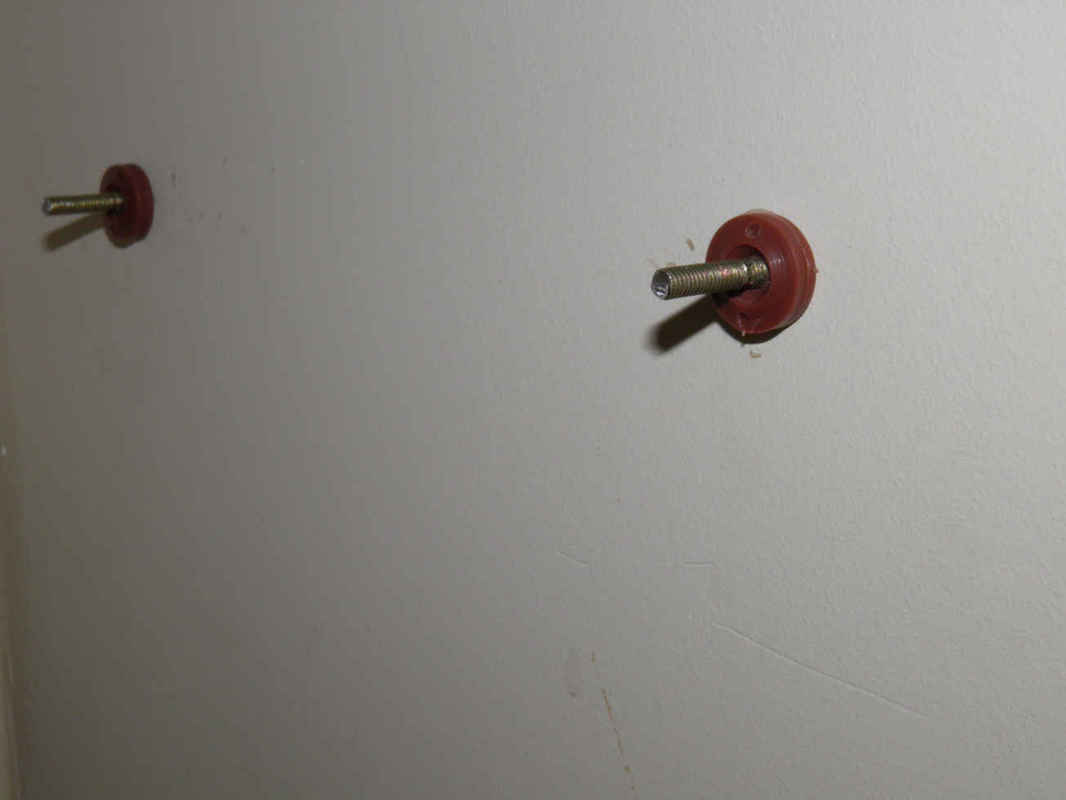
Drill the wall with a 6 mm bit, and use 6 mm wall plugs of good quality.
You may visit our page for drilling into masonry walls if you are a DIY beginner.
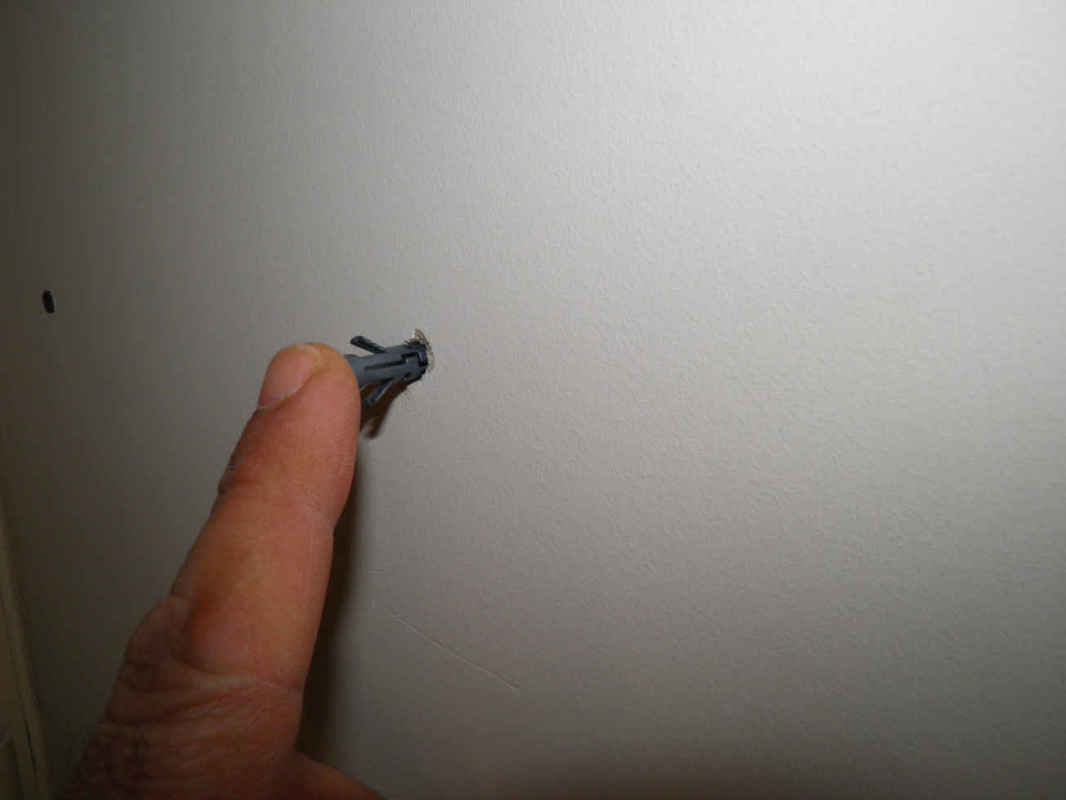
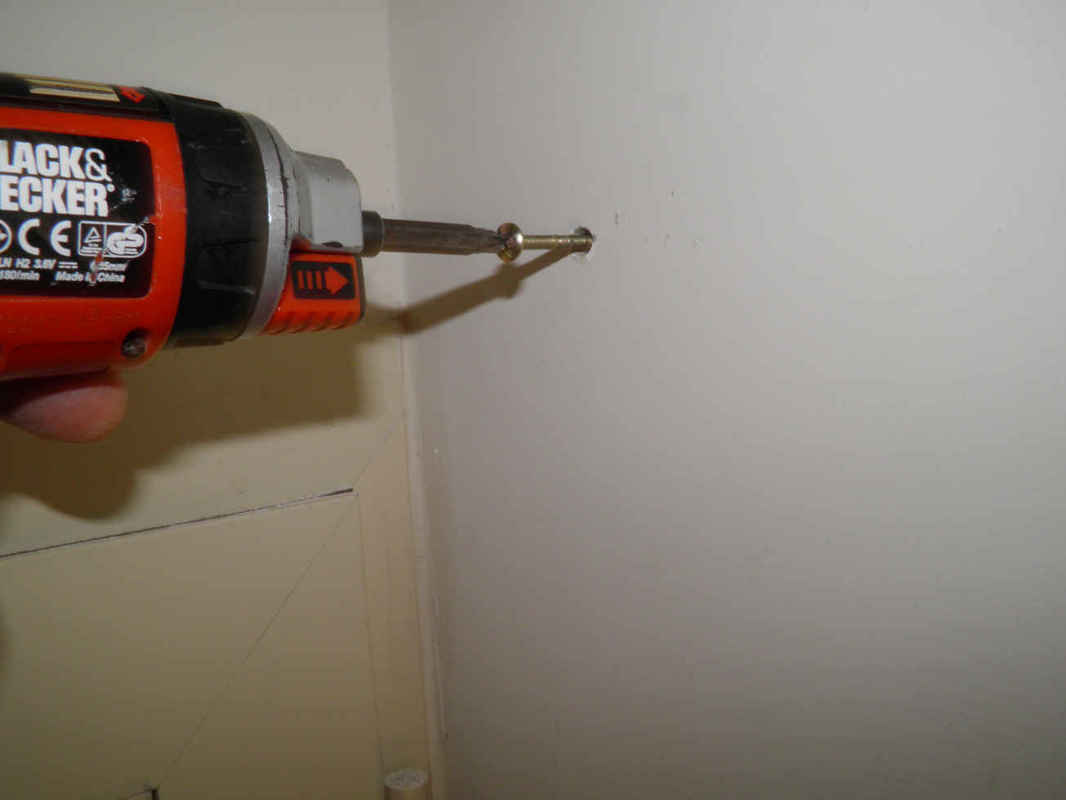
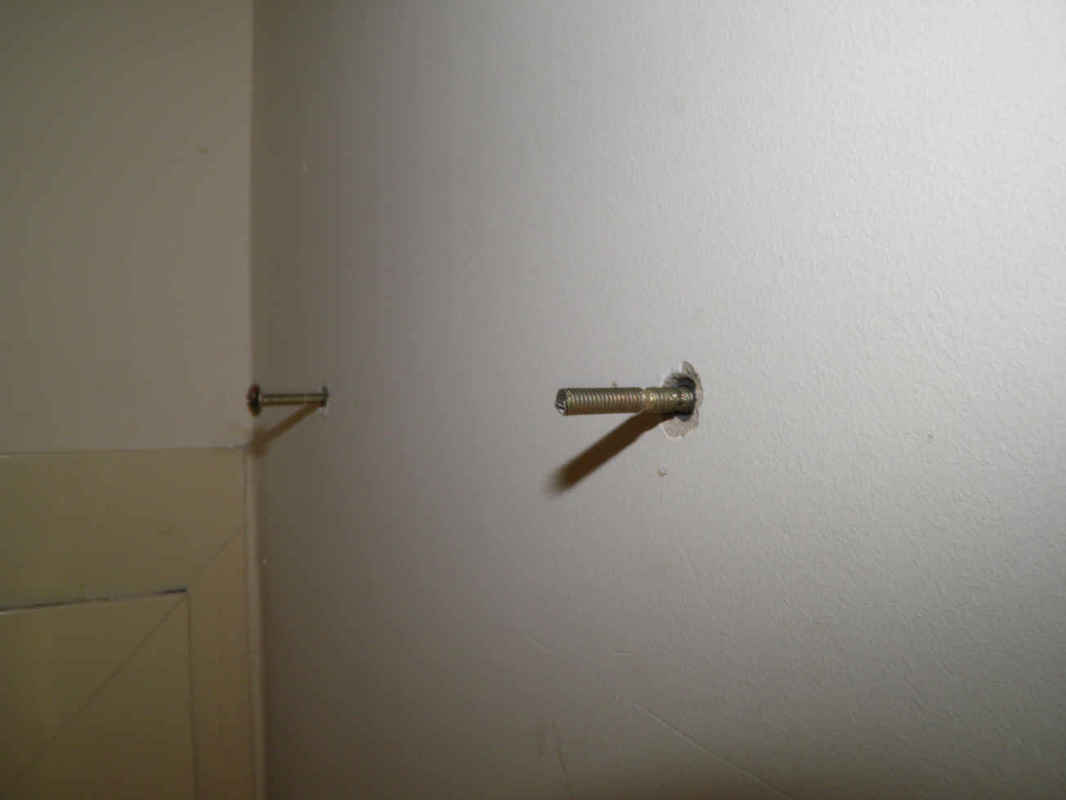
Fix the screws but do not let them go too much into the wall. Leave them at least 2 cm out.
You may visit our page for drilling into masonry walls if you are a DIY beginner.
Fix the screws but do not let them go too much into the wall. Leave them at least 2 cm out.
|
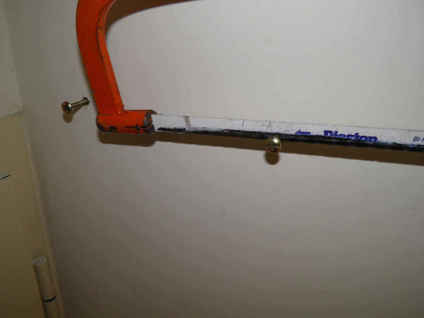
Cut their head carefully not to damage the wall paint.
|
|
|
|
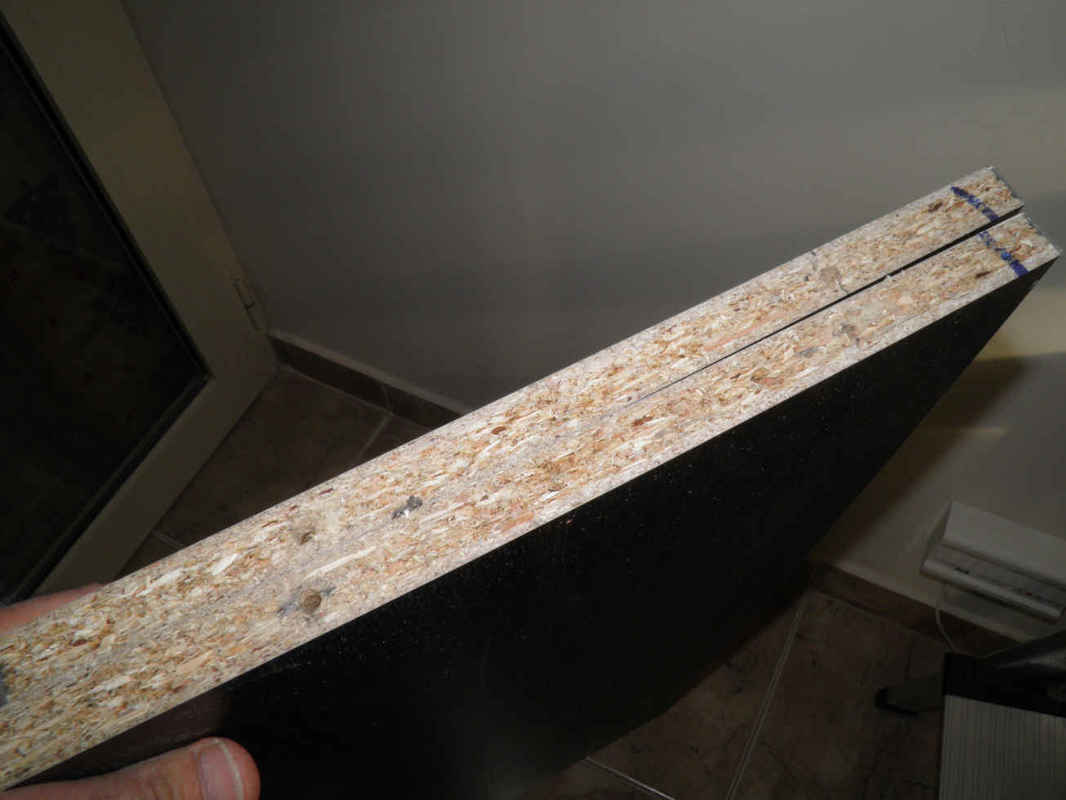
Drill the cabinet with the bit of appropriate size, 5 mm in this case.
|
Fixing the shelves
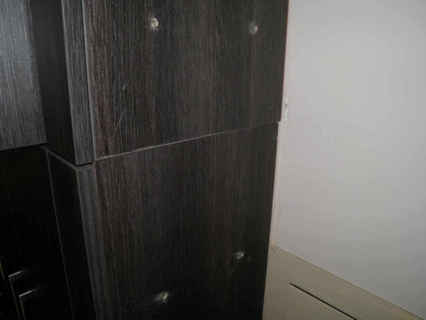
Temporarily introduce each shelf into the wall screws and check the gap with the wall.
Use plastic cabinet washers as spacers. Add as much as needed to fill the entire gap in a manner that the shelf gets stuck between the cabinet and the wall.
Fix the shelves to the cabinet and tighten well the assembly screws. Click here for more about screws and accessories.
Use plastic cabinet washers as spacers. Add as much as needed to fill the entire gap in a manner that the shelf gets stuck between the cabinet and the wall.
Fix the shelves to the cabinet and tighten well the assembly screws. Click here for more about screws and accessories.
The job is now done.
The shelves are suitable for medium loads.
The shelves are suitable for medium loads.

See also...
|
|
|