COPYRIGHT WARNING:
All pictures and texts in this web page are the property of nomaallim.com. Any use of any part of those contents without the written consent of nomaallim.com shall be subject to legal procedures as per international and local laws in the concerned country. Using the name "nomaallim" or "nomaallim com" or "nomaallim.com" in the text describing the unauthorized copied content shall not constitute an exception and shall be sanctioned in accordance to the effective laws and proceedings.
All pictures and texts in this web page are the property of nomaallim.com. Any use of any part of those contents without the written consent of nomaallim.com shall be subject to legal procedures as per international and local laws in the concerned country. Using the name "nomaallim" or "nomaallim com" or "nomaallim.com" in the text describing the unauthorized copied content shall not constitute an exception and shall be sanctioned in accordance to the effective laws and proceedings.
BEFORE YOU START
|
|
DISCLAIMER:
Our pictorials are of informative nature and do illustrate works carried out by ourselves at our own premises for our own use and satisfaction.
Readers who envisage to carry out similar works inspired by the below method shall do this at their own risks and liability.
Our pictorials are of informative nature and do illustrate works carried out by ourselves at our own premises for our own use and satisfaction.
Readers who envisage to carry out similar works inspired by the below method shall do this at their own risks and liability.
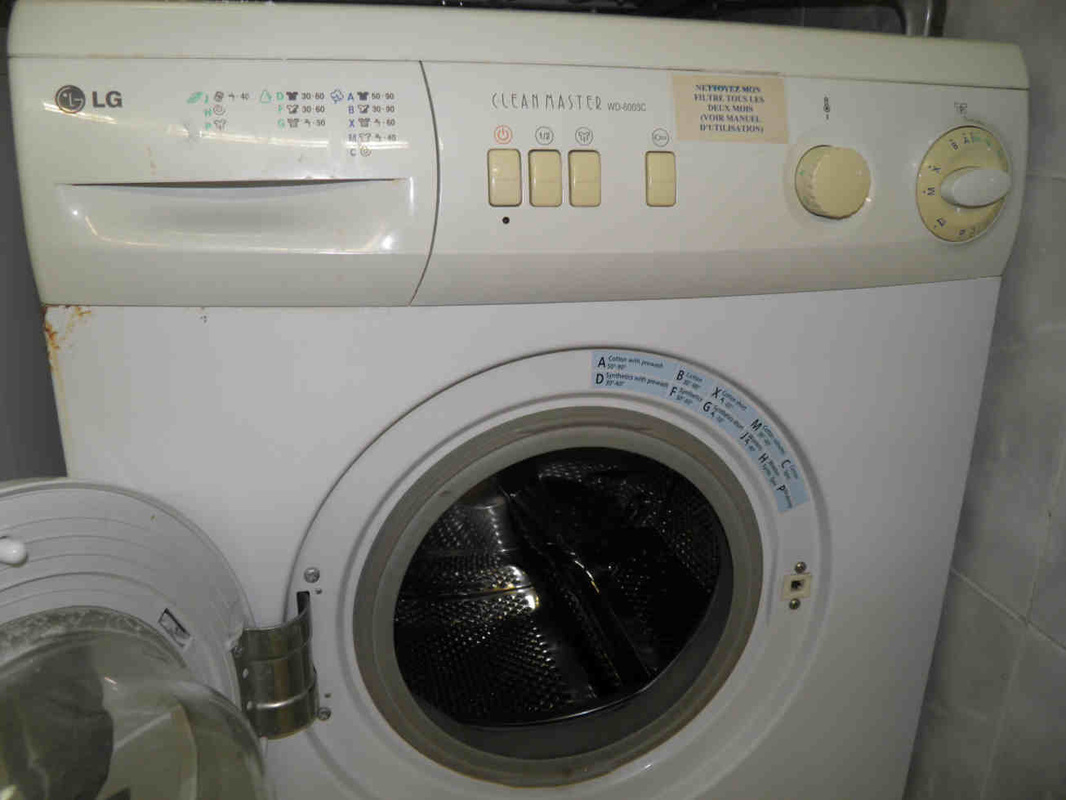
Washing machine inlet valve replacement pictorial
1- Context and preparatory works
|
1- This machine gets flooded when not in use. Its controlled inlet valve is not closing which lets the water flow in and up to the floor.
|
2- Turn off the water supply then manually activate the pump to get the rid of the water in the drum.
|
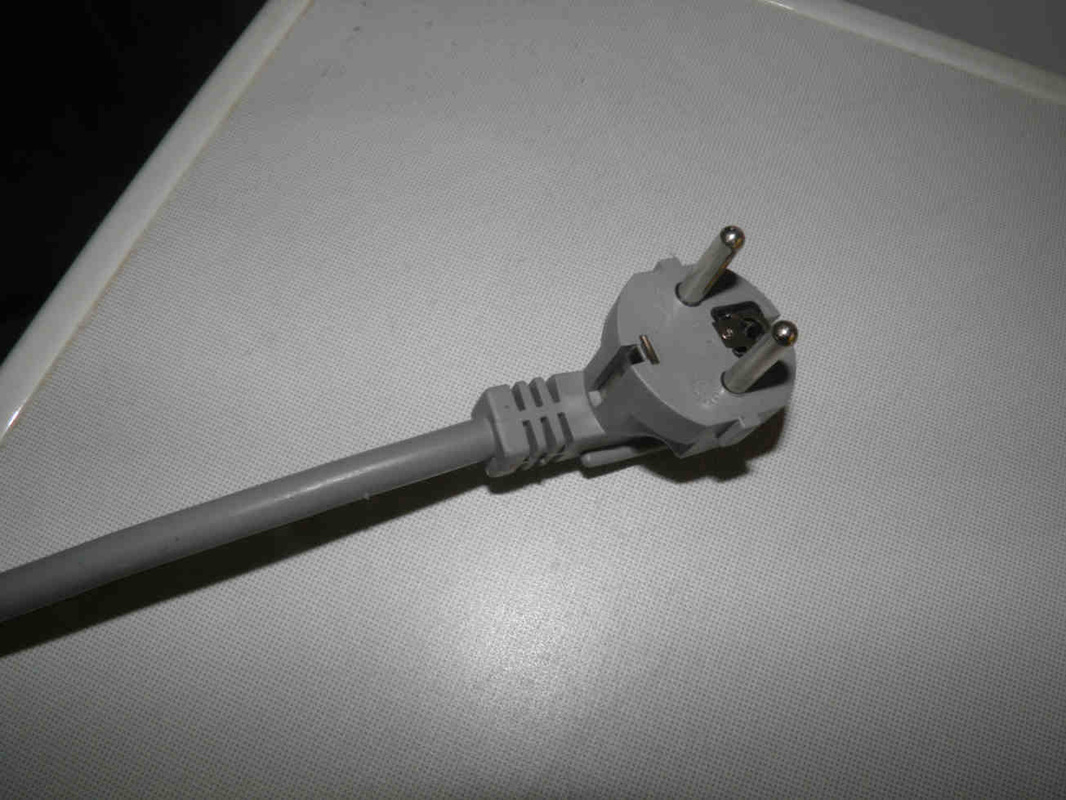
3- Unplug your machine.
|
2- Reaching and removing the washing machine inlet valve
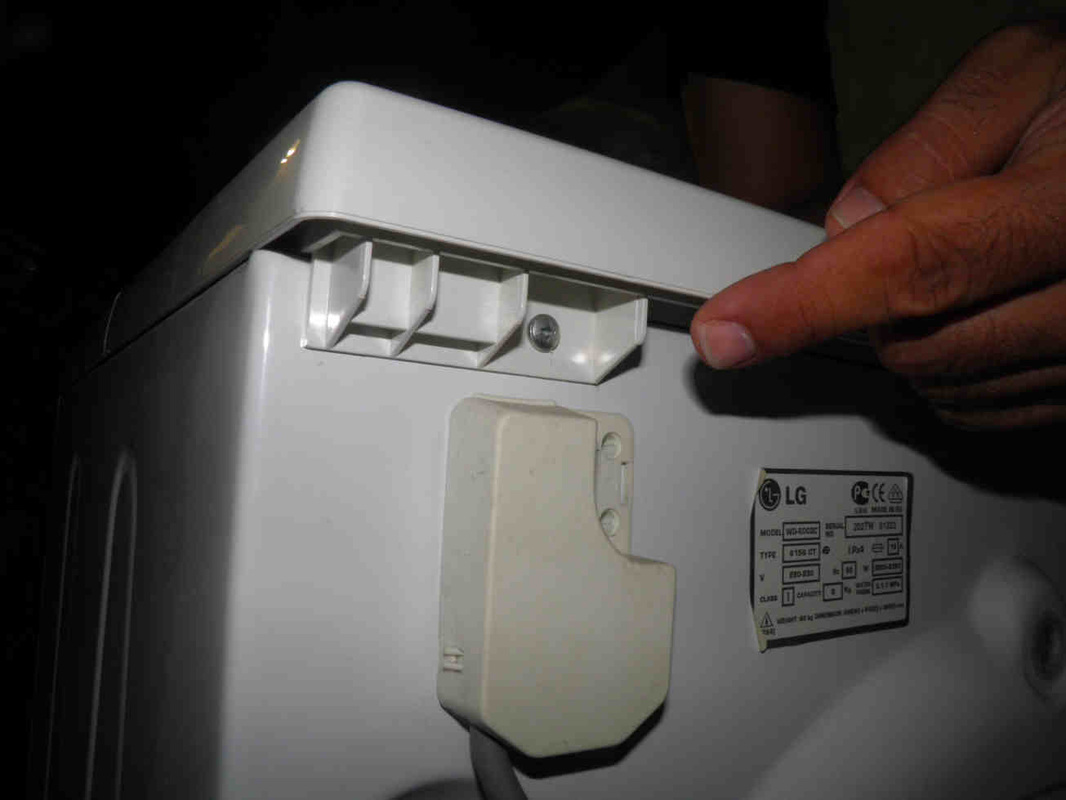
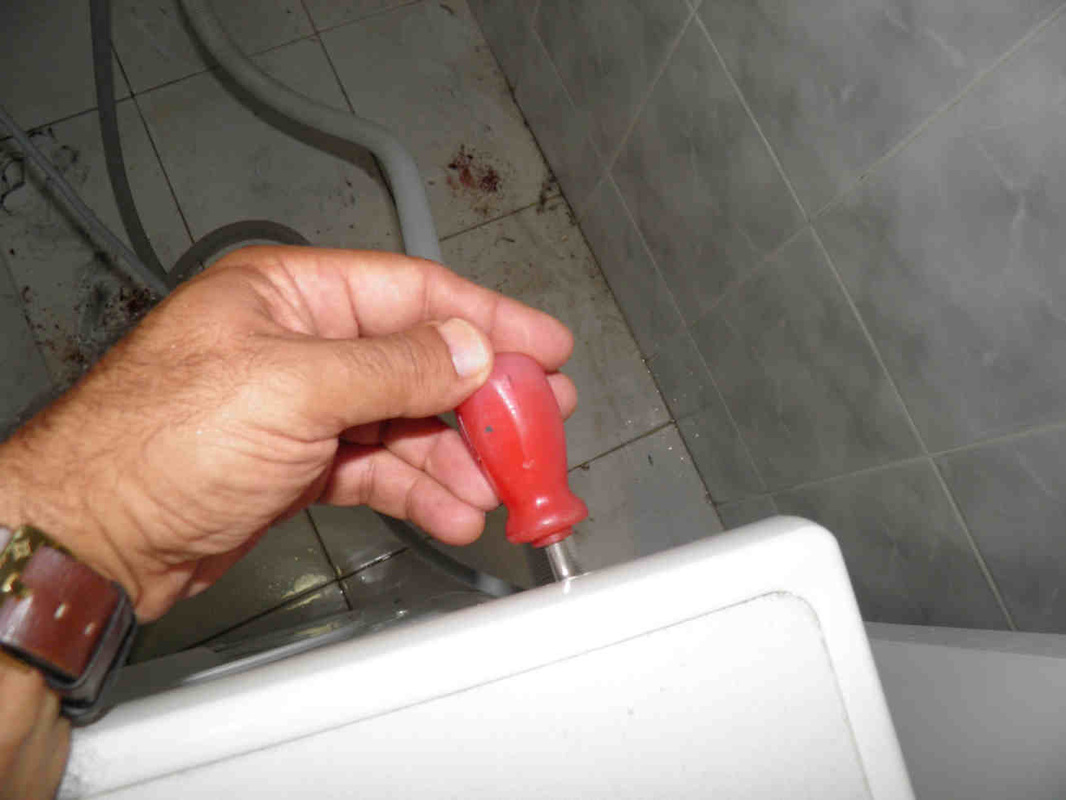
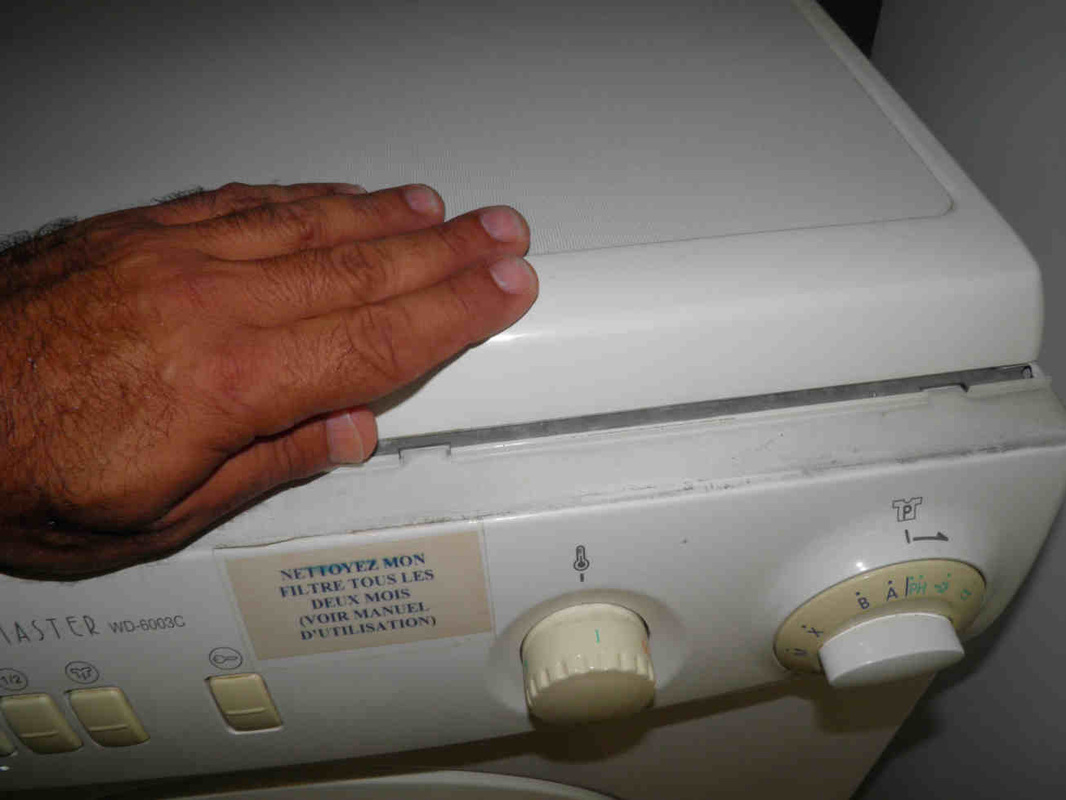
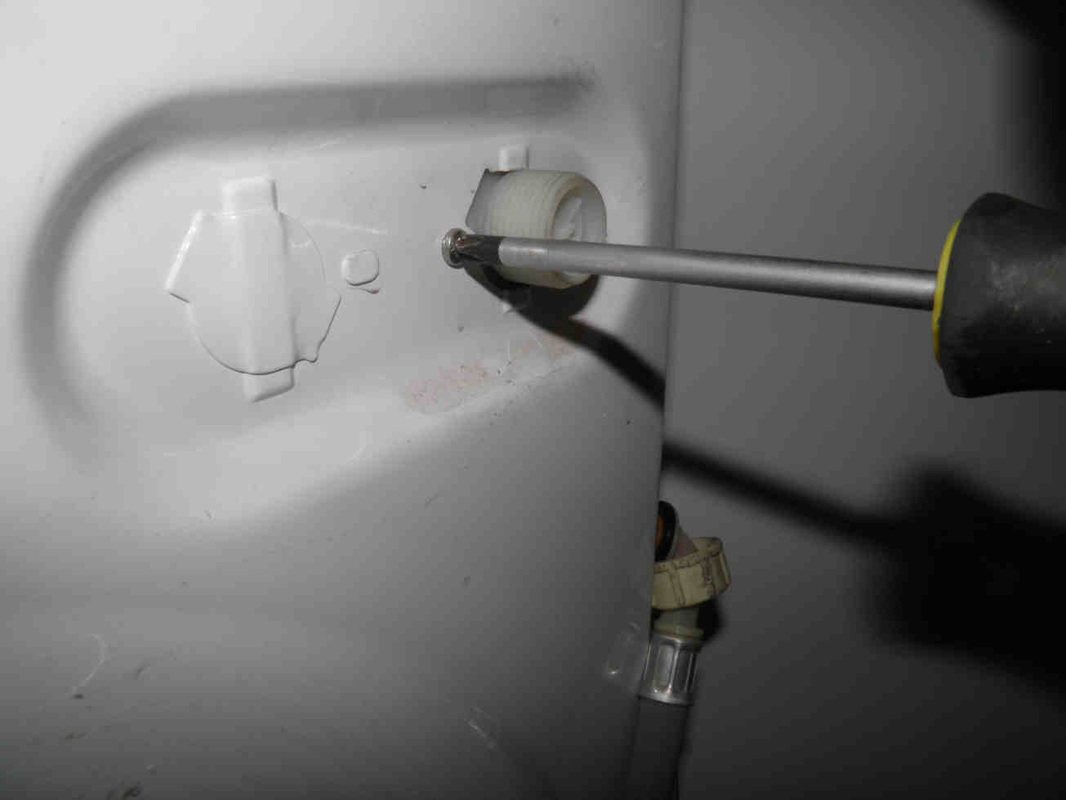
Everything is below the machine cover which is to be removed prior to any intervention.
Find the two screw drivers that hold it from the back, remove them then slide it to the back or pull it up (depending on machine)
Find the two screw drivers that hold it from the back, remove them then slide it to the back or pull it up (depending on machine)

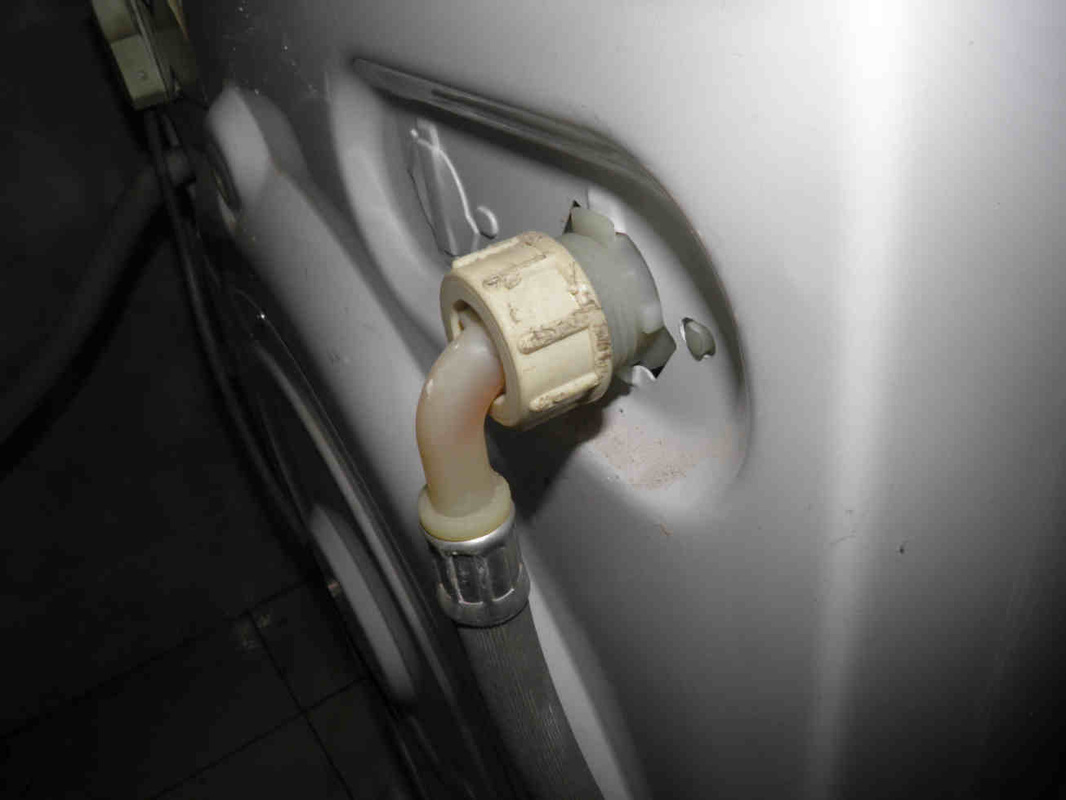
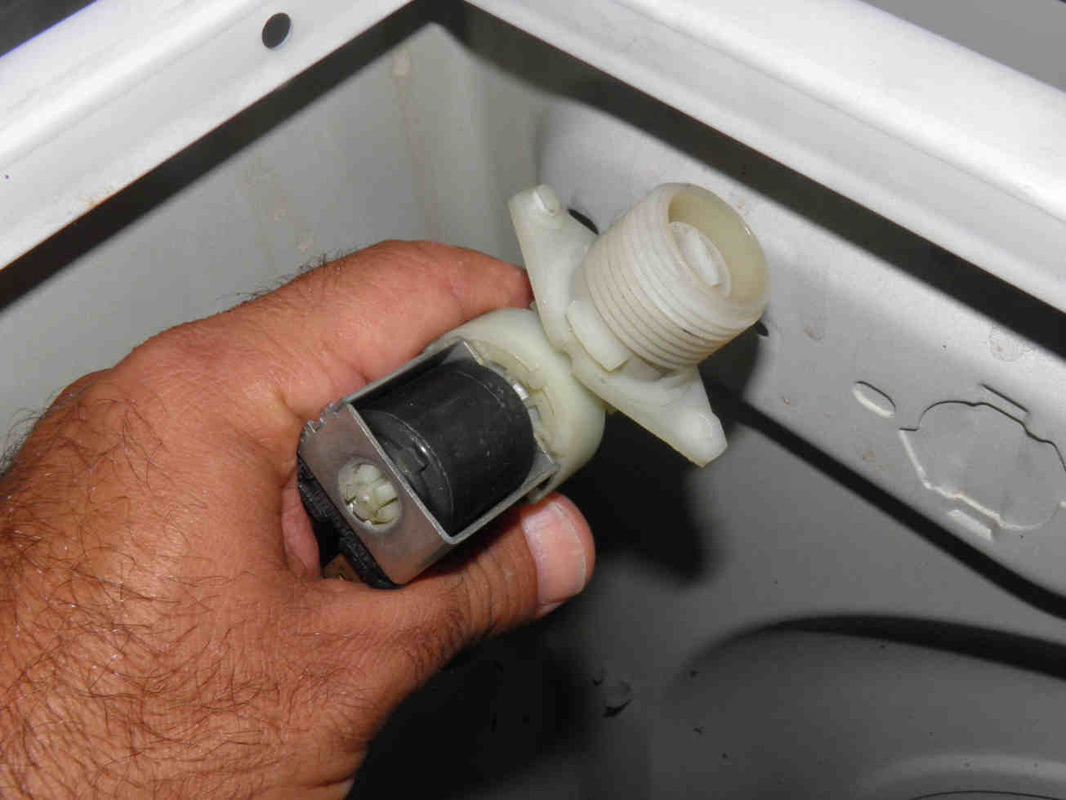
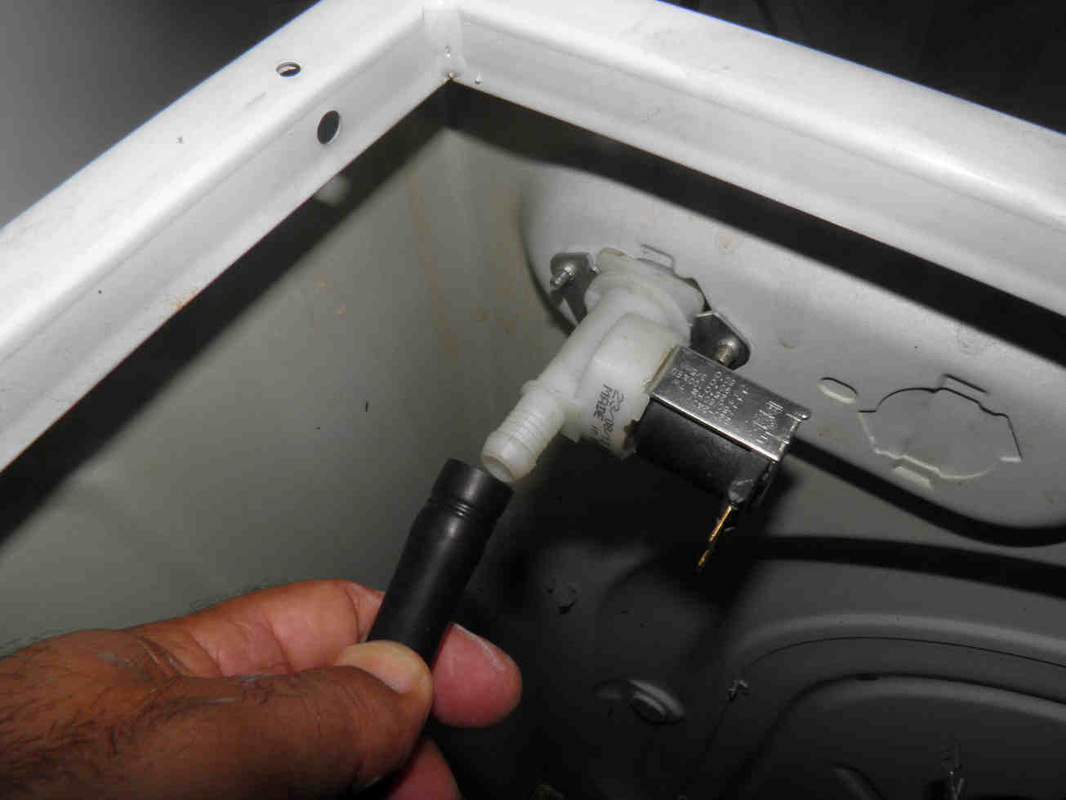
The solenoid valve (electrically controlled valve) is located where the water hose is connected.
Unscrew and remove the hose, and proceed as shown:
Unscrew and remove the hose, and proceed as shown:
|
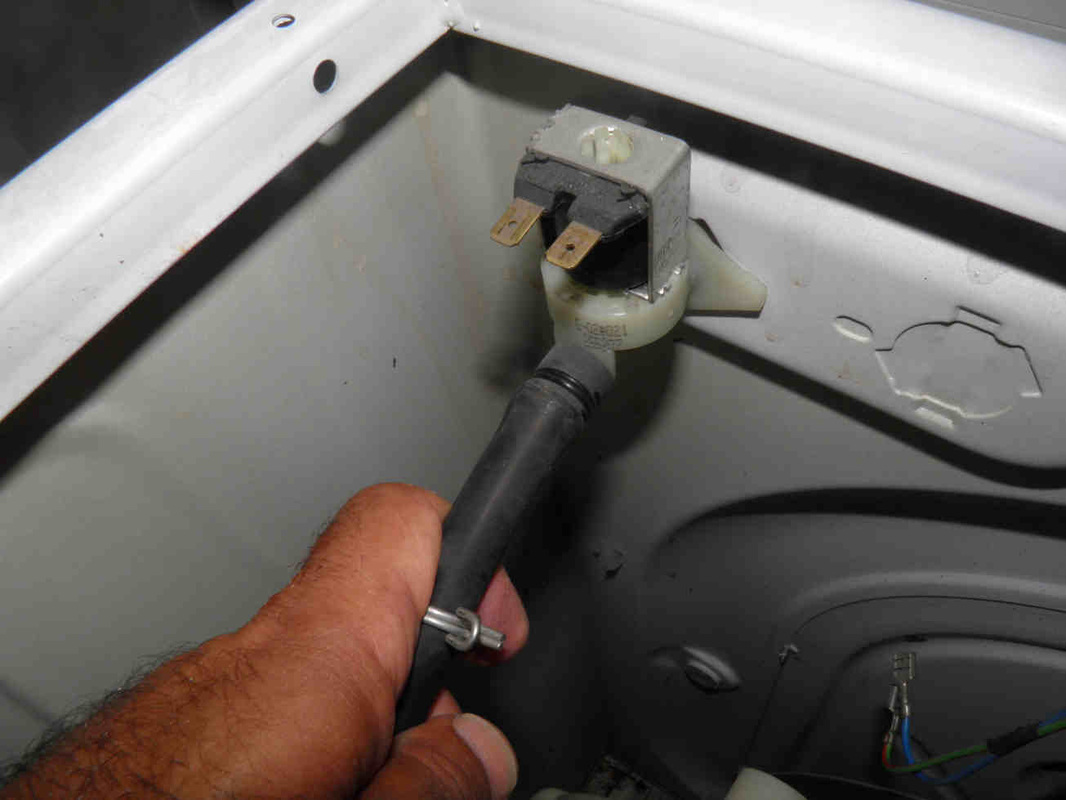
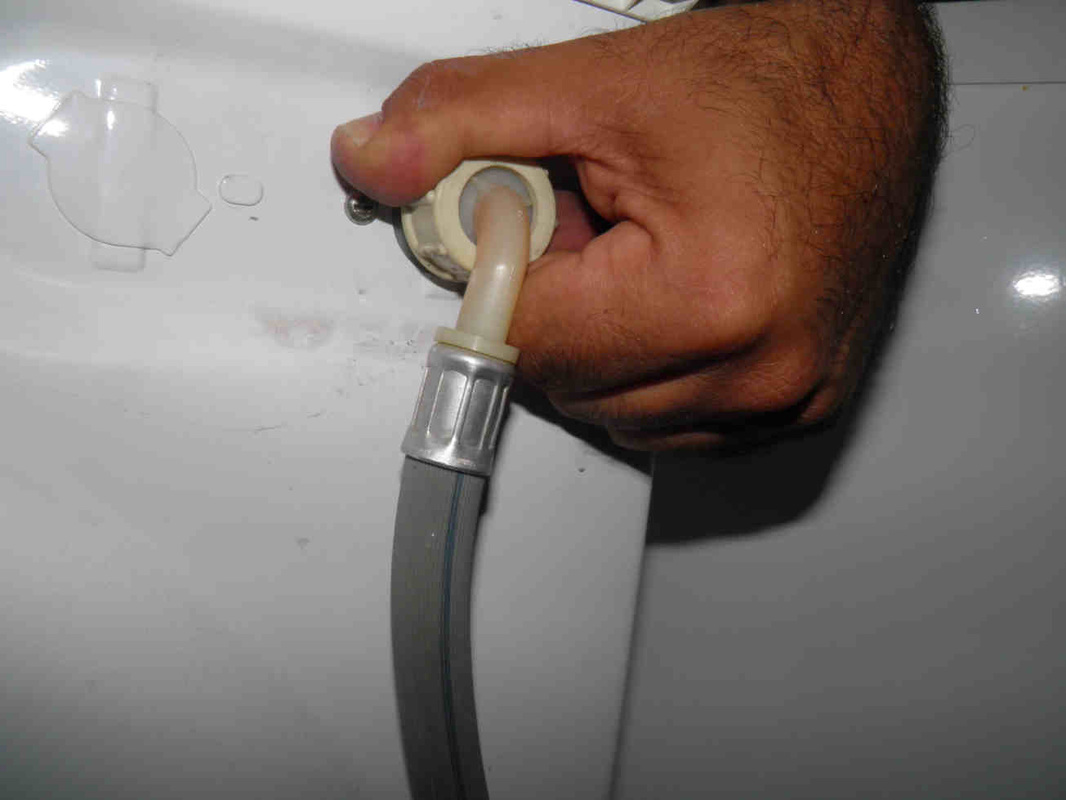
1- Unscrew and remove the water supply hose.
|
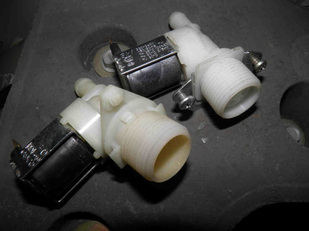
2- This is what the solenoid valve looks like.

|
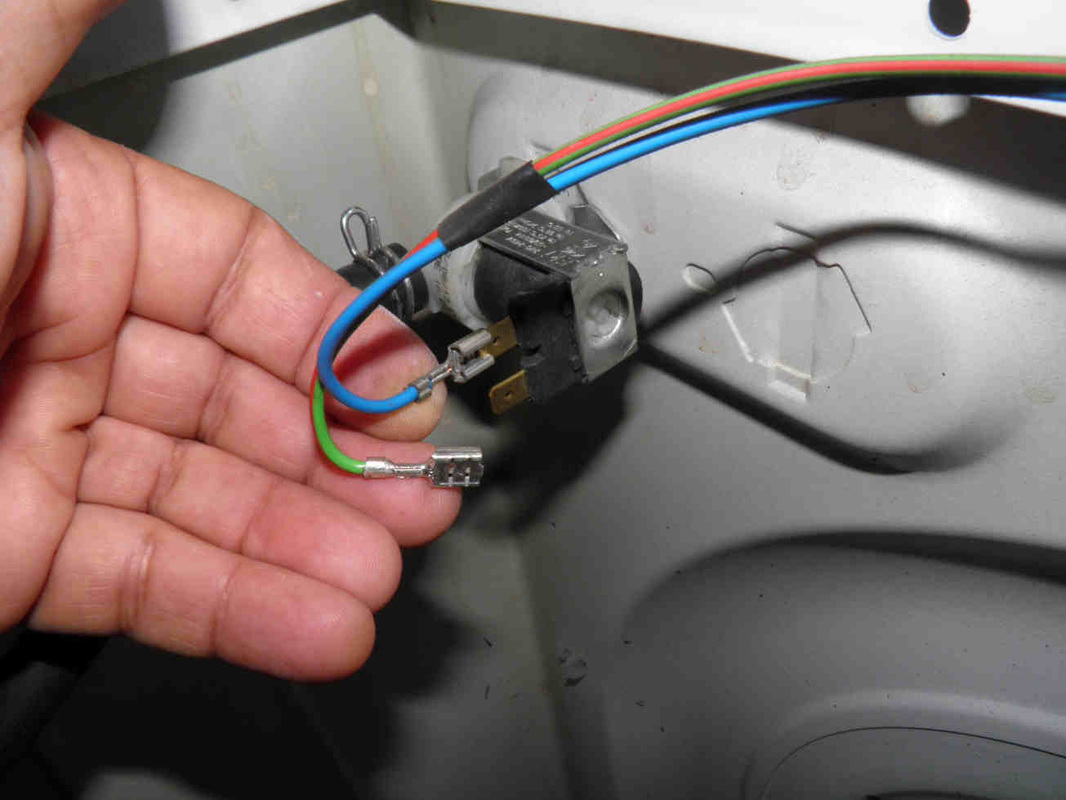
3- Unplug the connecting wires.
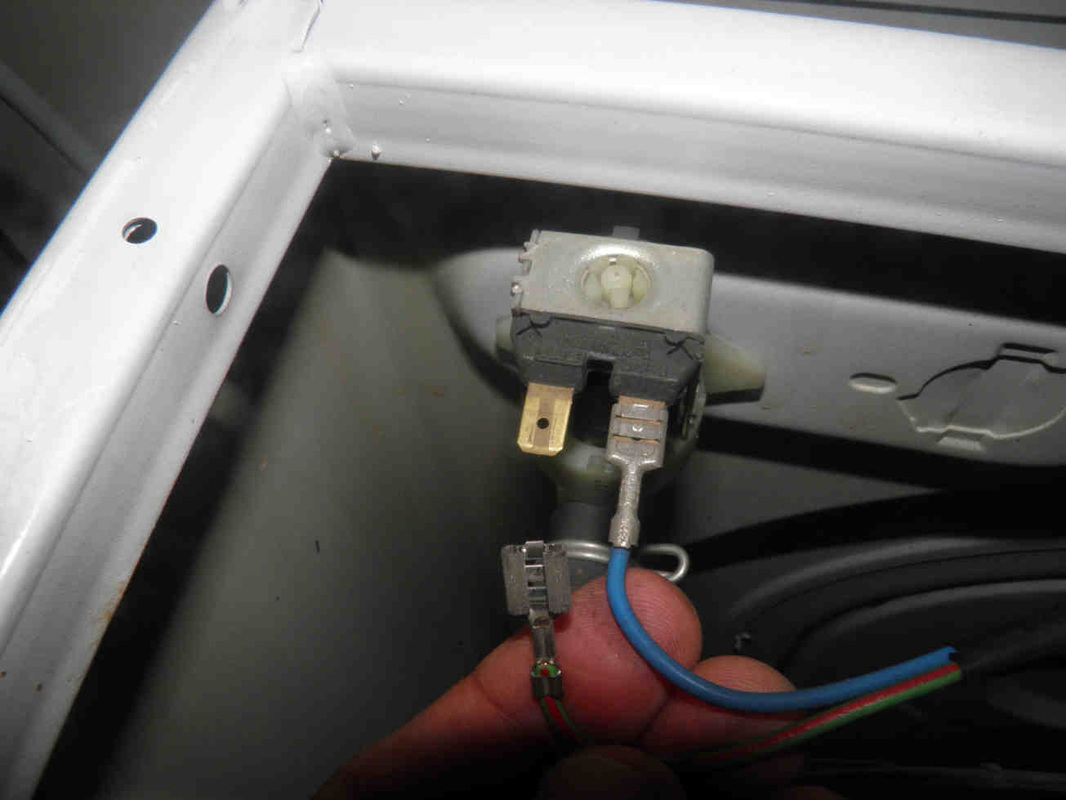
|
|
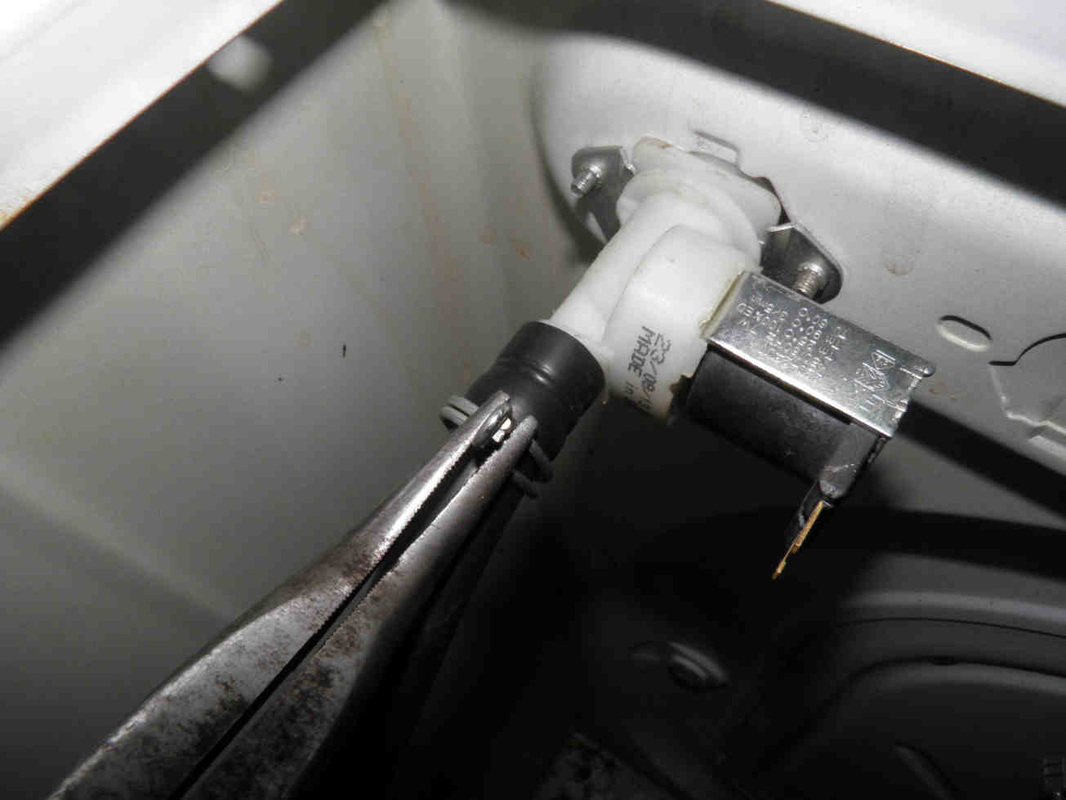
4- Use your pliers to remove the hose clip. This is the hose connecting the valve to the detergent drawer.
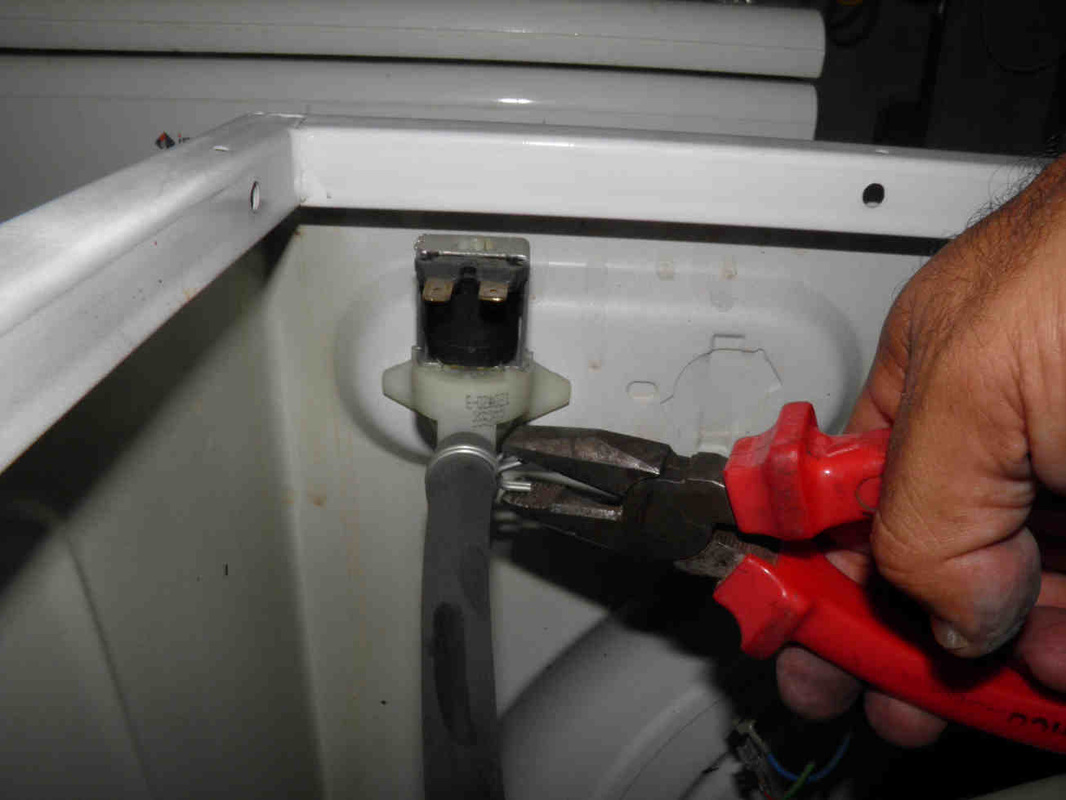
|
5- Pull the hose out. If it is stuck, use a screwdriver to take it out of its connector.
|
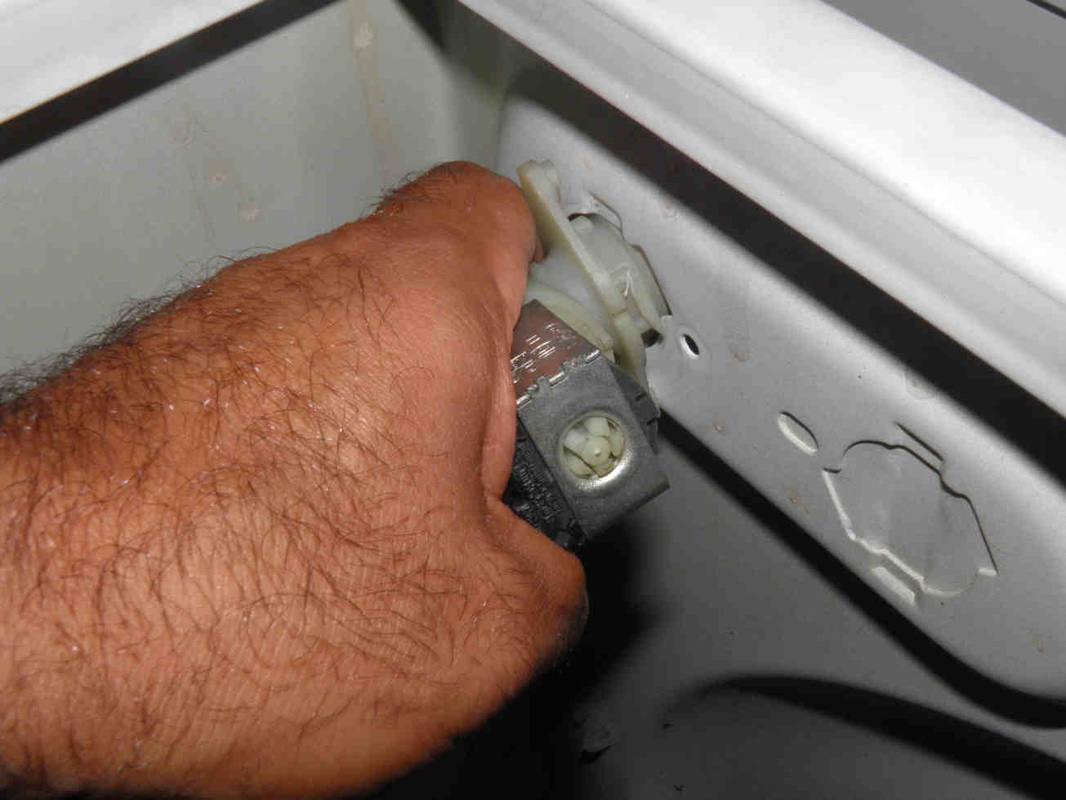
6- Rotate the valve counter clockwise and remove it.
|
|
|
|
3- Testing the washing machine valve and buying a replacement
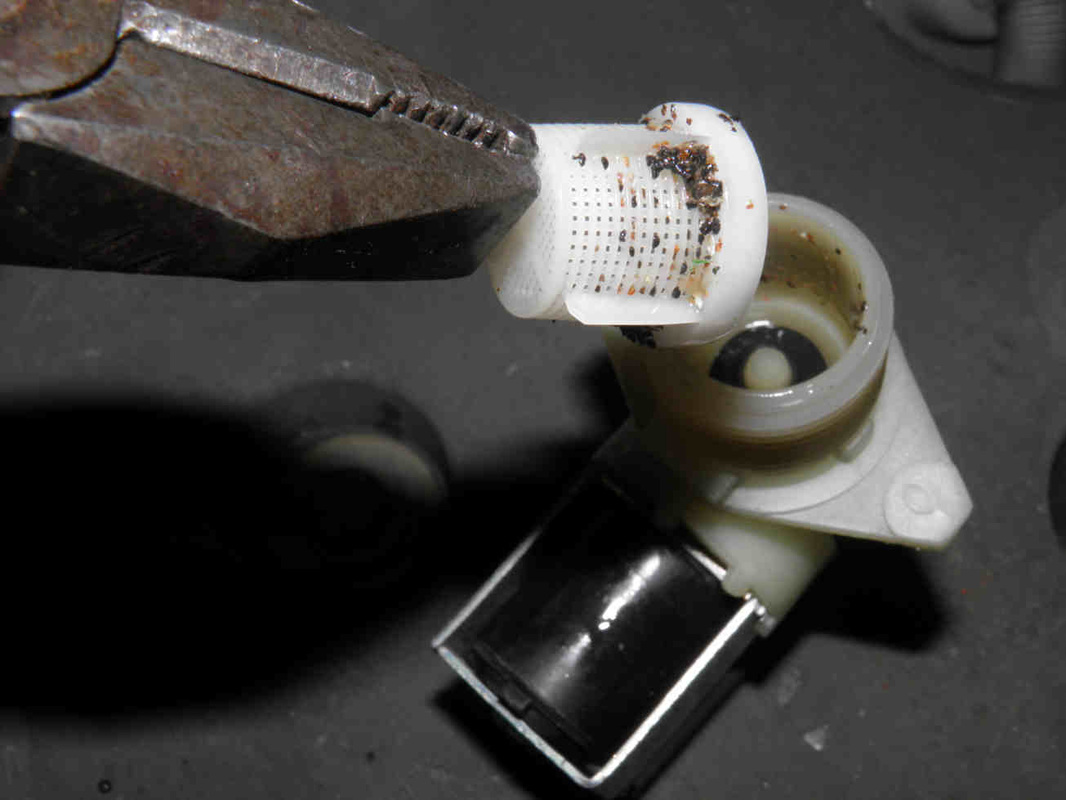
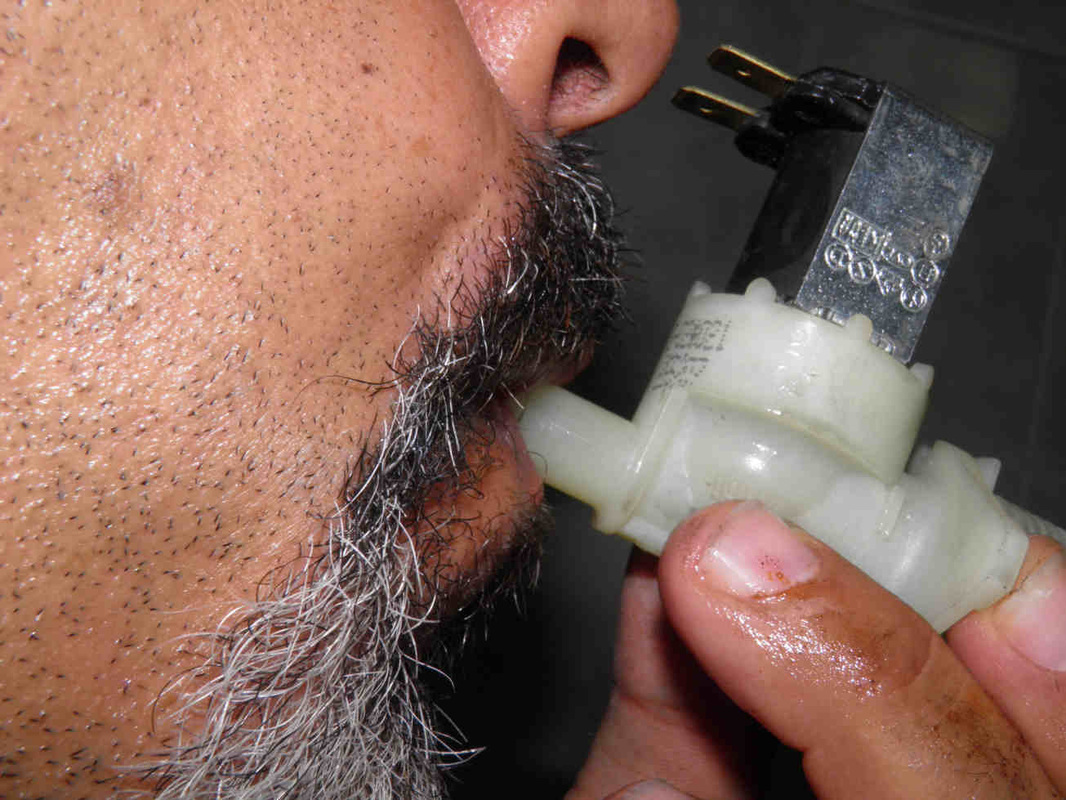
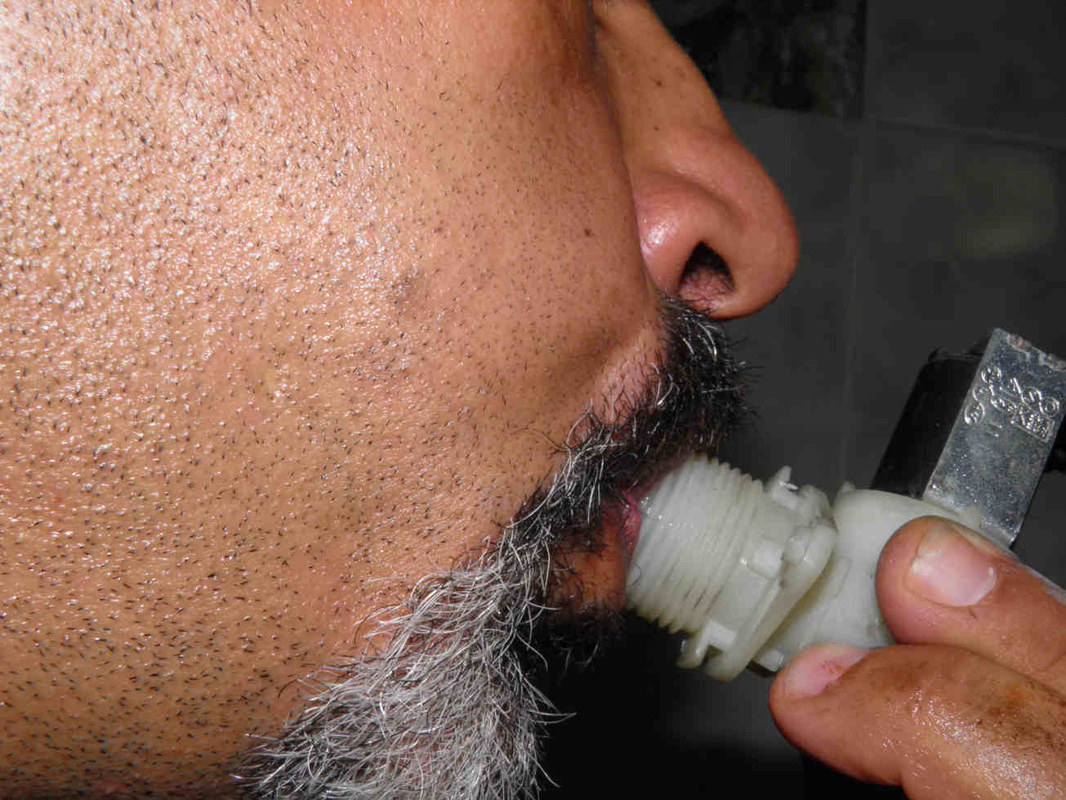
Check the filter exists, remove it and blow the valve in both ways.
If it is easy to blow air, its seal got shrunk and the valve needs replacement.
If it is not, some scale could have built up yet it is not advised to attempt cleaning it with vinegar if the machine is more than 7 years old.
You need to buy a new solenoid valve.
If it is easy to blow air, its seal got shrunk and the valve needs replacement.
If it is not, some scale could have built up yet it is not advised to attempt cleaning it with vinegar if the machine is more than 7 years old.
You need to buy a new solenoid valve.
Finding an exact match is not always possible. In this case, the new valve mounts using screws instead of rotating it into its opening.
|
|
4- Completing the flooded washing machine repair
Insert the new valve in its opening, fit the screws and tighten them, reconnect the drawer's hose, refit its clamp and connect the wires.
Reconnect the water inlet, temporarily refit the cover, plug the machine in its power outlet and start any cycle to make sure the water flows in when it starts. Refit and tighten the cover screws. The repair is complete.
See also...


|
|
|