COPYRIGHT WARNING:
All pictures and texts in this web page are the property of nomaallim.com. Any use of any part of those contents without the written consent of nomaallim.com shall be subject to legal procedures as per international and local laws in the concerned country. Using the name "nomaallim" or "nomaallim com" or "nomaallim.com" in the text describing the unauthorized copied content shall not constitute an exception and shall be sanctioned in accordance to the effective laws and proceedings.
All pictures and texts in this web page are the property of nomaallim.com. Any use of any part of those contents without the written consent of nomaallim.com shall be subject to legal procedures as per international and local laws in the concerned country. Using the name "nomaallim" or "nomaallim com" or "nomaallim.com" in the text describing the unauthorized copied content shall not constitute an exception and shall be sanctioned in accordance to the effective laws and proceedings.
BEFORE YOU START
It is obvious that such works are to be carried out on a cold boiler. Make sure to isolate the electrical circuit feeding the boiler. You should not proceed by simply shutting it off with the switch or thermostat but rather isolate its breaker. |

|
DISCLAIMER:
Our pictorials are of informative nature and do illustrate works carried out by ourselves at our own premises for our own use and satisfaction.
Readers who envisage to carry out similar works inspired by the below method shall do this at their own risks and liability.
Our pictorials are of informative nature and do illustrate works carried out by ourselves at our own premises for our own use and satisfaction.
Readers who envisage to carry out similar works inspired by the below method shall do this at their own risks and liability.
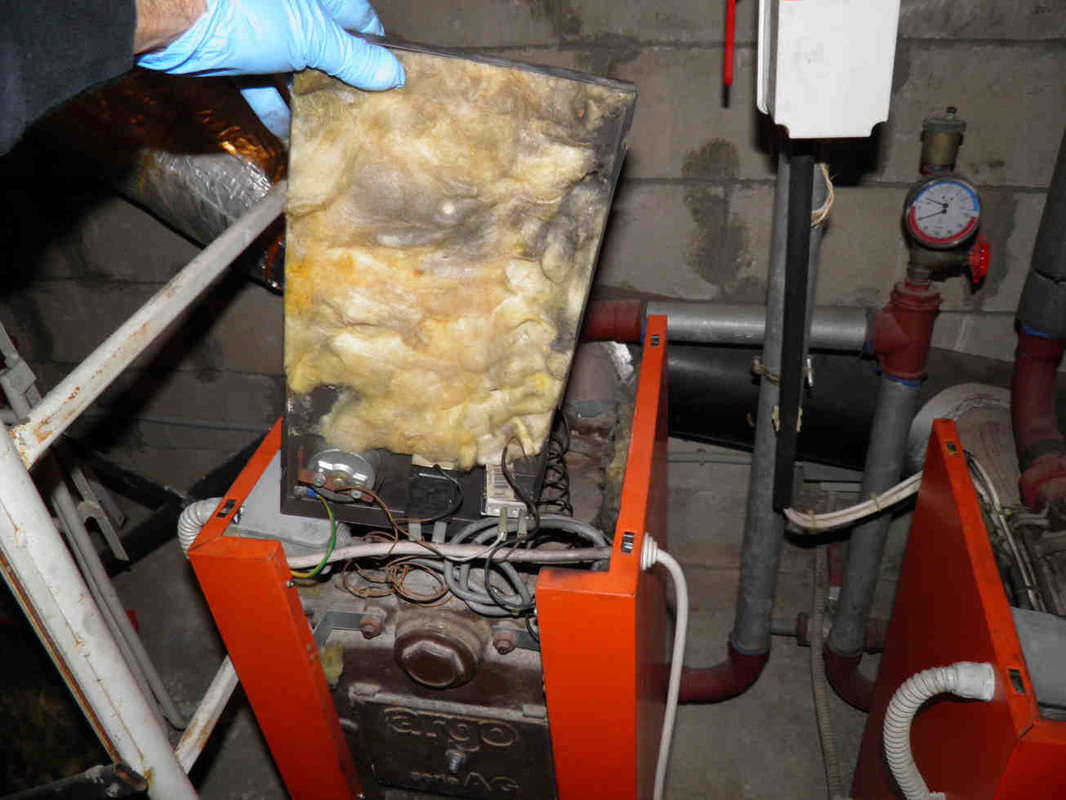
Removing the boiler panels, covers and access traps
Start by removing the boiler panels and which are normally held in place by simple push-springs.
You should be able to pull them out easily with no tools.
Pay attention to the copper thermocouple and wires that connect to the switch, thermostat and safety thermostat.
You should be able to pull them out easily with no tools.
Pay attention to the copper thermocouple and wires that connect to the switch, thermostat and safety thermostat.

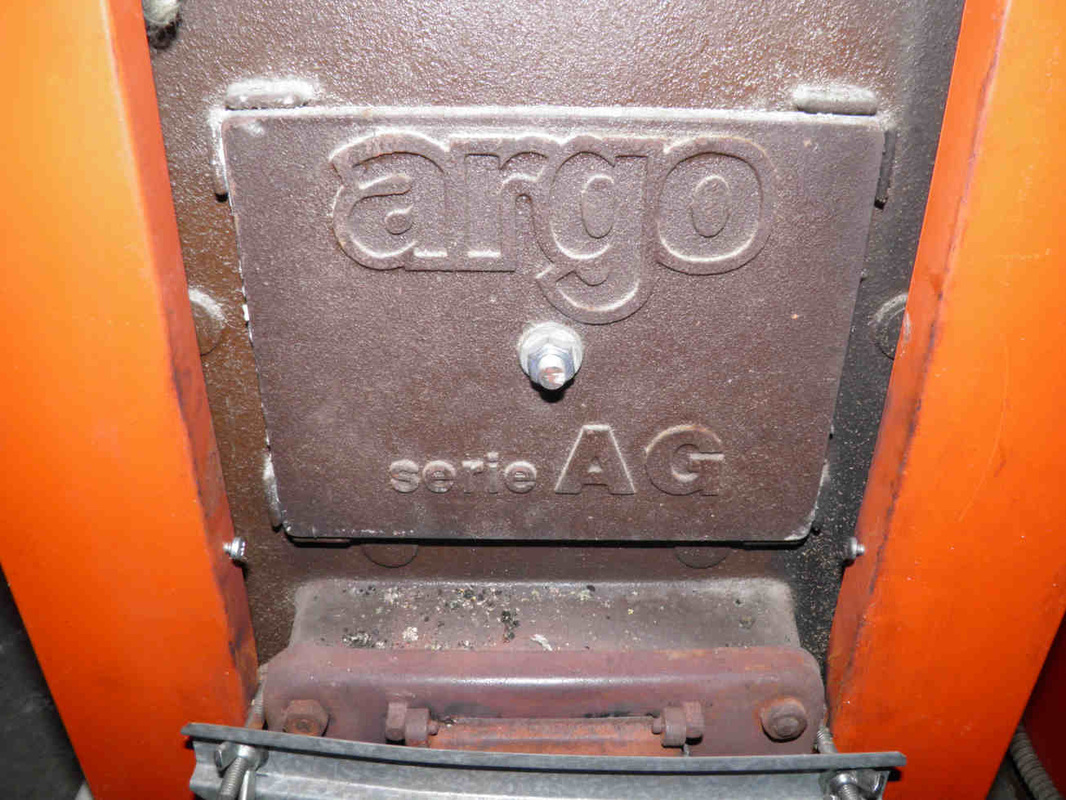
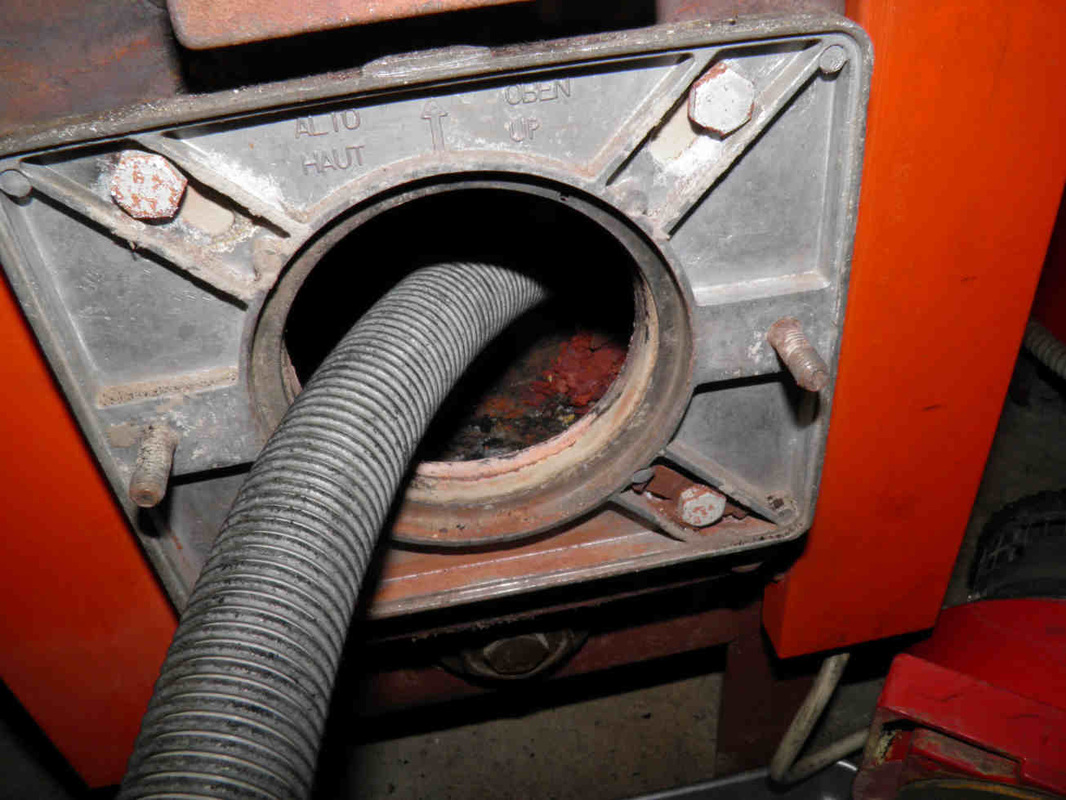
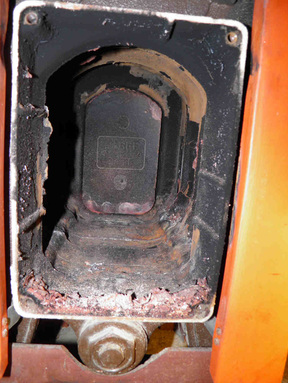
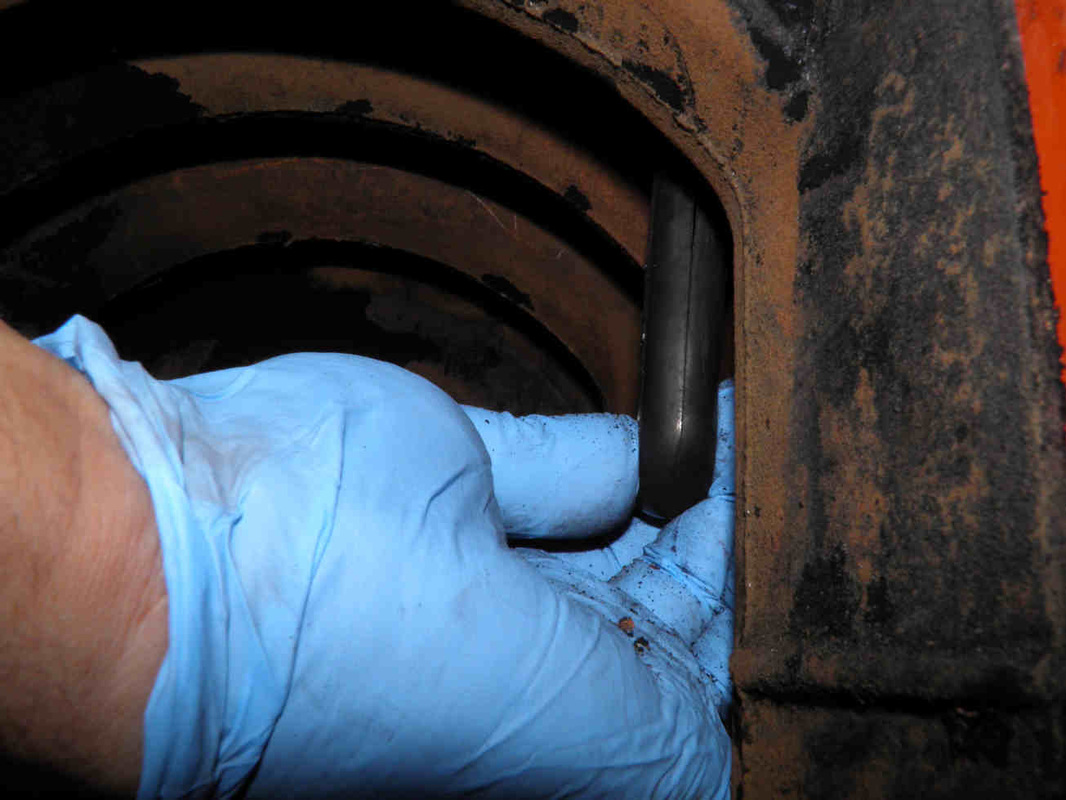
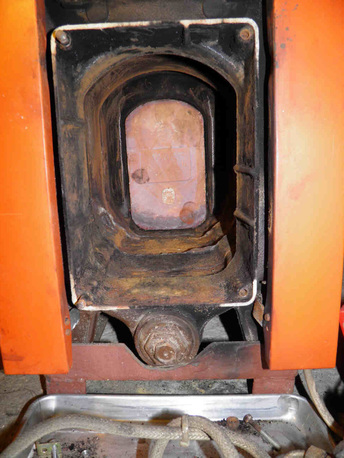
Remove the nut (s) or bolt (s) that hold the access trap on top of the burner and take out the iron cover:
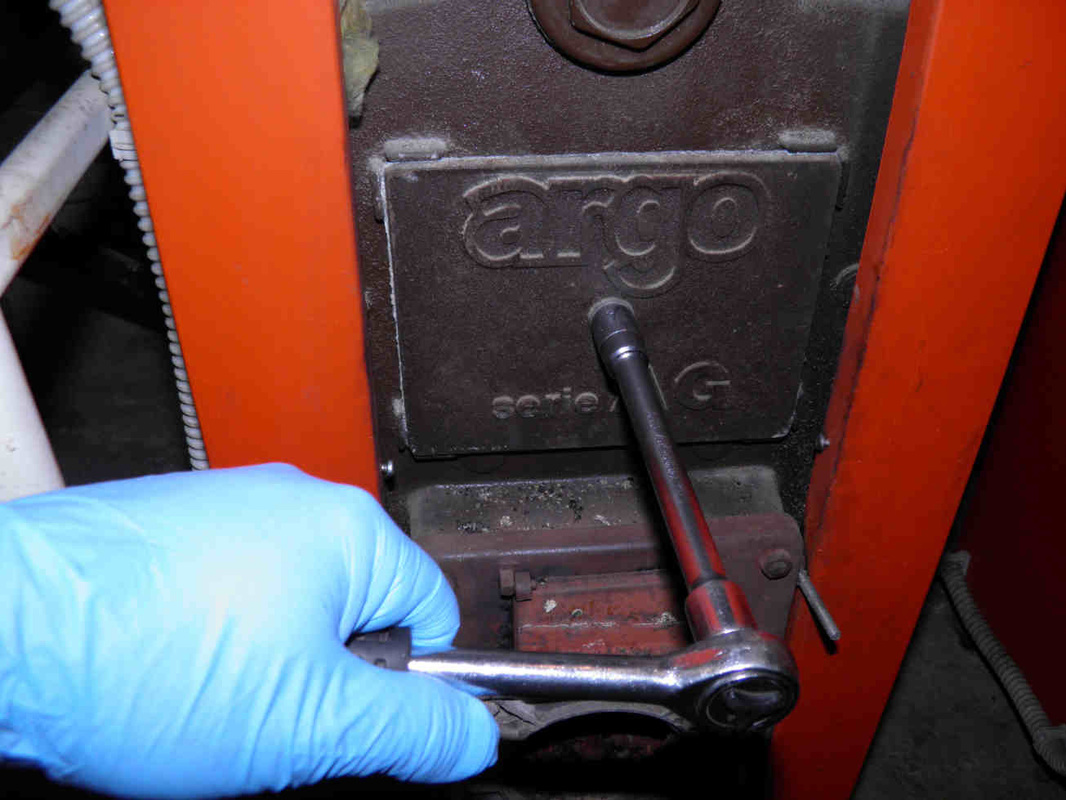

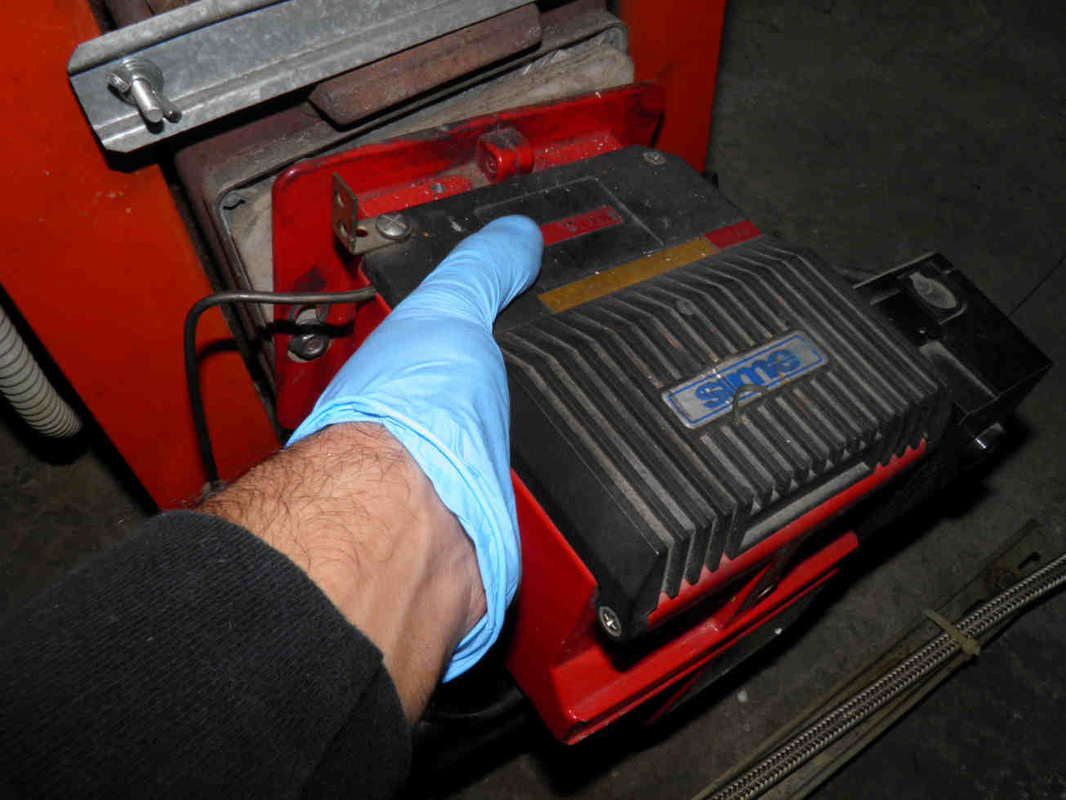
Removing the burner from the boiler
In this case, the removal of the burner requires only loosening a couple of nuts, tilting the burner and taking it out.
Do steps 2 and 3 with care not to damage the gasket between the burner and its holder.
Visit our specific page for DIY burner repair.
Do steps 2 and 3 with care not to damage the gasket between the burner and its holder.
Visit our specific page for DIY burner repair.


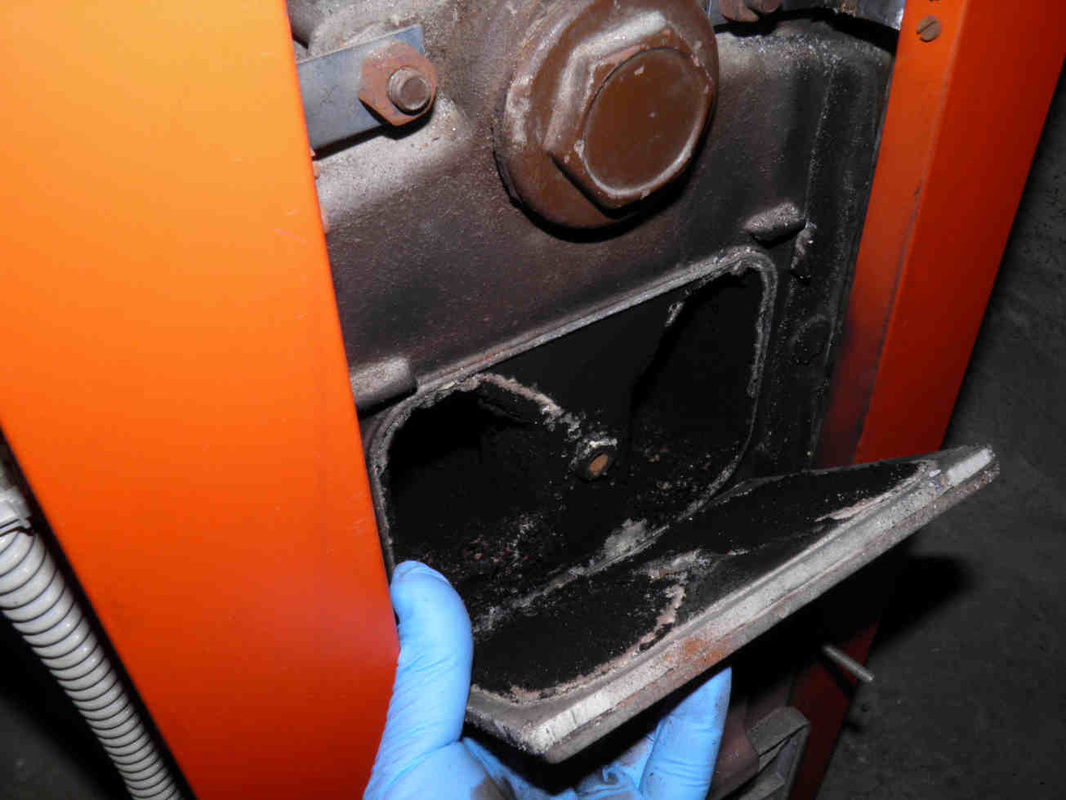
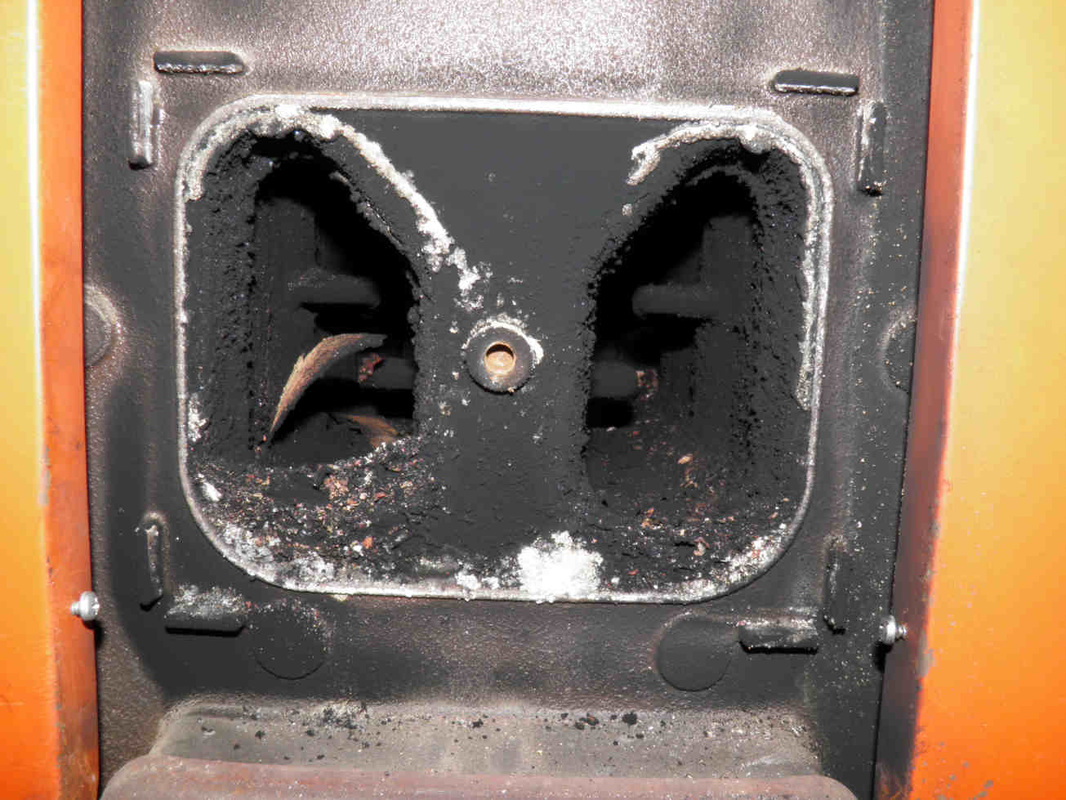
DIY cleaning of the boiler chamber
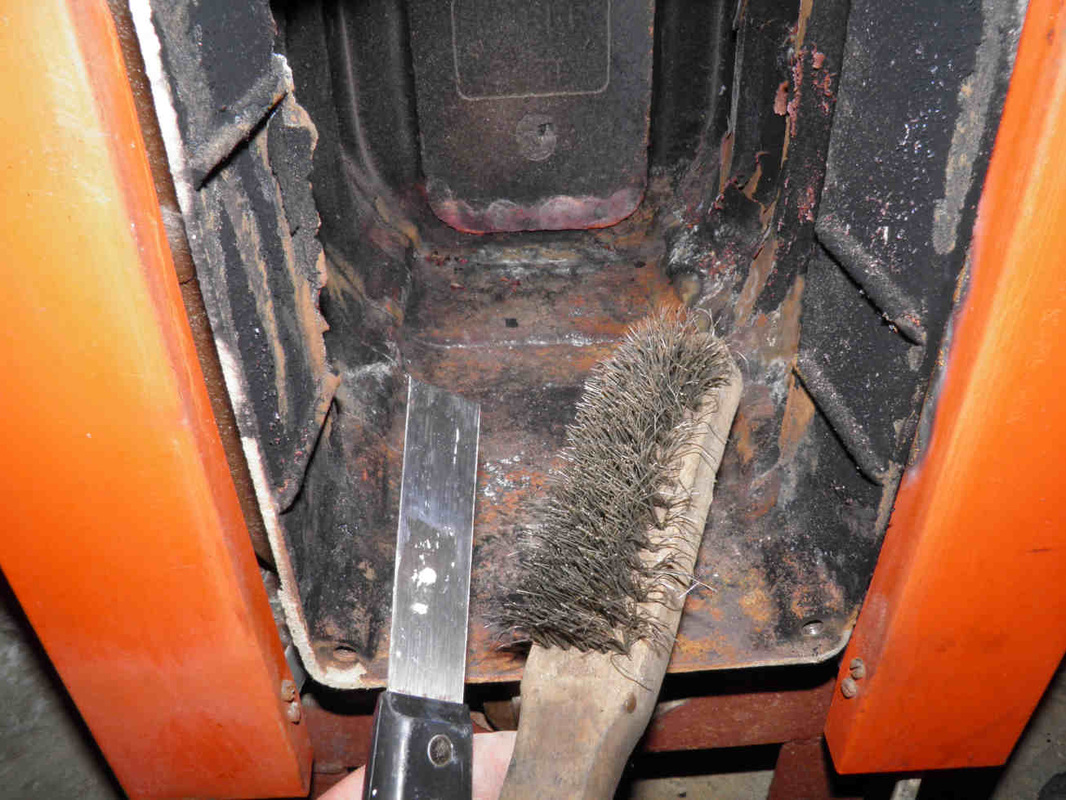
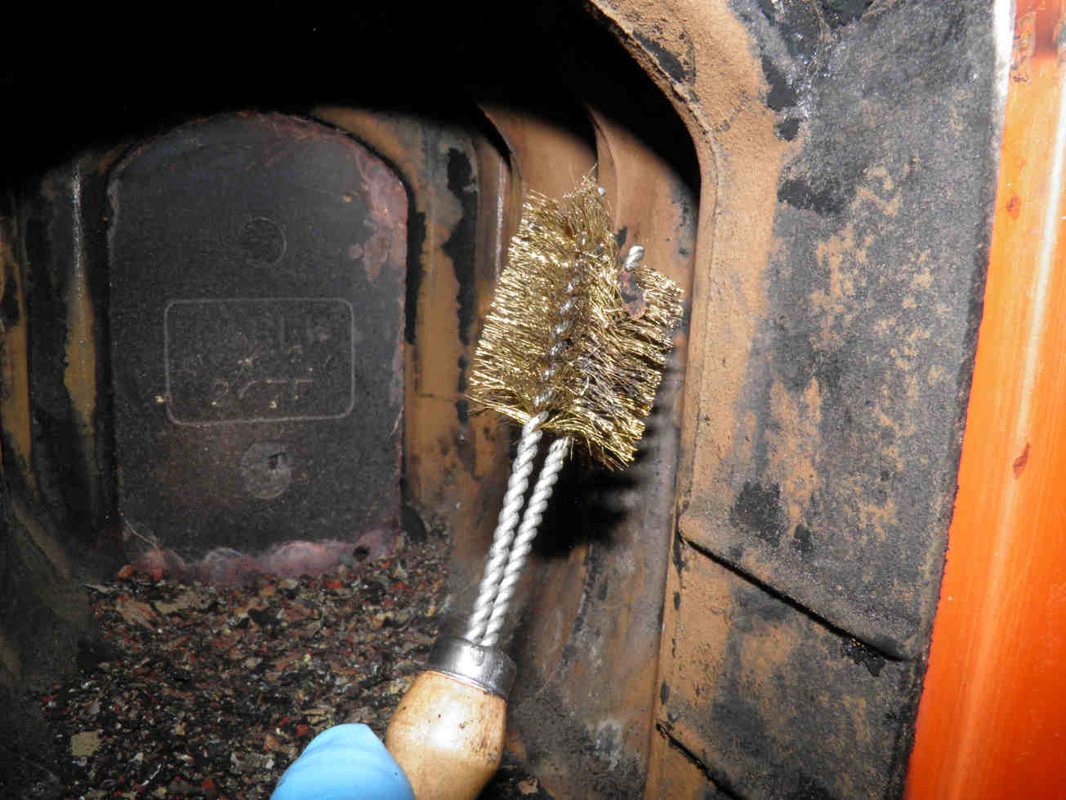
- The access trap located above the burner allows you to clean the so called "second-pass exchanger" because this is where the fumes still hot do heat up the water while the first pass is obviously the one happening in the flame chamber. If your burner is well adjusted, a hard plastic brush will do the job perfectly or else you have to use a metallic brush.
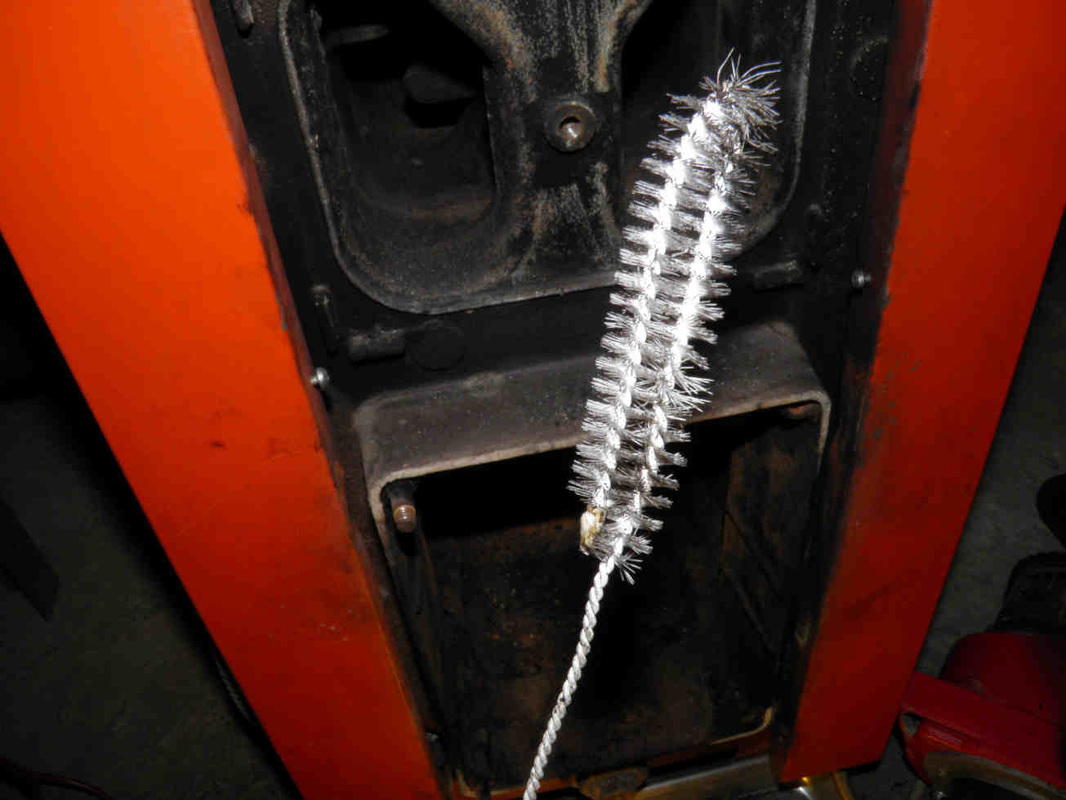
- The advantage of plastic brushes is that they are found so easily in all supermarkets for having many house uses while metallic cylindrical brushes of various diameters can only be found at a hardware shop.
- Complete your action by using a vacuum cleaner. It is not advised to use your daily vacuum machine, rather a specific one used only for DIY tasks. Note that the vacuum hose supplied with the machine would not go inside the flue gas chamber and between the fins; in this case a thinner extender was used.

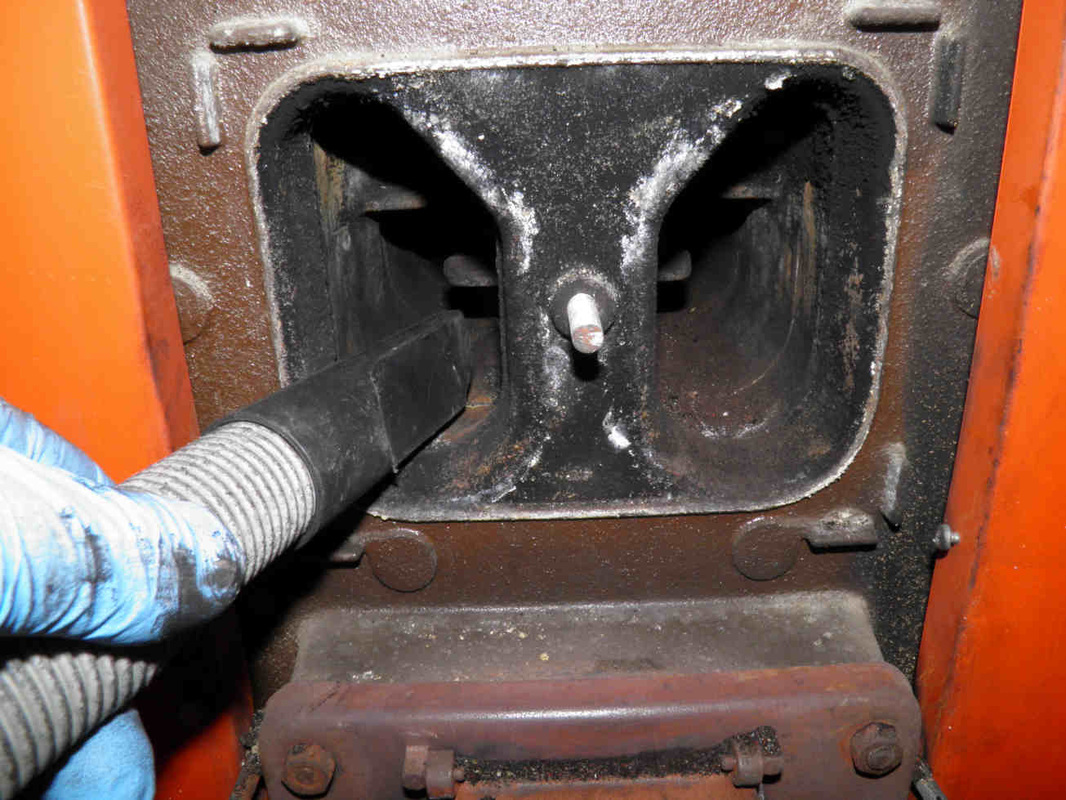
- Have the vacuum hose cross the boiler fumes chamber to behind the boiler and clean well the residues that were left in the pipe connecting the boiler to the main chimney.
- Take your time and make sure you don't leave carbon deposits behind. This is when you don't here them moving into the vacuum hose anymore.

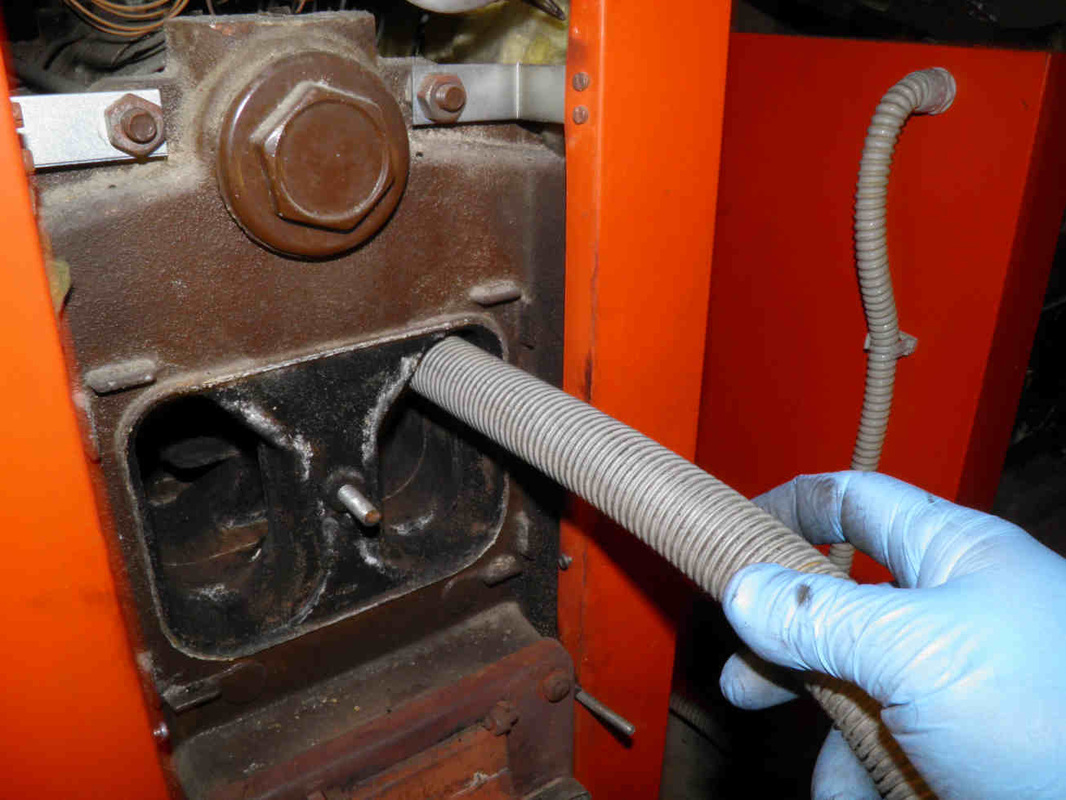

- Now use the vacuum machine to clear the main chamber (flame chamber) before dismantling the burner support to avoid having particles falling to the floor.
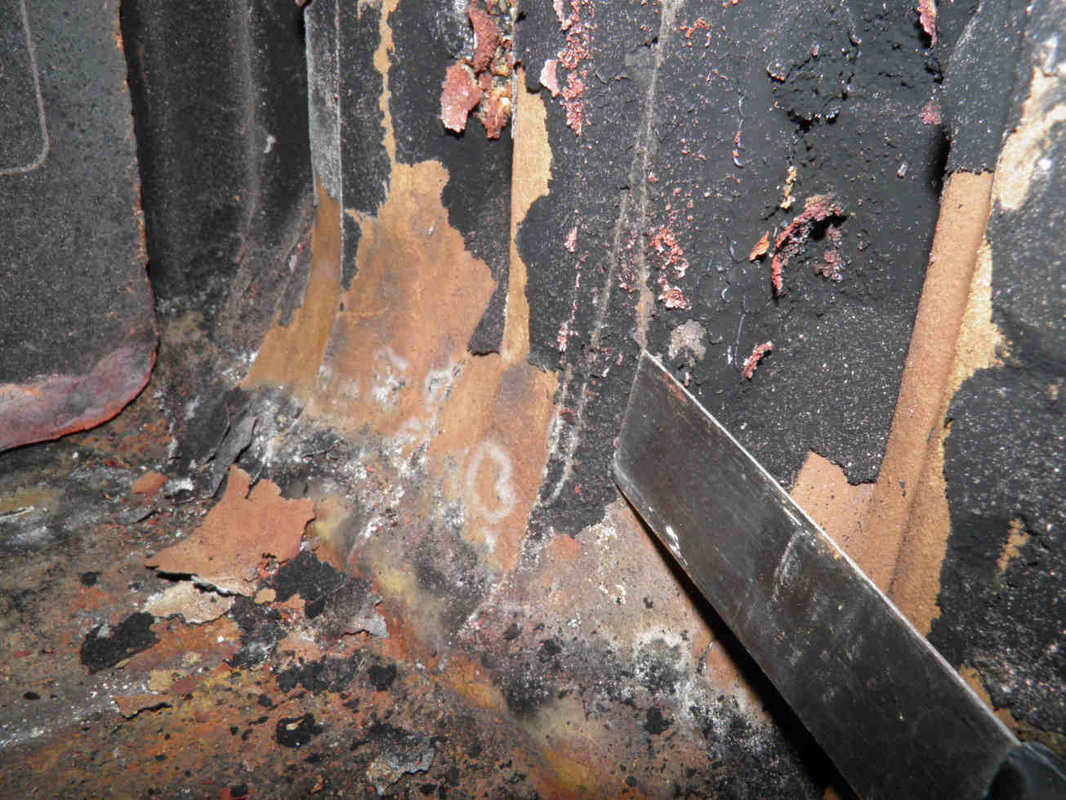
- Depending on the gas-oil quality you are using, you may find loose deposits of black, red or yellow color. Red and yellow denote the presence of sulfur (left).
- The main chamber walls will be covered by a black coating which needs to be cleaned in order to enhance the boiler efficiency (right).

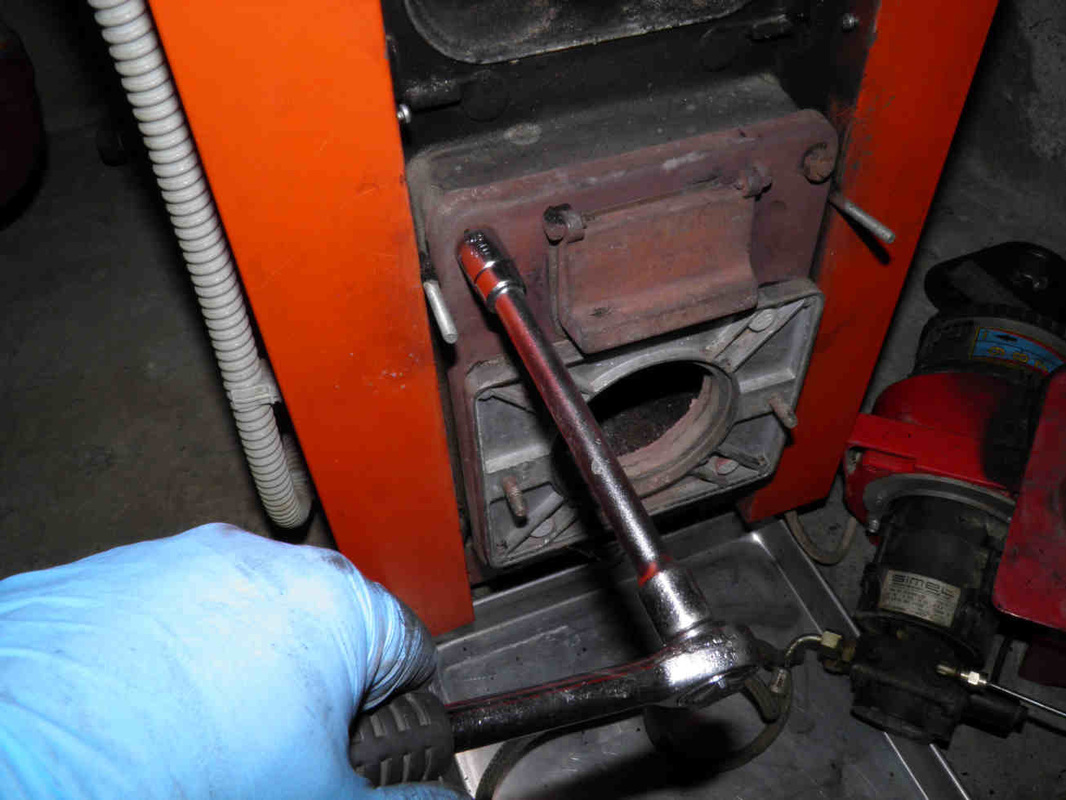
Time now to remove the main chamber cover whch is at the same time the burner's support.
Loosen the bolts or nuts that hold it and take it out.
You might face corroded bolts that refuse to slacken and eventually break.
I am showing further below how to replace broken bolts.
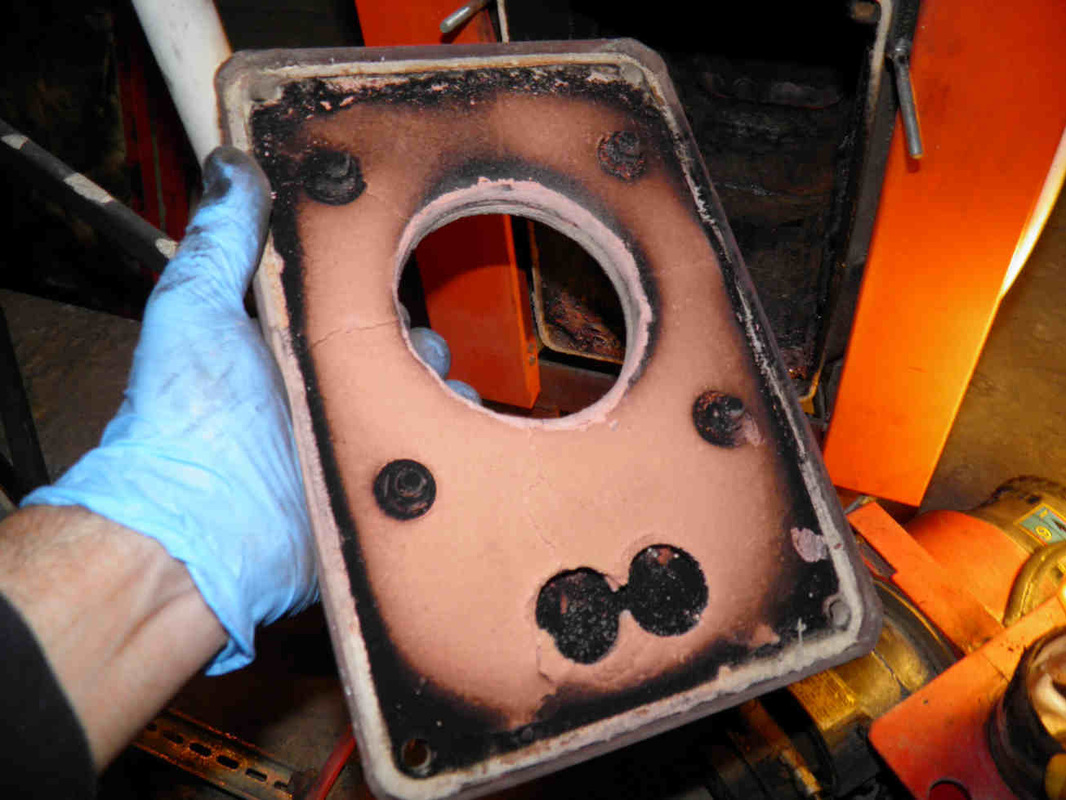
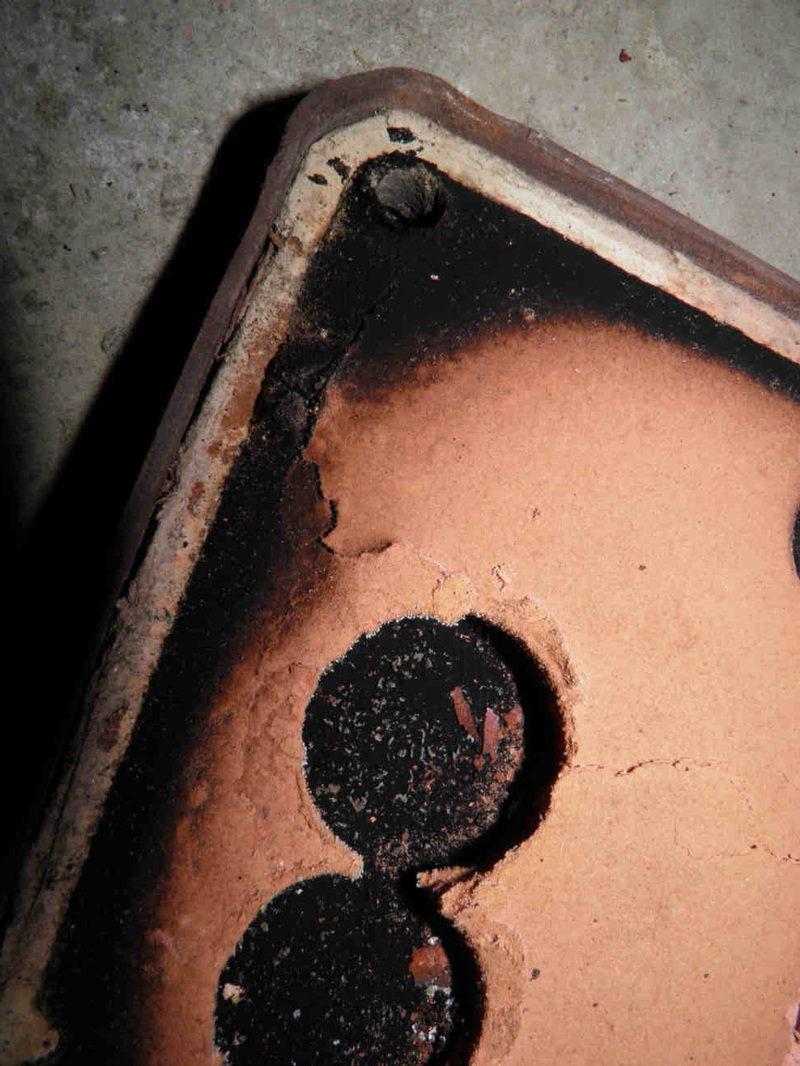
Note well how the inner insulation of the boiler cover is burnt all around. It needs replacement.
Loosen the bolts or nuts that hold it and take it out.
You might face corroded bolts that refuse to slacken and eventually break.
I am showing further below how to replace broken bolts.
Note well how the inner insulation of the boiler cover is burnt all around. It needs replacement.
|
The flame chamber is covered with black carbon deposits that need to be removed.
|
|

|
At this stage, the use of a good dust protection mask is mandatory.
A 1" spatula is used first followed by the brushing of the iron with a metallic brush. DO NOT START by the brush as this makes it more difficult. Use the spatula first and you will notice that not less than 80% of the deposits were simply peeled off the chamber walls. |
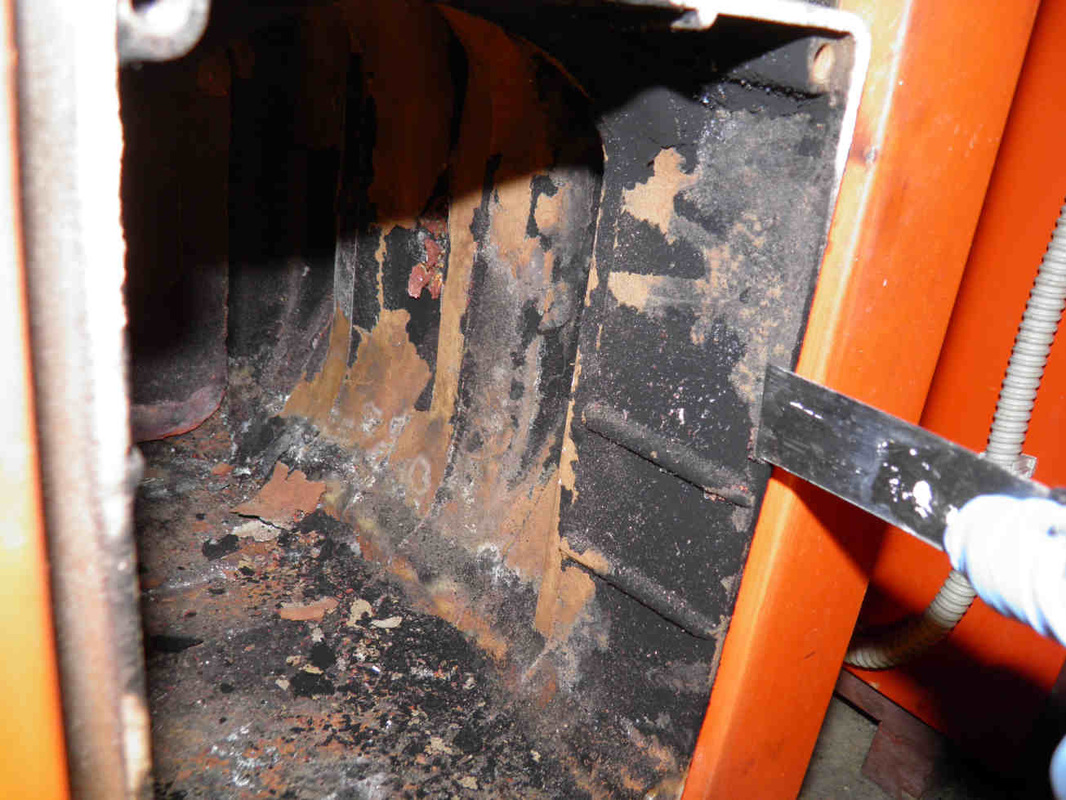
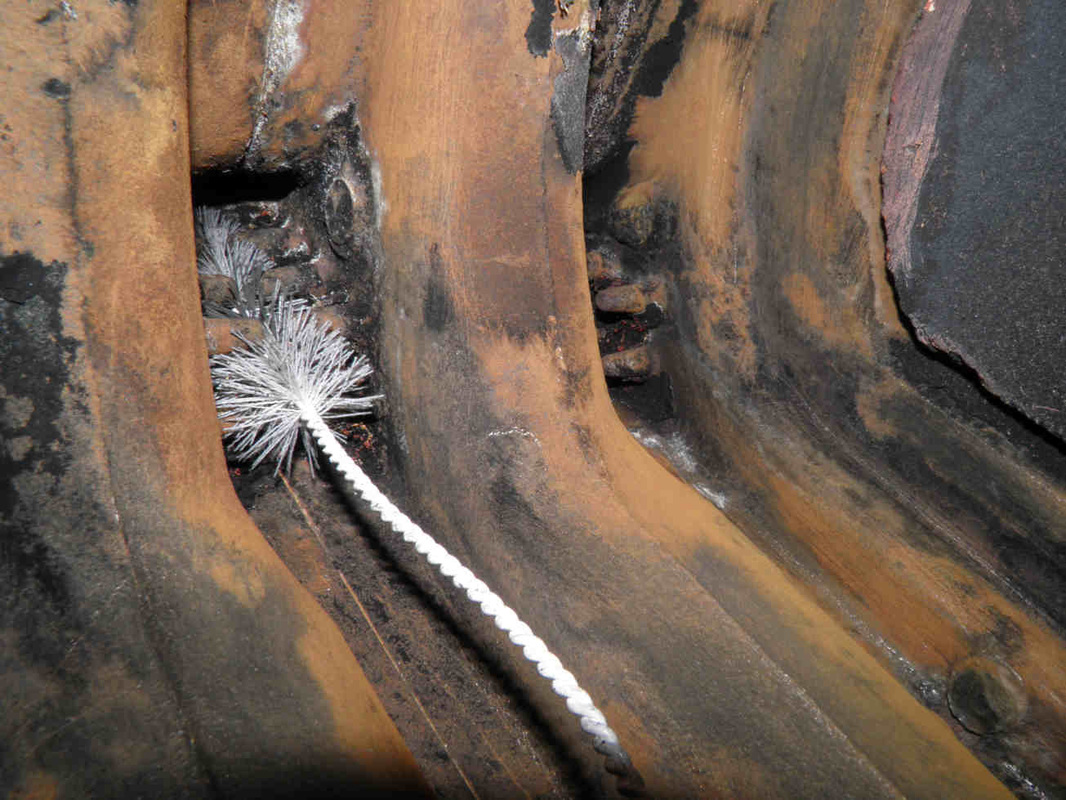
You need then to work into the flue gas passages on top of the chamber and towards the second-pass exchanger.
The spatula will still go in there and remove 90% of the deposits but this is to be followed by brushing the passages using various cylindrical brushes of various sizes.
The spatula will still go in there and remove 90% of the deposits but this is to be followed by brushing the passages using various cylindrical brushes of various sizes.
|
The fumes passage upwards is shown in this picture and the fins are starting to be cleared and clean. Note how the plastic brush passes through and in between all fins sometimes better than a metallic brush.
|
|
|
When done, your chamber should be as clean as the one pictured here (at least).
This is the maximum achievable by hand brushing. If you like, you can fit a disc brush on your drill and have the chamber look like new but this is only possible if the boiler is in a place where you can generate as much dust. |
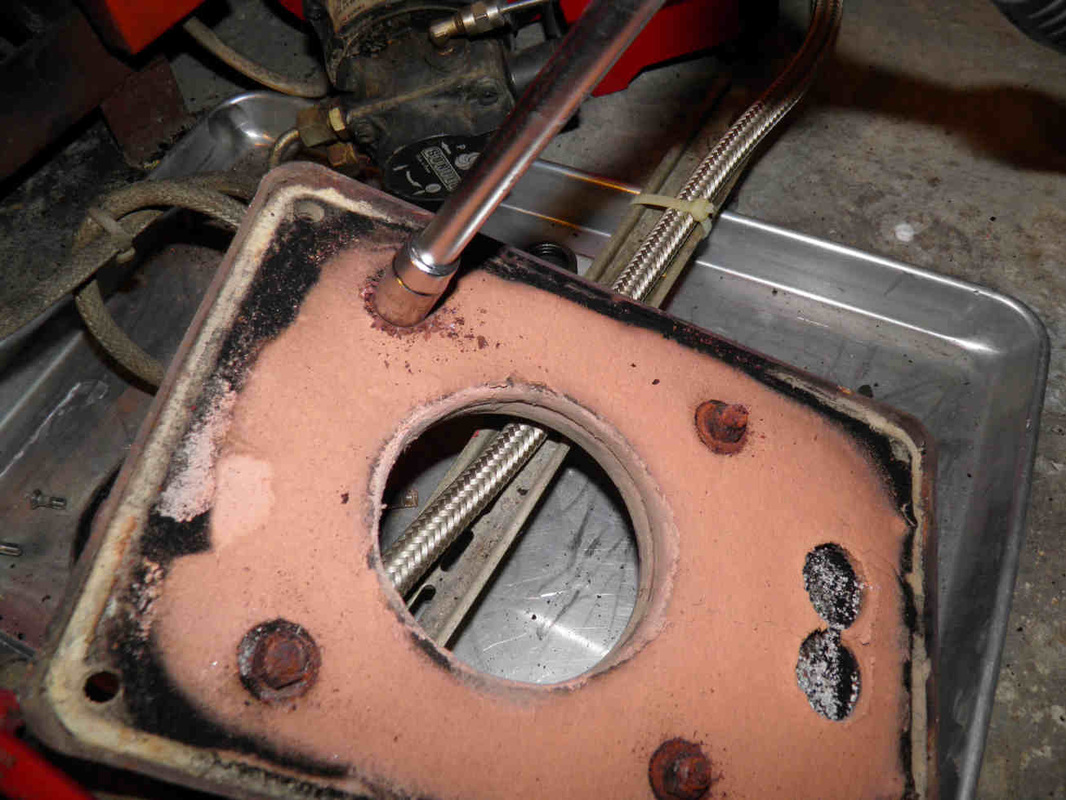
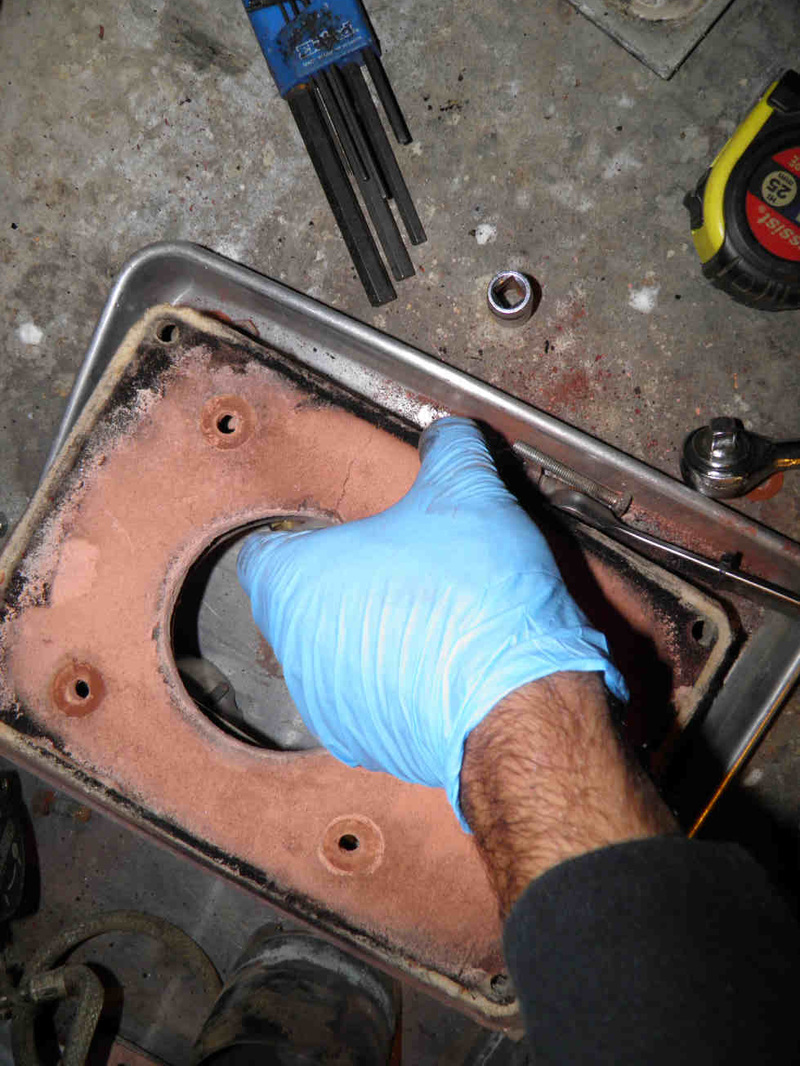
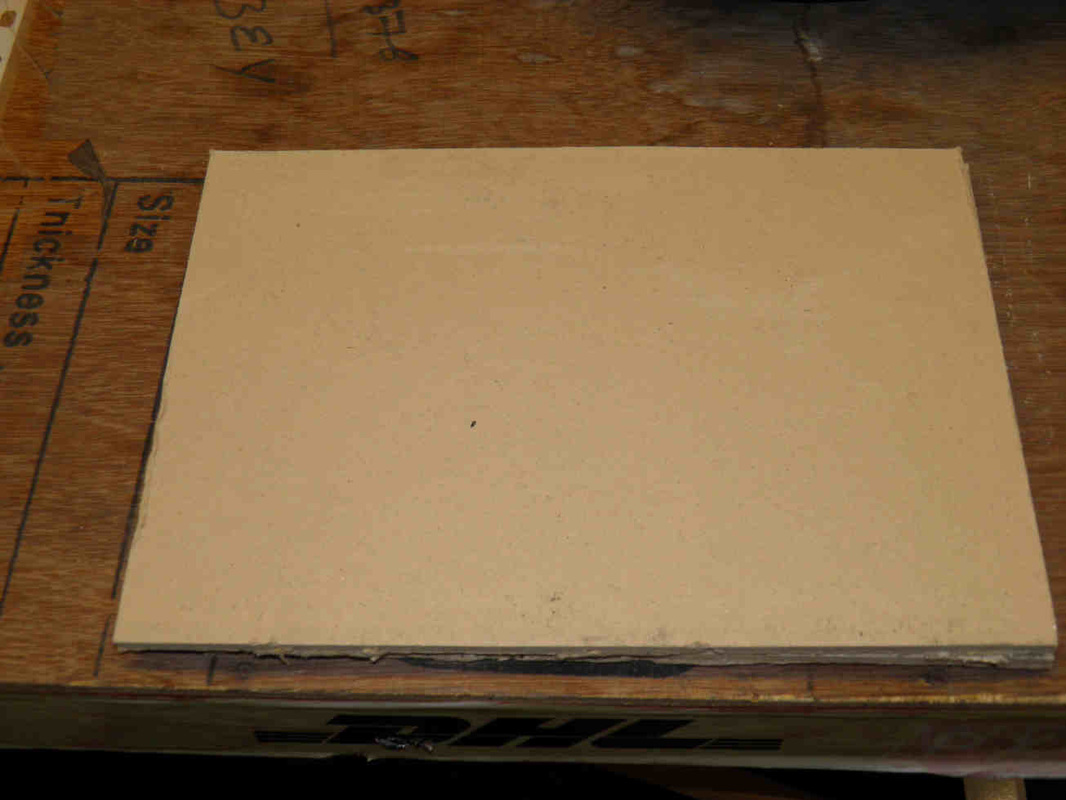
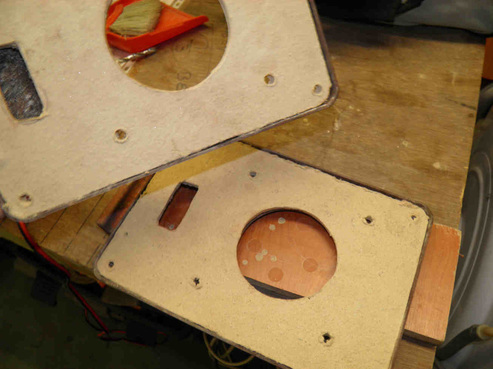
Cutting and preparing replacement boiler gaskets
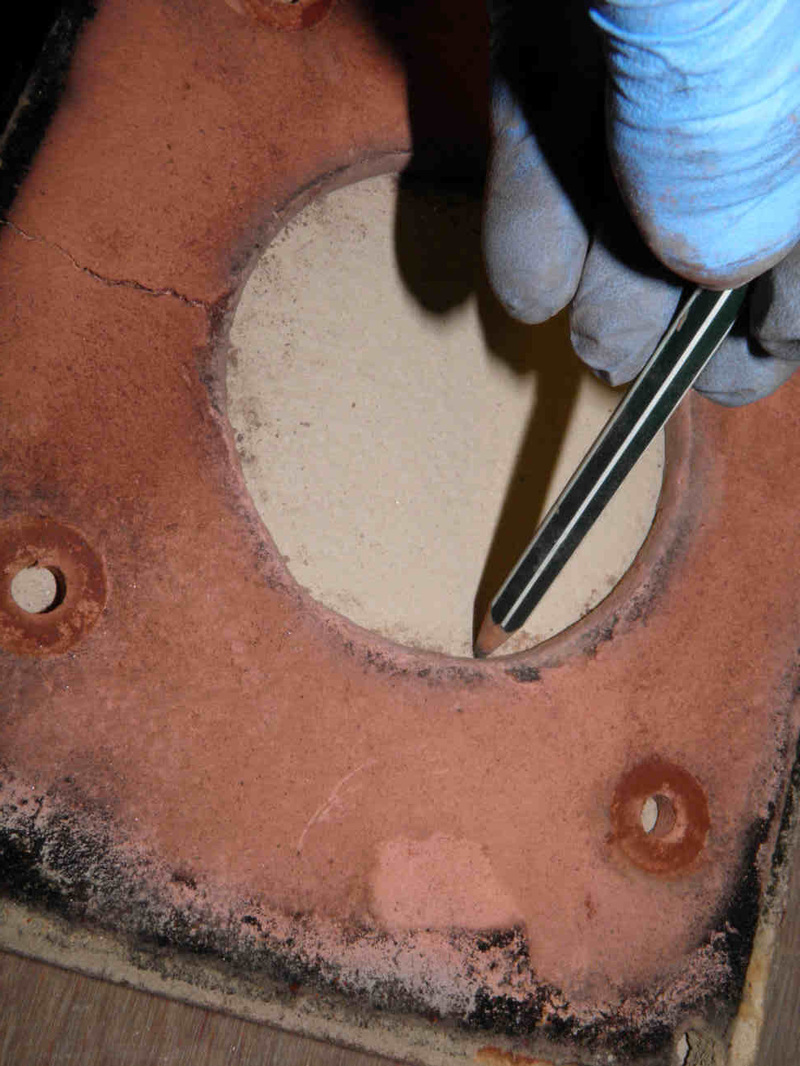
Before purchasing new gaskets, start by removing the existing ones.
They could be held in place by the means of bolts like in this case.
Take them out carefully as you need them to remain in one piece for later using these as a template to cut new ones.
They could be held in place by the means of bolts like in this case.
Take them out carefully as you need them to remain in one piece for later using these as a template to cut new ones.
|
If you're lucky, you find replacement gaskets to the right size based on your boiler's model number.
If not, you need to buy plates and cut them to the required shape. Make sure to purchase non-asbestos material but still the dust mask is a must during this operation. |

|

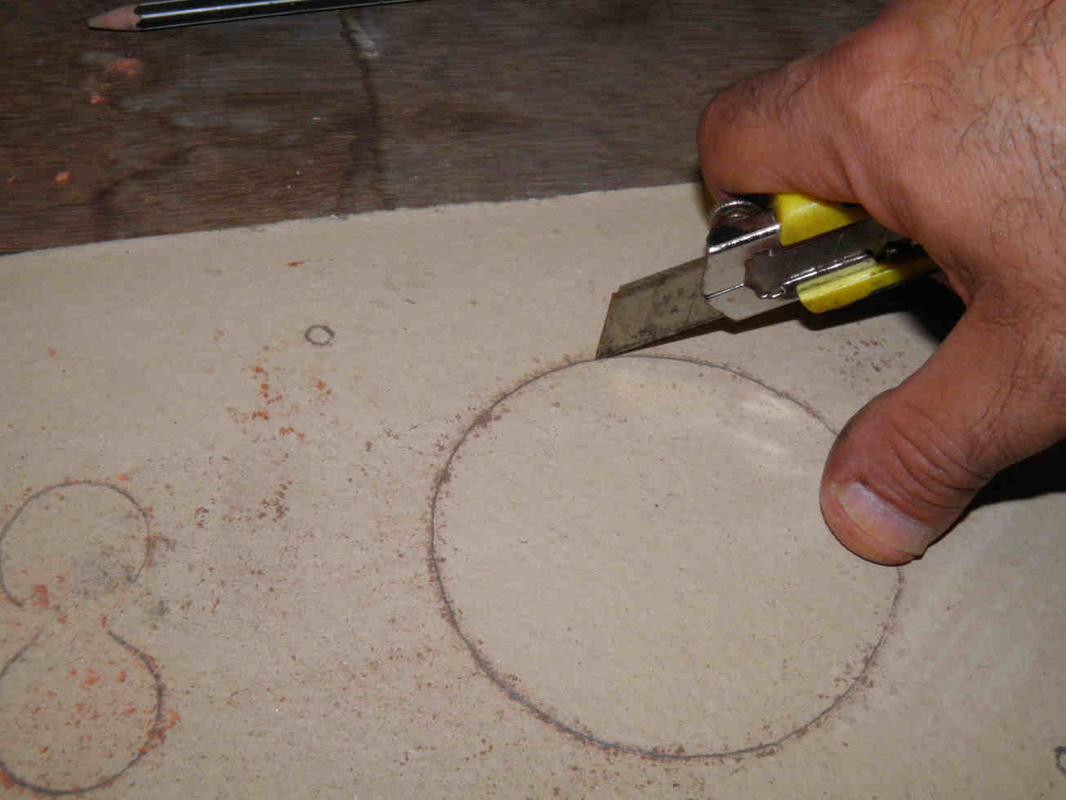
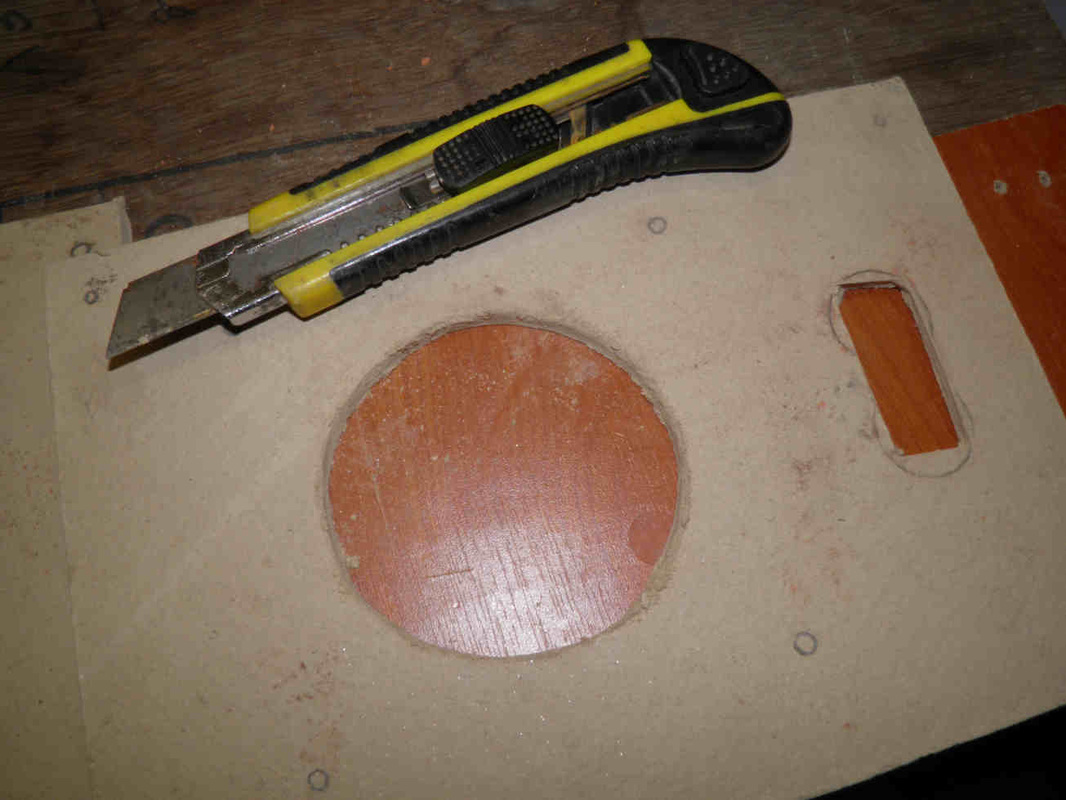

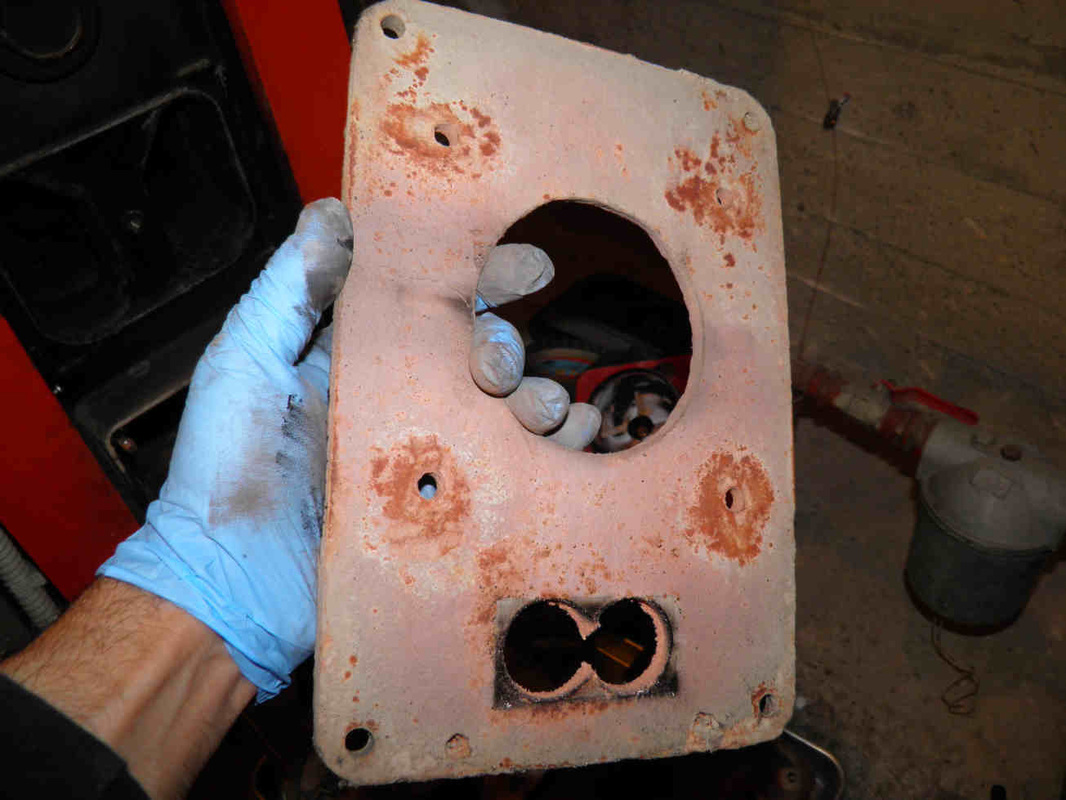
The gaskets are ready.
All is needed is to reassemble the boiler by reversing the above steps.
In case you had broken a bolt, see below how to repair it.
Visit also our burner renewal page for burner's maitenance pictorials.
All is needed is to reassemble the boiler by reversing the above steps.
In case you had broken a bolt, see below how to repair it.
Visit also our burner renewal page for burner's maitenance pictorials.
|
|
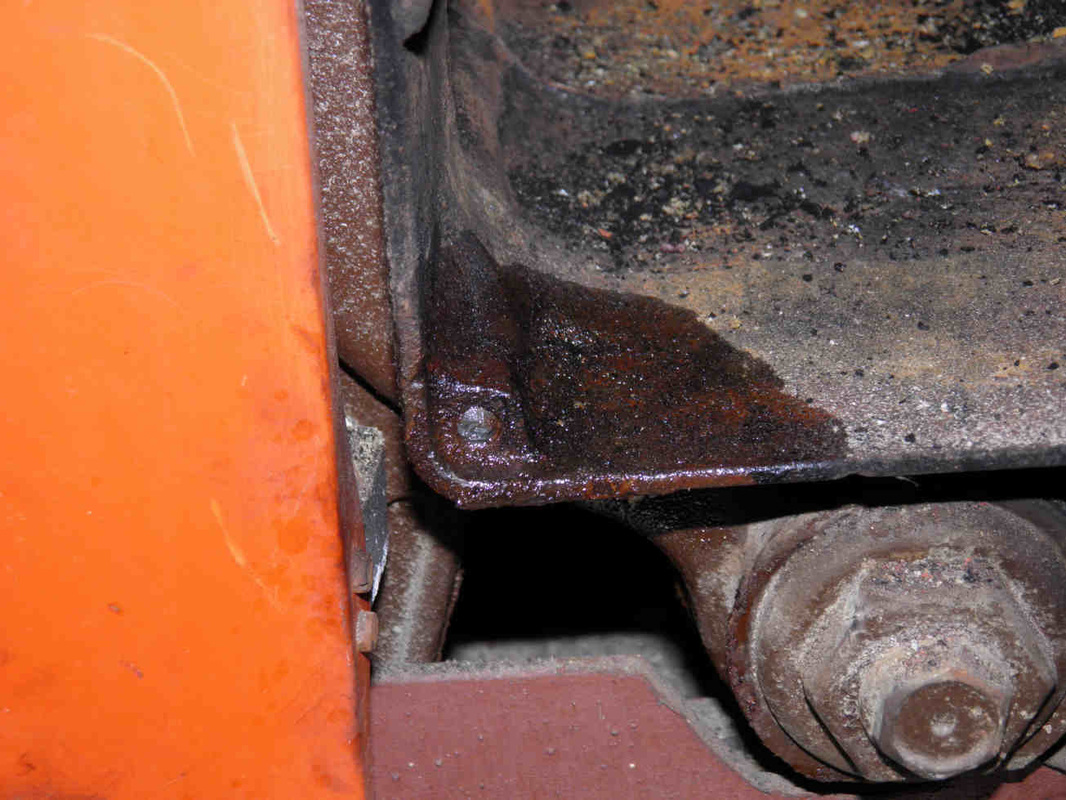
What to do if a bolt is broken and remains inside its hole?
|
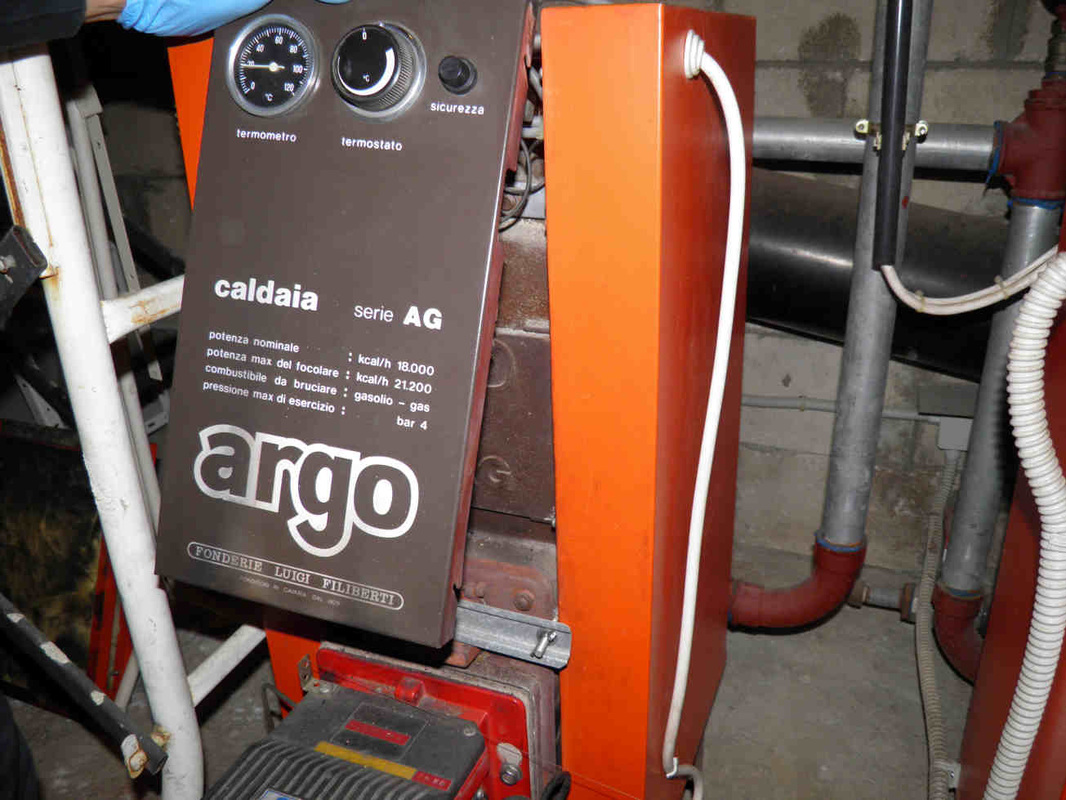
This bolt holding the burner support to the boiler's body broke inside its threaded hole despite the use of penetrating oil before attempting to loosen it.
No panic! This may happen and can be cured in minutes. |
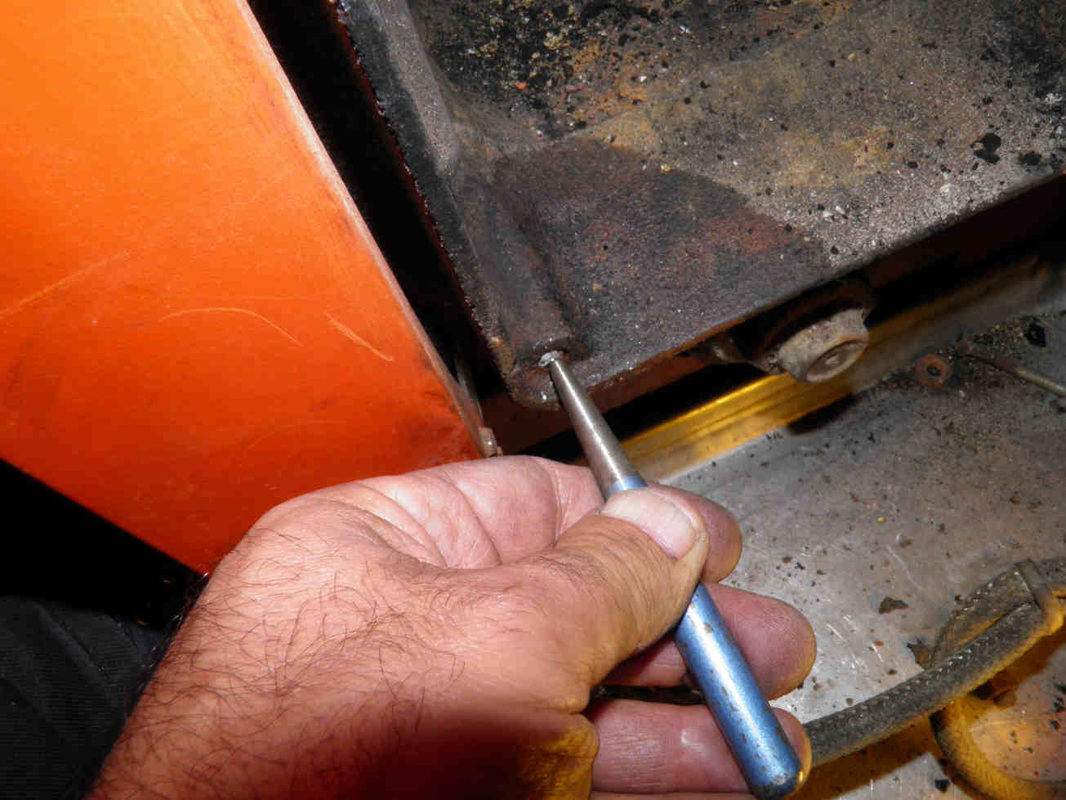
Start by hitting the center of the bolt with a punch (left and middle) then drill it with a 4 or 4.5mm bit.
Enlarge the hole by using a bit which size = the bolt zise - 1.5.
For example, use a 6.4 or 6.5mm bit for an M8 bolt.
Enlarge the hole by using a bit which size = the bolt zise - 1.5.
For example, use a 6.4 or 6.5mm bit for an M8 bolt.


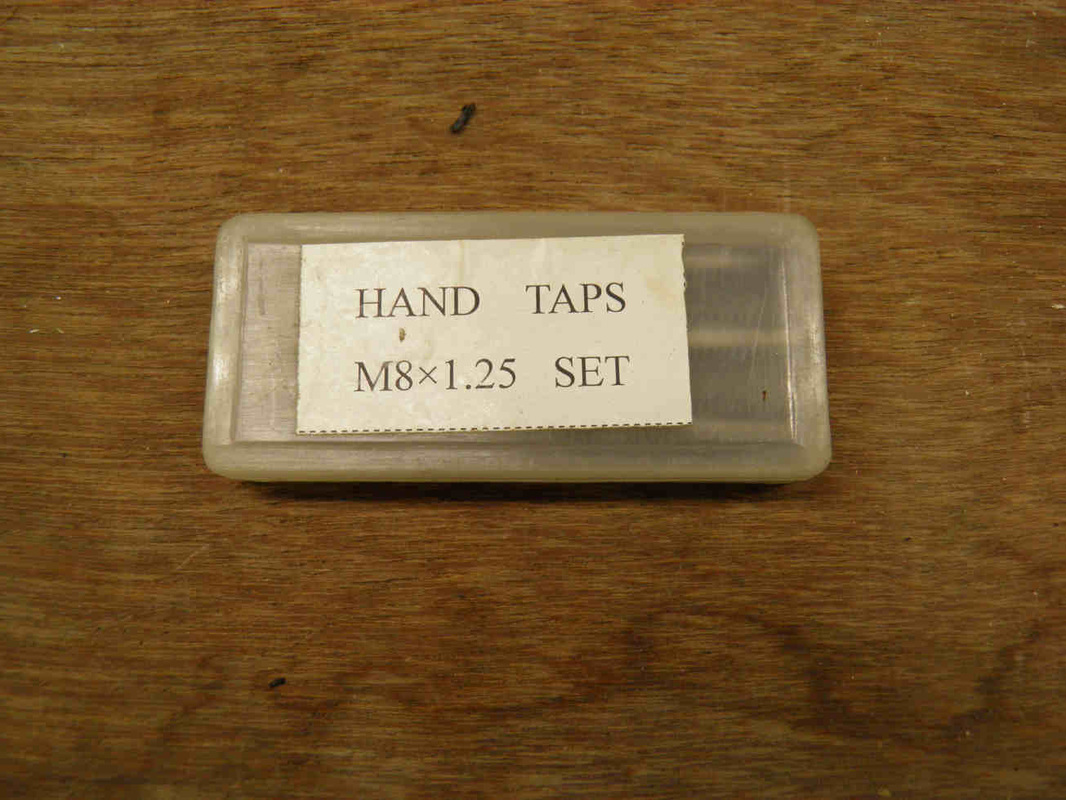
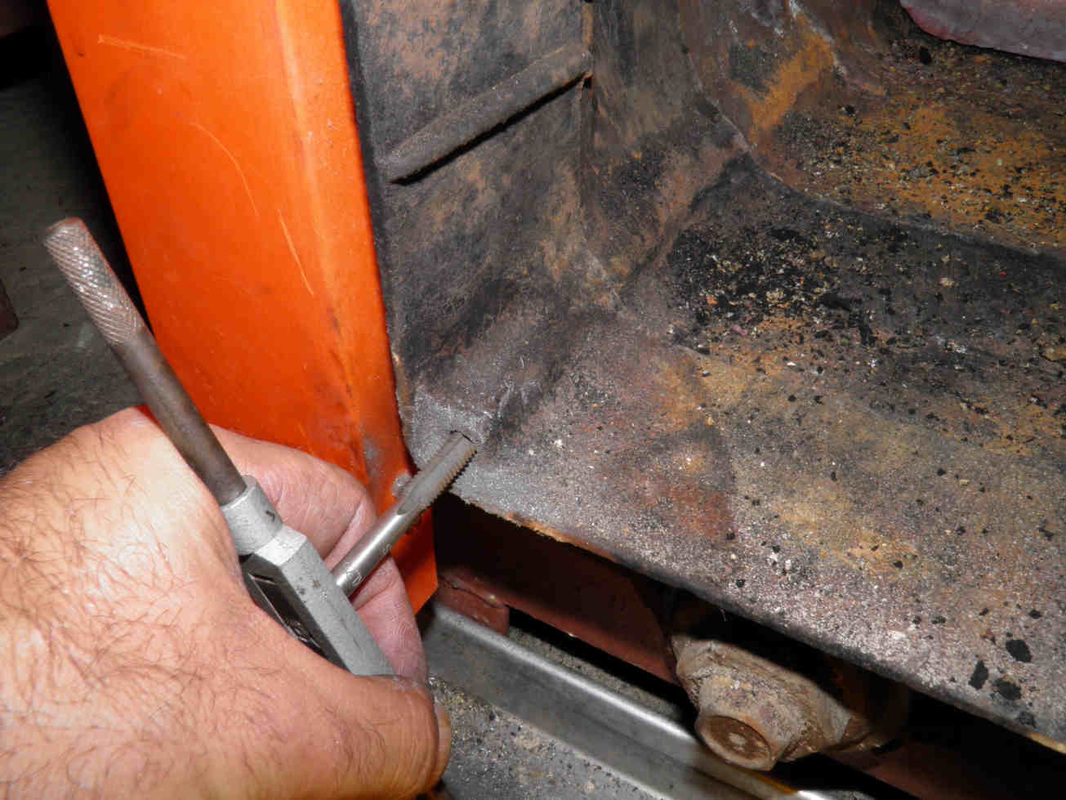
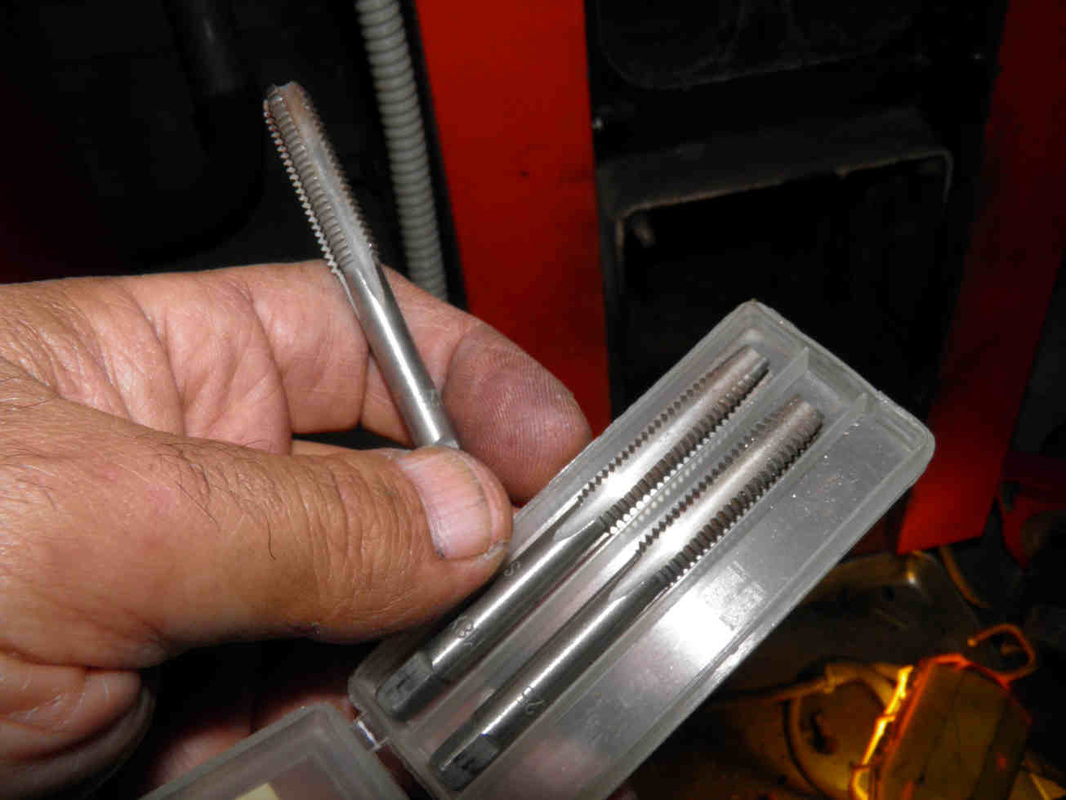
Now use the threading taps in the right order to re-thread the hole.
The taps are marked 1-2-3 but an experienced DIYer recognizes them visually.
Alternate your movements by rotating clockwise and counter closkwise around a hard point until you cross it.
Do not hesitate to drill a larger hole and use the next size bolt (e.g. M10 instead of M8) if necessary.
The taps are marked 1-2-3 but an experienced DIYer recognizes them visually.
Alternate your movements by rotating clockwise and counter closkwise around a hard point until you cross it.
Do not hesitate to drill a larger hole and use the next size bolt (e.g. M10 instead of M8) if necessary.