COPYRIGHT WARNING:
All pictures and texts in this web page are the property of nomaallim.com. Any use of any part of those contents without the written consent of nomaallim.com shall be subject to legal procedures as per international and local laws in the concerned country. Using the name "nomaallim" or "nomaallim com" or "nomaallim.com" in the text describing the unauthorized copied content shall not constitute an exception and shall be sanctioned in accordance to the effective laws and proceedings.
All pictures and texts in this web page are the property of nomaallim.com. Any use of any part of those contents without the written consent of nomaallim.com shall be subject to legal procedures as per international and local laws in the concerned country. Using the name "nomaallim" or "nomaallim com" or "nomaallim.com" in the text describing the unauthorized copied content shall not constitute an exception and shall be sanctioned in accordance to the effective laws and proceedings.
BEFORE YOU START
|
|
DISCLAIMER:
Our pictorials are of informative nature and do illustrate works carried out by ourselves at our own premises for our own use and satisfaction.
Readers who envisage to carry out similar works inspired by the below method shall do this at their own risks and liability.
Our pictorials are of informative nature and do illustrate works carried out by ourselves at our own premises for our own use and satisfaction.
Readers who envisage to carry out similar works inspired by the below method shall do this at their own risks and liability.
Preparatory works for car start (starter) switch replacement
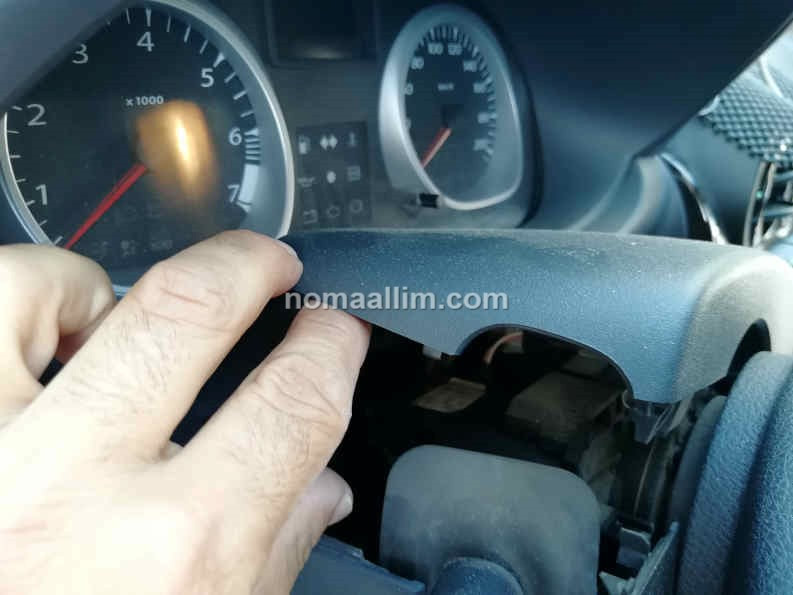
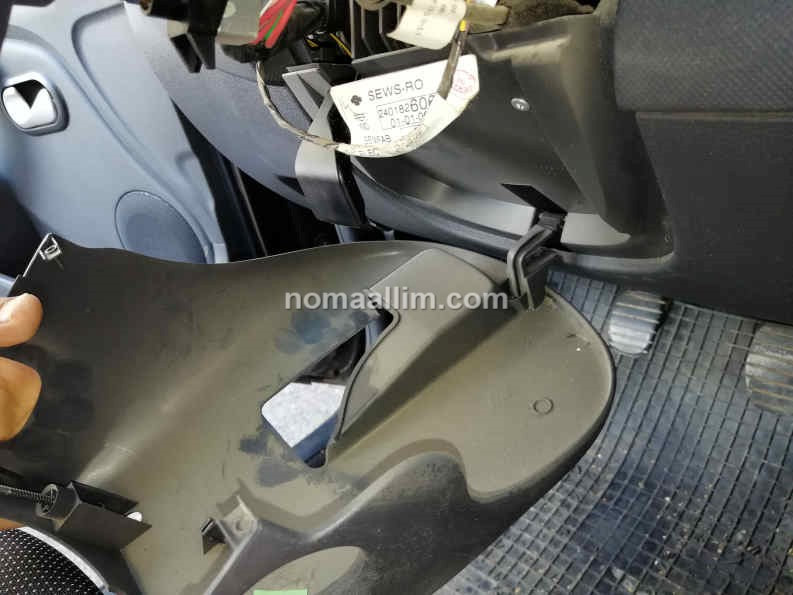
The steering column behind the steering wheel is covered by two plastic trims that are fixed to each other by the means of a couple of screws. The screws are accessible from the bottom as shown in the left picture.
Take out the screws and the upper half shell first.
Take out the screws and the upper half shell first.

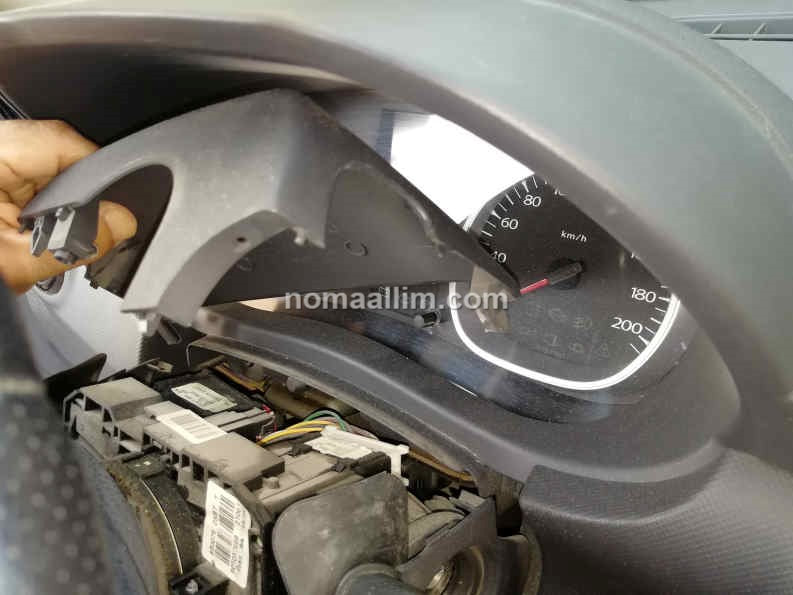
Gently pull down the lower plastic shell trim of the steering column then pull it out of its bottom fixing.
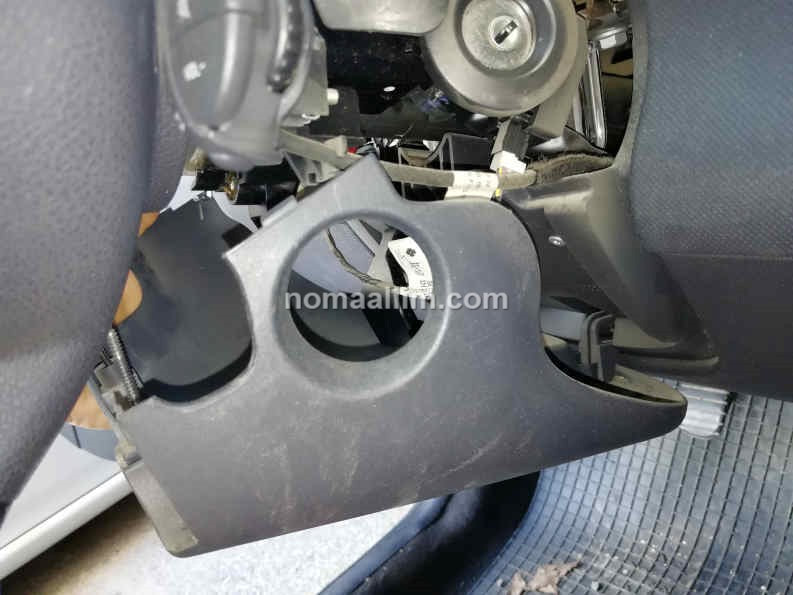
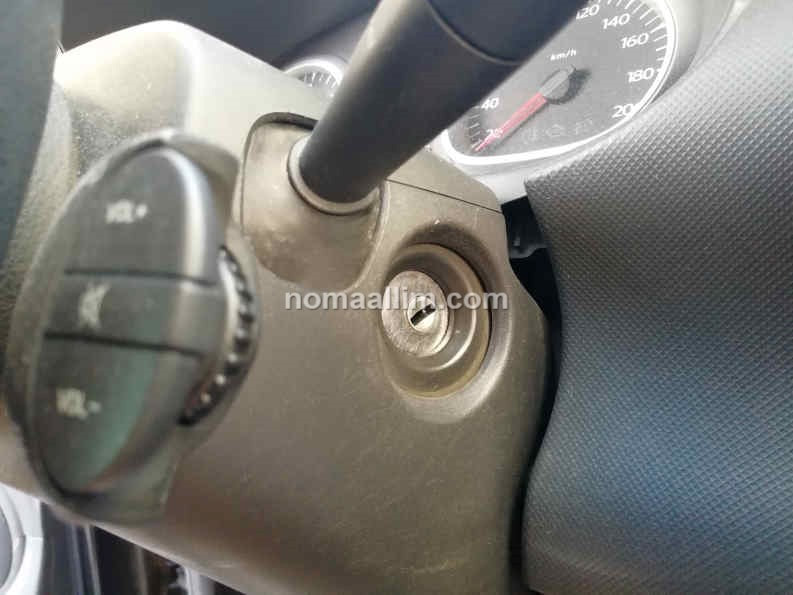
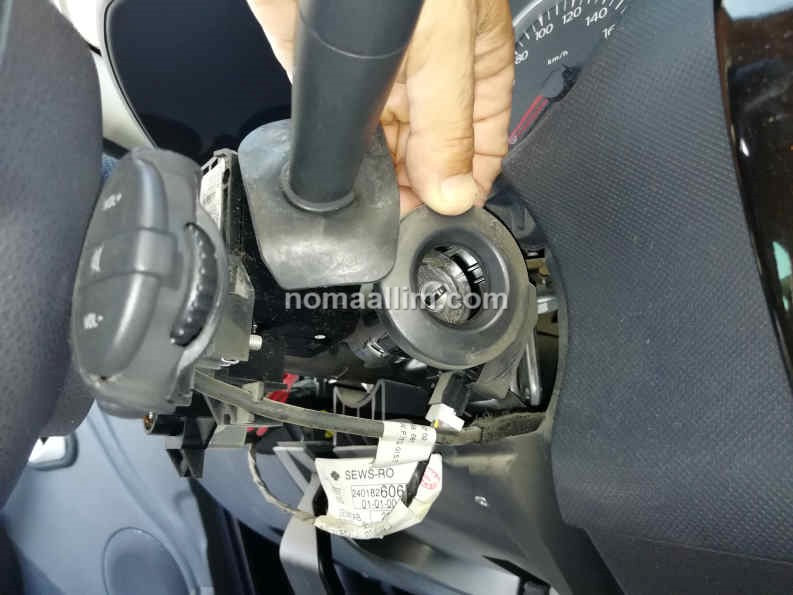
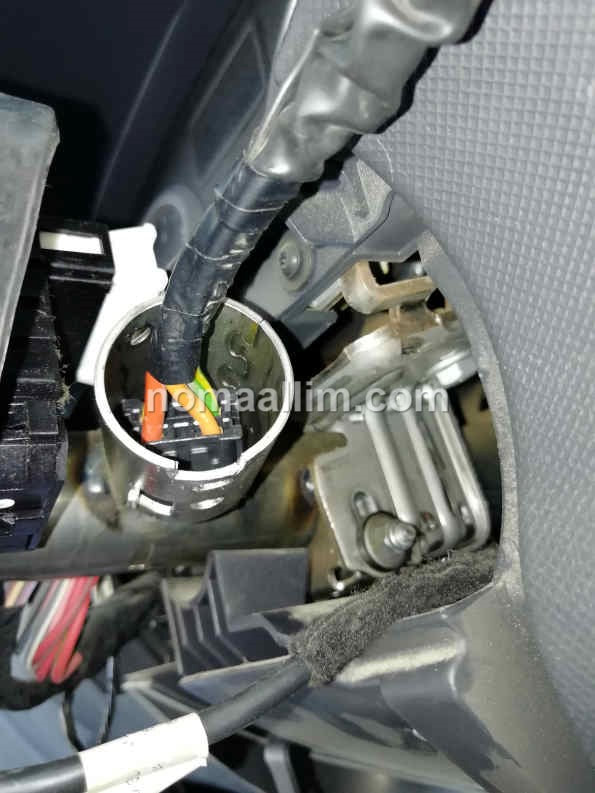
Remove the engine immobilizer ring (left) and keep it aside without unplugging its wires.
This is the ring that communicates with the key transponder inside your key fob and reads the security code that allows the engine to start. The ignition (start, starter) switch is now well visible and accessible for removal.
This is the ring that communicates with the key transponder inside your key fob and reads the security code that allows the engine to start. The ignition (start, starter) switch is now well visible and accessible for removal.
|
|


|
|
|
Car ignition (start, starter) switch removing and refitting
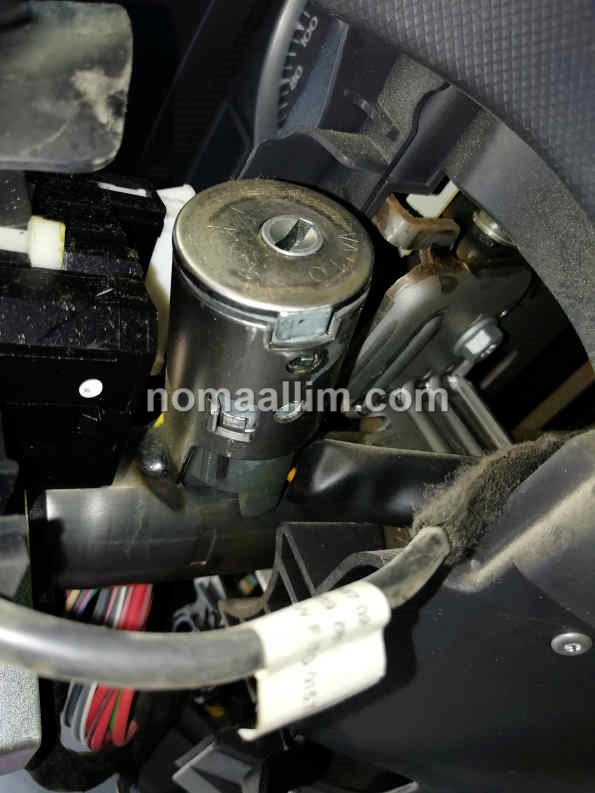
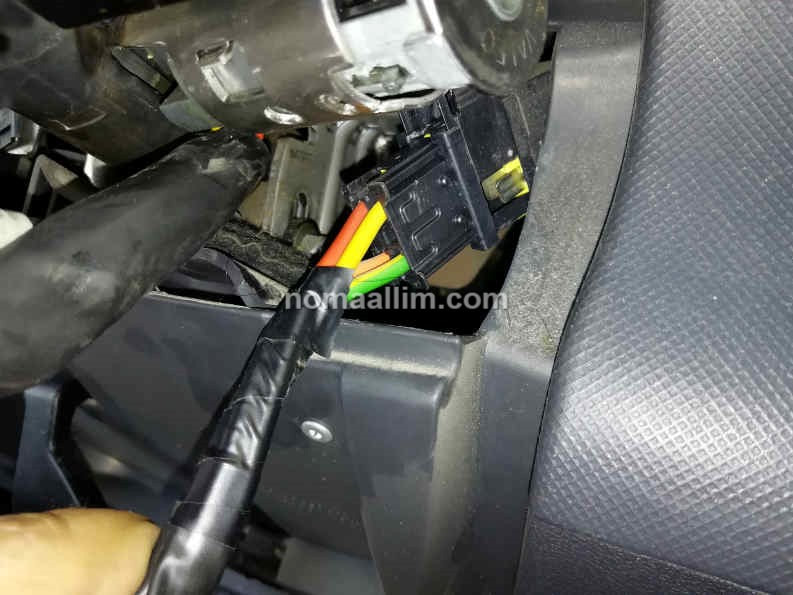
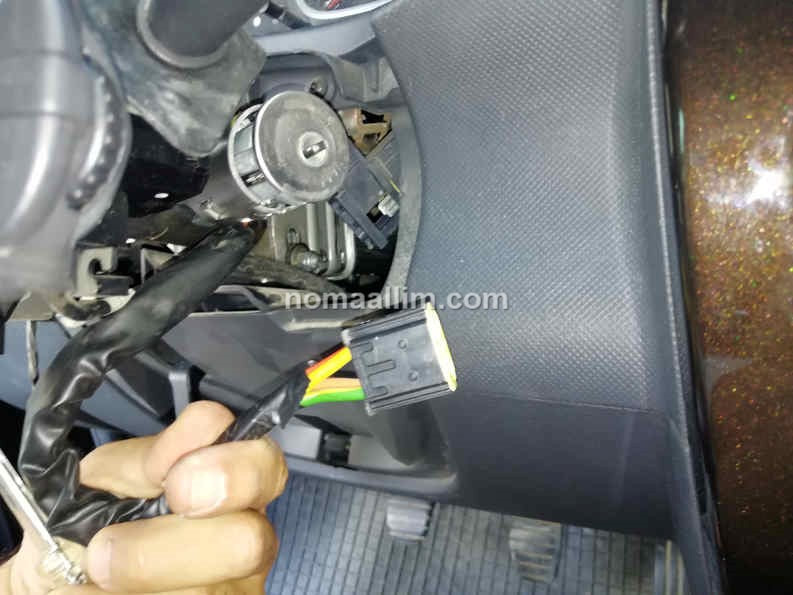
Unscrew the only screw that holds the starter switch and pull out the wire harness in order to access the ignition wires connector.
Disconnect the wire harness.
Disconnect the wire harness.
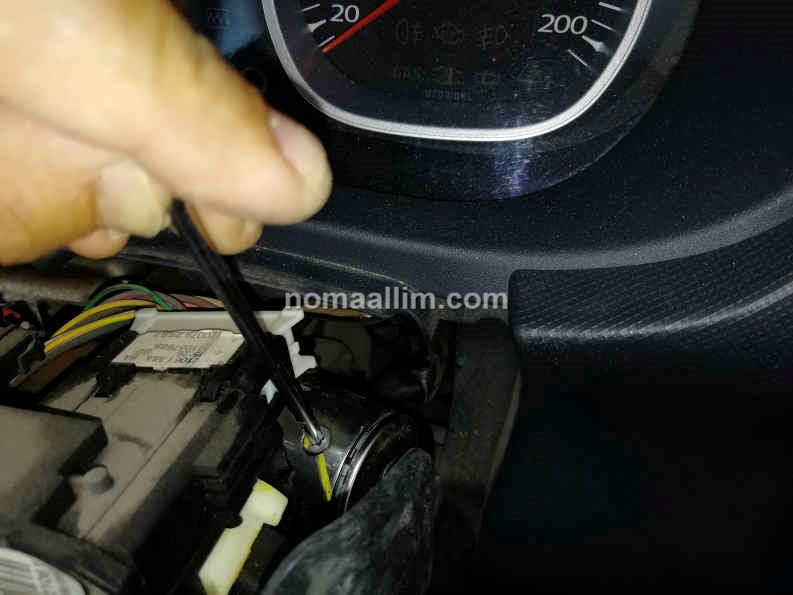
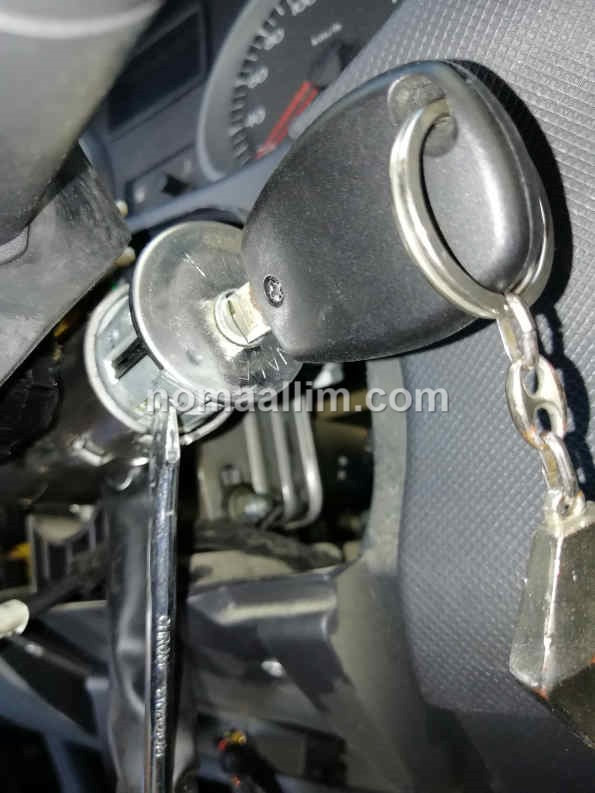
Use your key to find the position that releases the mechanical lock of your ignition cylinder so you can pull it out.
Do this simultaneously while turning the ignition key with one hand and pushing the mechanical pin that holds the cylinder with a flat screwdriver.
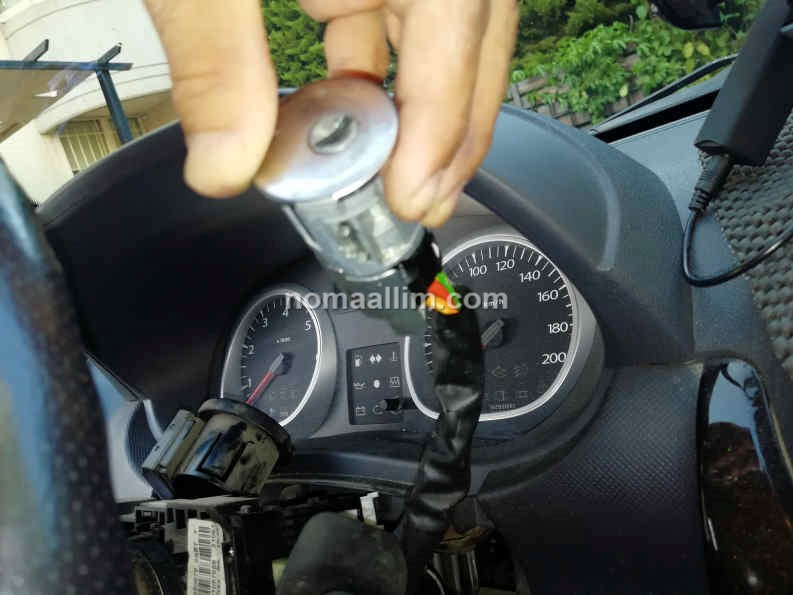
Take out the start cylinder out of its seat and gently let the connector pass through it as shown in the picture to the right.
Do this simultaneously while turning the ignition key with one hand and pushing the mechanical pin that holds the cylinder with a flat screwdriver.
Take out the start cylinder out of its seat and gently let the connector pass through it as shown in the picture to the right.
|
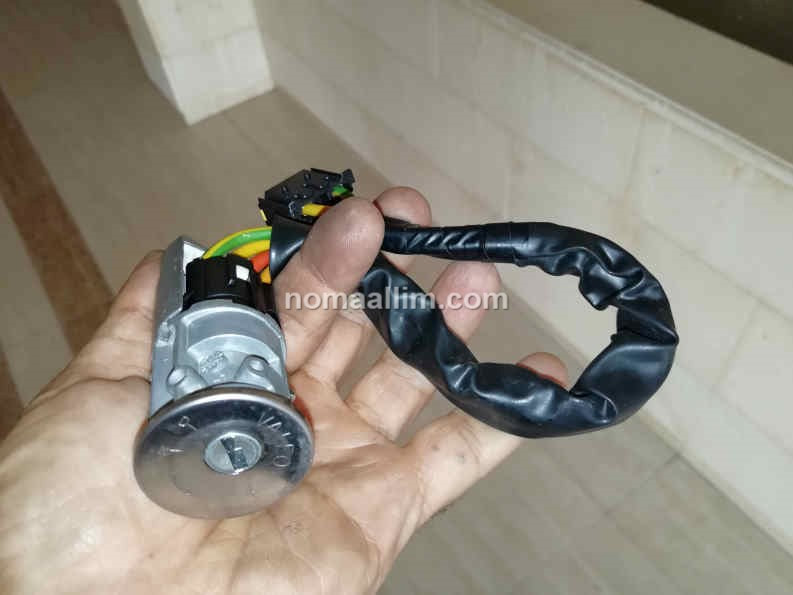
This is the replaceable part made out of the ignition switch barrel and its wire harness up to the electrical connector.
Reverse above steps to refit a new one. |
|


