COPYRIGHT WARNING:
All pictures and texts in this web page are the property of nomaallim.com. Any use of any part of those contents without the written consent of nomaallim.com shall be subject to legal procedures as per international and local laws in the concerned country. Using the name "nomaallim" or "nomaallim com" or "nomaallim.com" in the text describing the unauthorized copied content shall not constitute an exception and shall be sanctioned in accordance to the effective laws and proceedings.
All pictures and texts in this web page are the property of nomaallim.com. Any use of any part of those contents without the written consent of nomaallim.com shall be subject to legal procedures as per international and local laws in the concerned country. Using the name "nomaallim" or "nomaallim com" or "nomaallim.com" in the text describing the unauthorized copied content shall not constitute an exception and shall be sanctioned in accordance to the effective laws and proceedings.
DISCLAIMER:
Our pictorials are of informative nature and do illustrate works carried out by ourselves at our own premises for our own use and satisfaction.
Readers who envisage to carry out similar works inspired by the below method shall do this at their own risks and liability.
Our pictorials are of informative nature and do illustrate works carried out by ourselves at our own premises for our own use and satisfaction.
Readers who envisage to carry out similar works inspired by the below method shall do this at their own risks and liability.
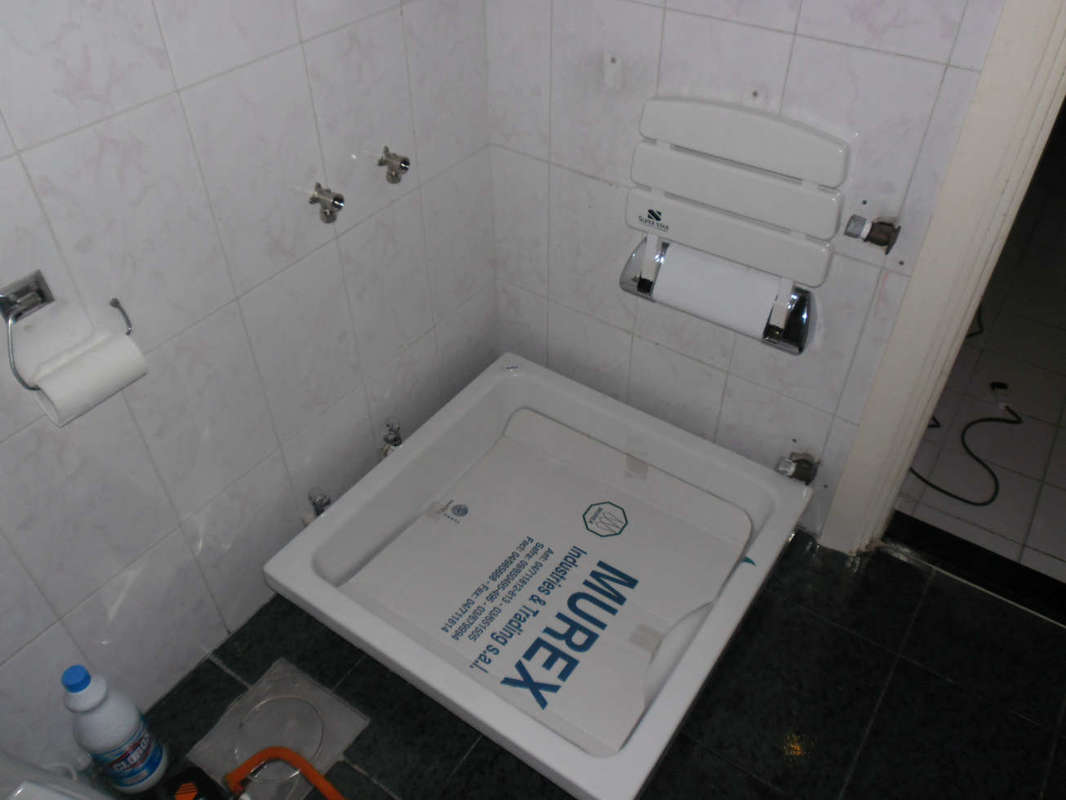
DAY 3 - CUTTING THE TILES FOR THE SHOWER TRAY DRAINAGE
As a reminder, it was decided to install a surface mount shower tray with the less possible tile braking and removal.
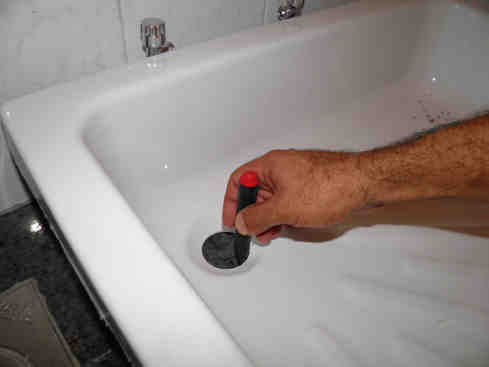
The bidet drainage is cut (left) and the shower tray tried in its intended place.
A fiber glass shower tray was chosen in this case.
The bidet drainage is cut (left) and the shower tray tried in its intended place.
A fiber glass shower tray was chosen in this case.
|
|
|
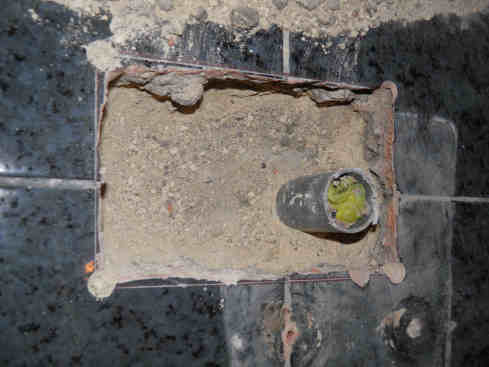
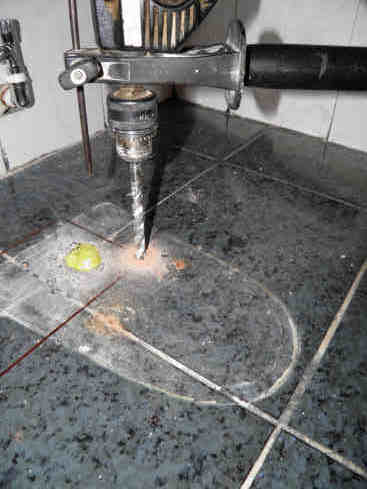
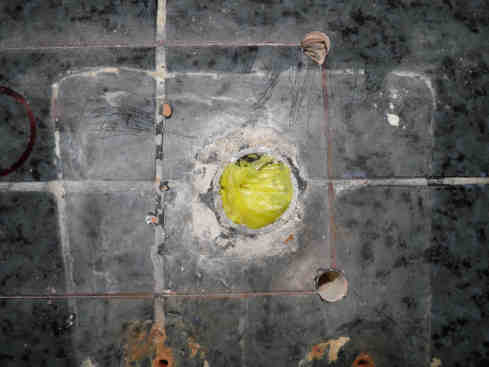
The location of the shower tray drainage is marked on the floor tiles (left).
It does not match the bidet drainage location (middle) which will require cutting the tiles.
A rectangle providing some space to connect both drainage locations is tentatively marked (right).
It does not match the bidet drainage location (middle) which will require cutting the tiles.
A rectangle providing some space to connect both drainage locations is tentatively marked (right).


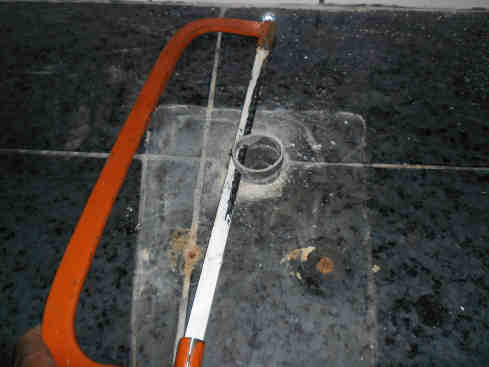
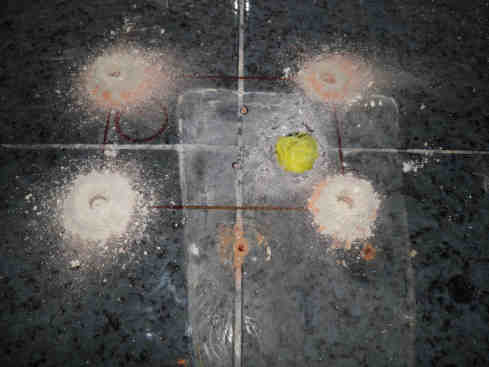
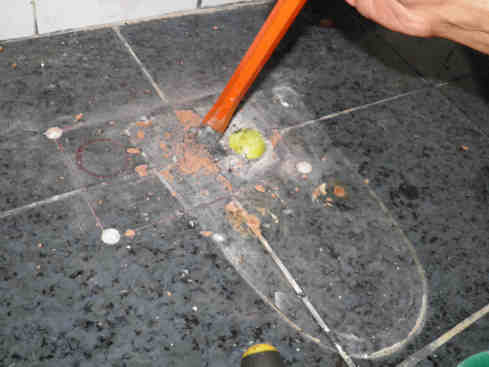
The 4 corners of the rectangle are drilled with a 10 mm bit.
The rectangle is then marked again with a tile-cutting tool (right).
The rectangle is then marked again with a tile-cutting tool (right).

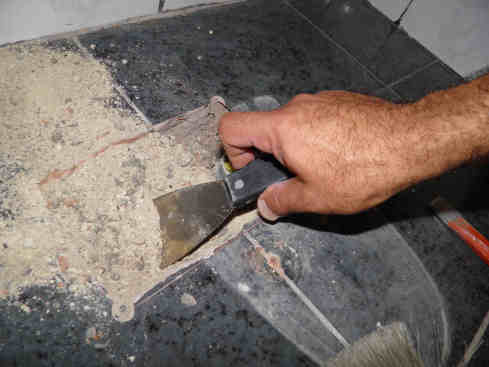
Time now to start breaking and removing the floor tiles inside the marked rectangle (left).
An old screwdriver is used first at the joints (middle) then the chisel and a heavier hammer (right).
An old screwdriver is used first at the joints (middle) then the chisel and a heavier hammer (right).
ALWAYS MAKE SURE TO WEAR SAFETY GOGGLES WHILE BREAKING PORCELAIN TILES.
SHARP PORCELAIN FRAGMENTS WILL BE EJECTED WITH SIGNIFICANT FORCE AND VELOCITY.
SHARP PORCELAIN FRAGMENTS WILL BE EJECTED WITH SIGNIFICANT FORCE AND VELOCITY.
|
|
|

After the tiles removal it is time for the substrate removal (middle) until reaching the concrete slab.
A vacuum cleaner is then used to complete the task.
A vacuum cleaner is then used to complete the task.