COPYRIGHT WARNING:
All pictures and texts in this web page are the property of nomaallim.com. Any use of any part of those contents without the written consent of nomaallim.com shall be subject to legal procedures as per international and local laws in the concerned country. Using the name "nomaallim" or "nomaallim com" or "nomaallim.com" in the text describing the unauthorized copied content shall not constitute an exception and shall be sanctioned in accordance to the effective laws and proceedings.
All pictures and texts in this web page are the property of nomaallim.com. Any use of any part of those contents without the written consent of nomaallim.com shall be subject to legal procedures as per international and local laws in the concerned country. Using the name "nomaallim" or "nomaallim com" or "nomaallim.com" in the text describing the unauthorized copied content shall not constitute an exception and shall be sanctioned in accordance to the effective laws and proceedings.
BEFORE YOU START
|
|
DISCLAIMER:
Our pictorials are of informative nature and do illustrate works carried out by ourselves at our own premises for our own use and satisfaction.
Readers who envisage to carry out similar works inspired by the below method shall do this at their own risks and liability.
Our pictorials are of informative nature and do illustrate works carried out by ourselves at our own premises for our own use and satisfaction.
Readers who envisage to carry out similar works inspired by the below method shall do this at their own risks and liability.
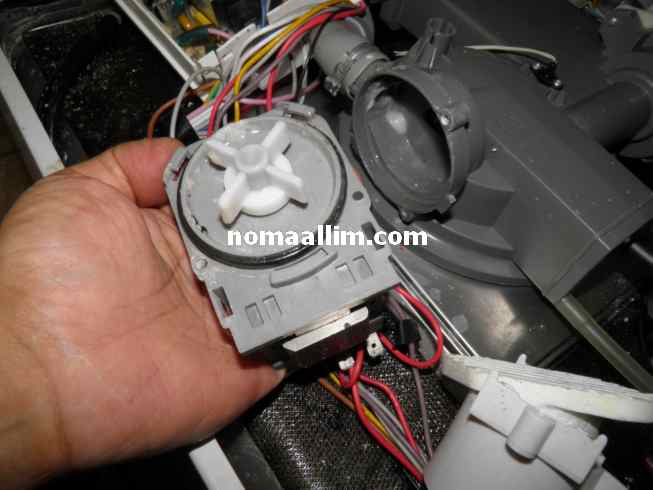
Appliance drain pump test No 1:
removing and inspecting a washing machine or dishwasher drain pump for foreign objects.
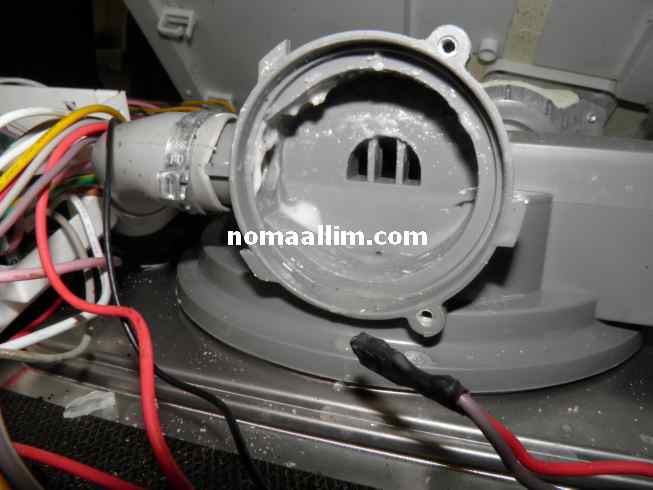
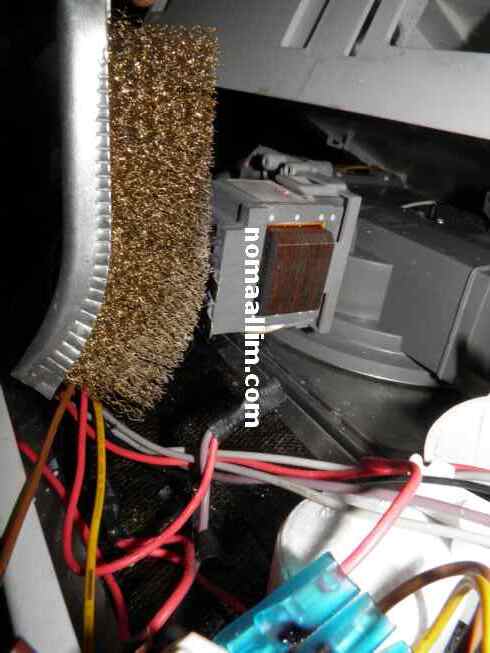
Turn your appliance upside down and remove the bottom tray in order to access the drain pump.
Unscrew the 2 or 3 screws that hold the washing machine or dishwasher pump.
Unscrew the 2 or 3 screws that hold the washing machine or dishwasher pump.


Pull out the appliance drain pump and check first that no foreign object obstructs the pump.
This is absolutely the first test to start with.
You could find glass or plastic debris in a dishwasher pump, pieces of fabric and buttons in the one of a washing machine, etc.
This is absolutely the first test to start with.
You could find glass or plastic debris in a dishwasher pump, pieces of fabric and buttons in the one of a washing machine, etc.
|
|
|
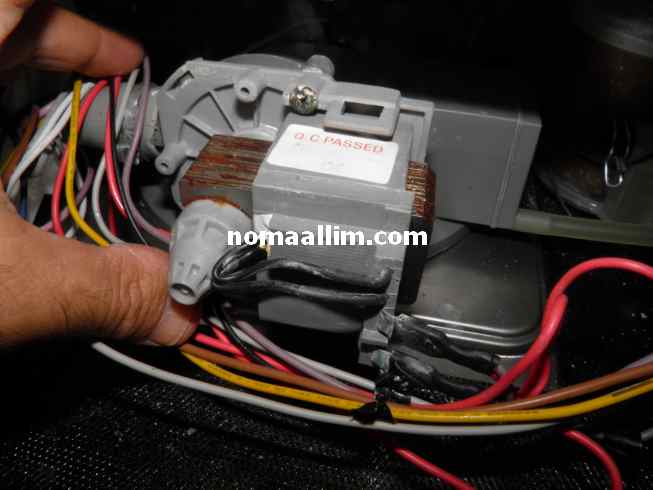
Appliance drain pump test No 2:
Cleaning the drain pump connectors and testing the pump motor
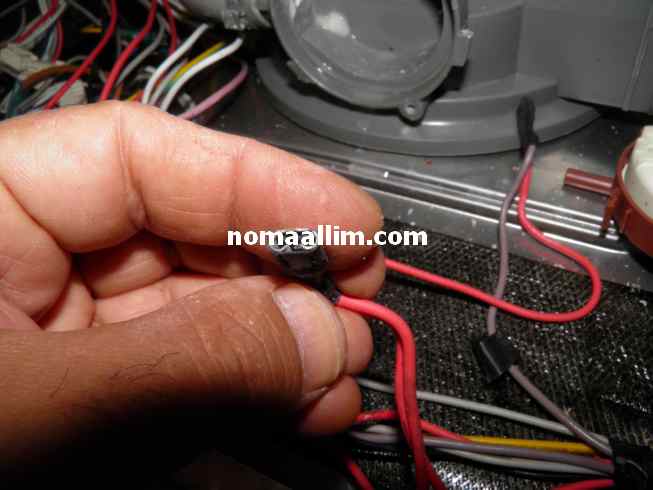
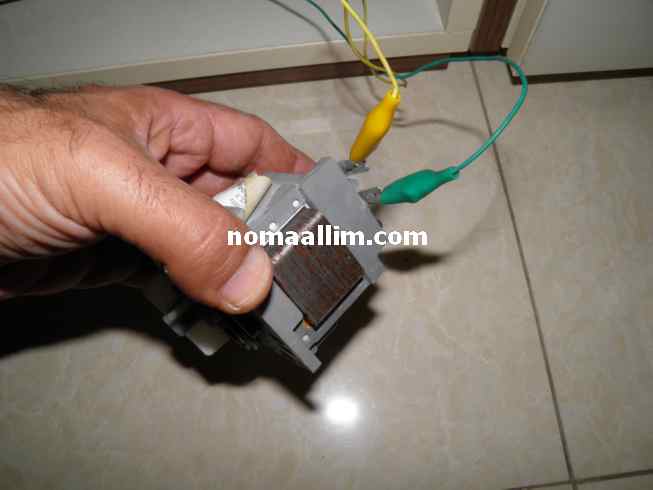
The appliance drain pump motor connectors can usually be pulled out by hand but you might need to use pliers as shown in the left picture. Inspect well the pump wire connectors which are often corroded. You will notice a green powder as a result of oxidation.
This is enough to cause a bad contact.
This is enough to cause a bad contact.
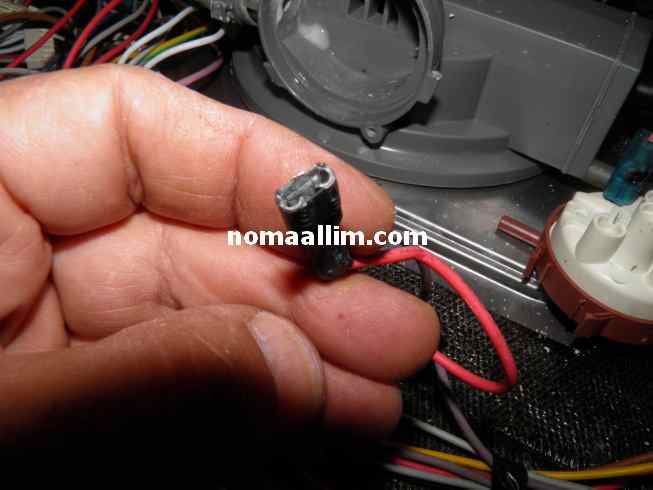
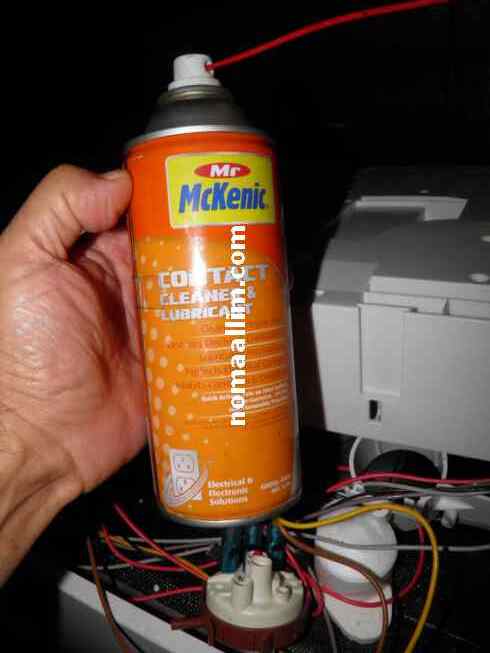
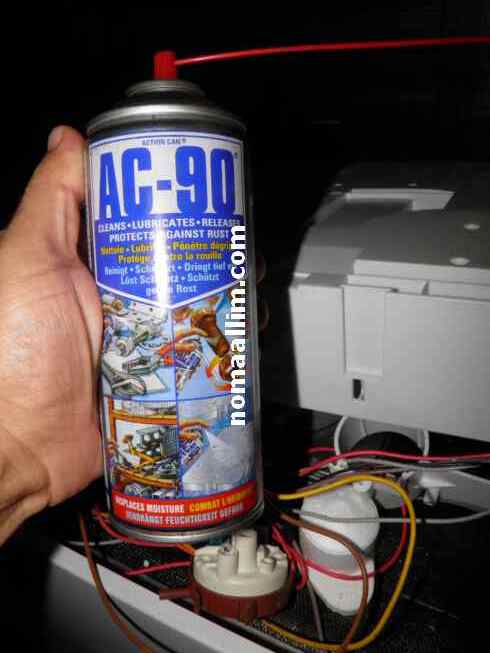
Clean well the connectors with a wire brush then with a contact cleaner.
Apply very little penetrating oil before reassembling the connectors.
Apply very little penetrating oil before reassembling the connectors.
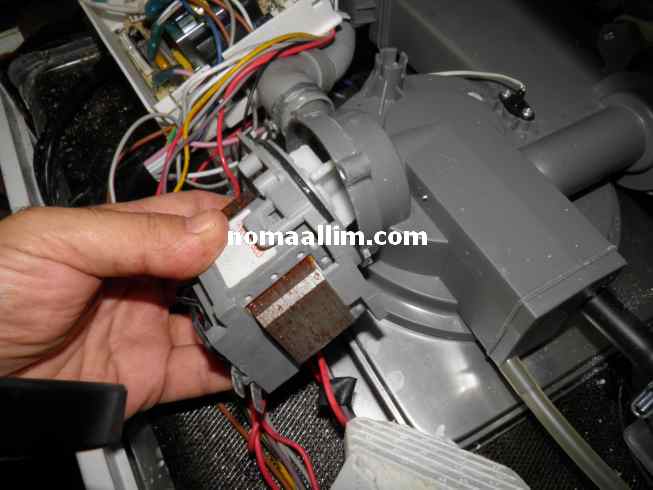
Test the motor alone before re-assembling it into the dishwasher or the washing machine.
Connect two wires to the drain pump motor terminals on one side and to an electric plug on the other side.
Wear electrically insulated gloves or stay away from any bare connector prior to inserting the plug into the wall socket.
Check that the drain pump is rotating smoothly and in silence.
Connect two wires to the drain pump motor terminals on one side and to an electric plug on the other side.
Wear electrically insulated gloves or stay away from any bare connector prior to inserting the plug into the wall socket.
Check that the drain pump is rotating smoothly and in silence.
|
|
|
Appliance drain pump test No 3:
Testing the control board relay
Follow the wires from the dishwasher or washing machine drain pump up to reaching the control board.
Disconnect all connectors and remove the control board.
Disconnect all connectors and remove the control board.
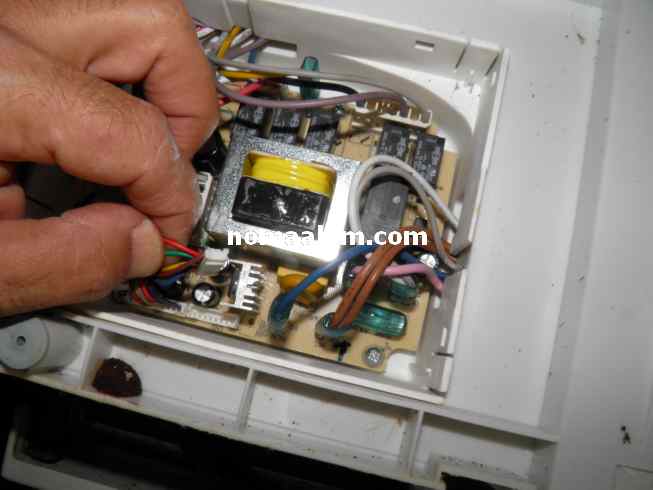
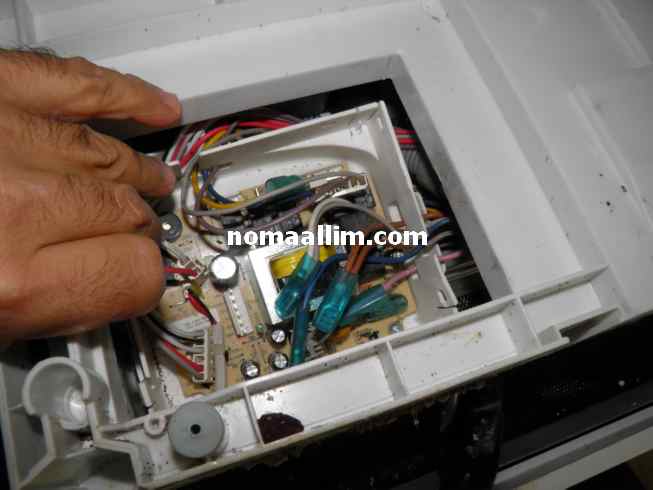
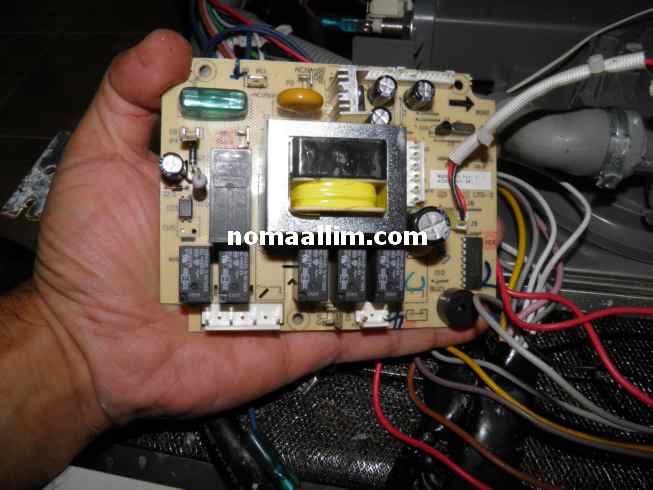
Observe well the type of output relays and note the voltage of the coil.
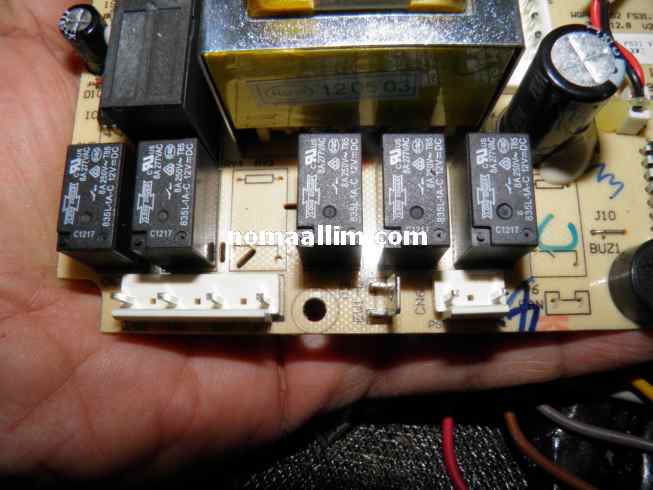
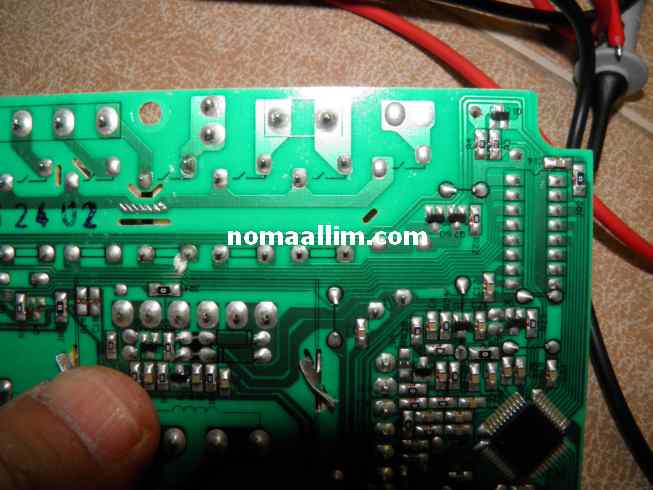
Look at the back of the PCB and follow the connectors of the drain pump to see to which relay they connect.
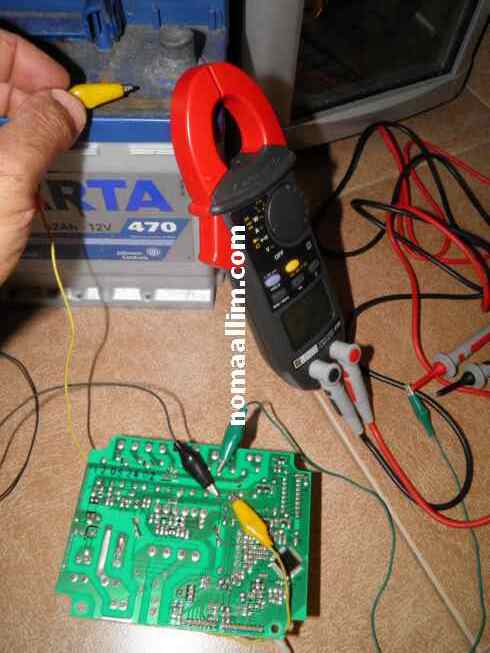
In this case, the relays are 12VDC reason why a car battery is used to test the relays.
An Ohmmeter is connected to the switch of the relay while applying 12VDC to the coil to test the relay which needs to be replaced if found defective.
Look at the back of the PCB and follow the connectors of the drain pump to see to which relay they connect.
In this case, the relays are 12VDC reason why a car battery is used to test the relays.
An Ohmmeter is connected to the switch of the relay while applying 12VDC to the coil to test the relay which needs to be replaced if found defective.

Recap of an appliance drain pump diagnostic:
- Visually check for the presence of foreign objects in the drain pump
- Clean the electrical connectors of the drain pump motor wires
- Test the drain pump motor
- Test the output relay of the control board
See also...


|
|
|