COPYRIGHT WARNING:
All pictures and texts in this web page are the property of nomaallim.com. Any use of any part of those contents without the written consent of nomaallim.com shall be subject to legal procedures as per international and local laws in the concerned country. Using the name "nomaallim" or "nomaallim com" or "nomaallim.com" in the text describing the unauthorized copied content shall not constitute an exception and shall be sanctioned in accordance to the effective laws and proceedings.
All pictures and texts in this web page are the property of nomaallim.com. Any use of any part of those contents without the written consent of nomaallim.com shall be subject to legal procedures as per international and local laws in the concerned country. Using the name "nomaallim" or "nomaallim com" or "nomaallim.com" in the text describing the unauthorized copied content shall not constitute an exception and shall be sanctioned in accordance to the effective laws and proceedings.
BEFORE YOU START
-Since usually mixer taps do last a matter of 15 to 20 years, it is probable to encounter some trouble behind the tap like corroded water outlets in the wall which could extend this intervention to 3 to 4 hours if you have no experience. |
|
DISCLAIMER:
Our pictorials are of informative nature and do illustrate works carried out by ourselves at our own premises for our own use and satisfaction.
Readers who envisage to carry out similar works inspired by the below method shall do this at their own risks and liability.
Our pictorials are of informative nature and do illustrate works carried out by ourselves at our own premises for our own use and satisfaction.
Readers who envisage to carry out similar works inspired by the below method shall do this at their own risks and liability.
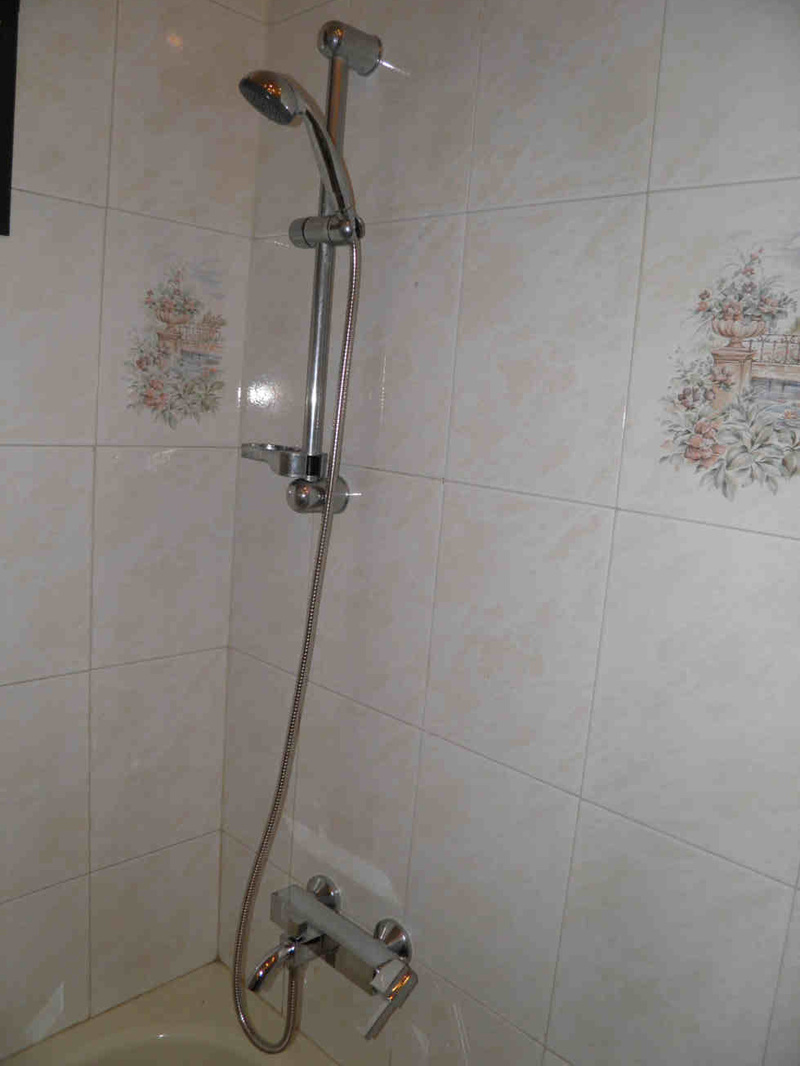
Preparatory works for the shower mixer replacement
Shut off the cold and hot water supplies of the shower mixer.
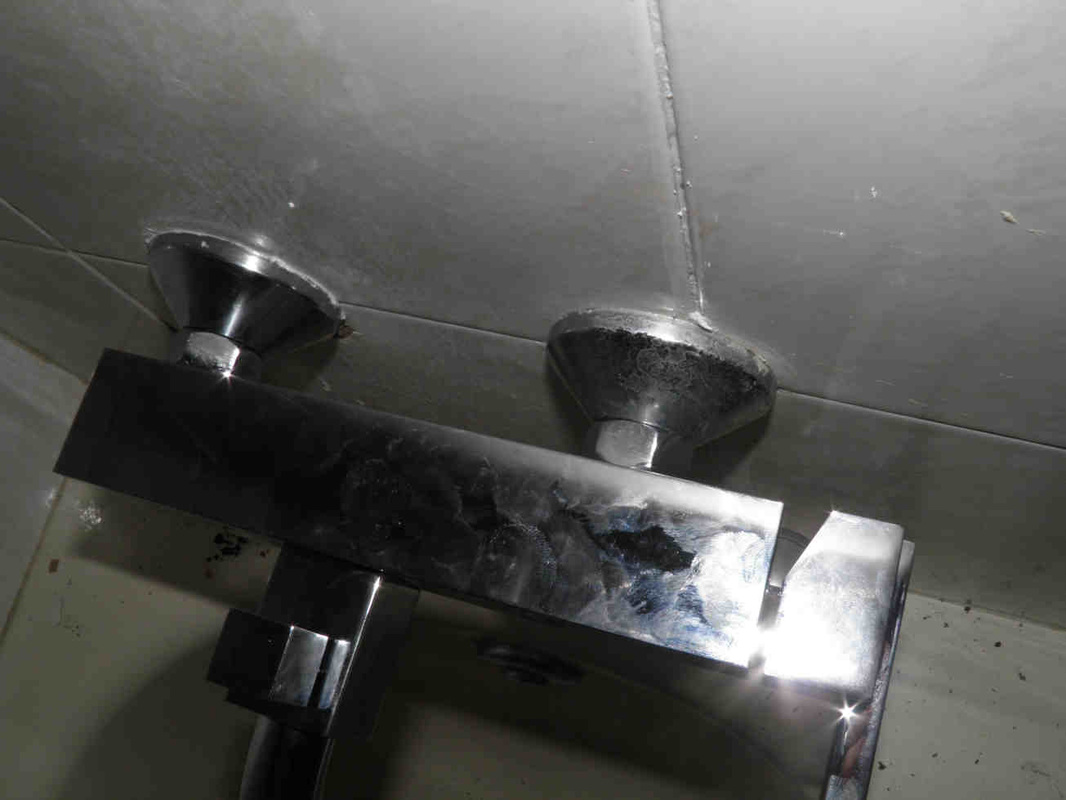
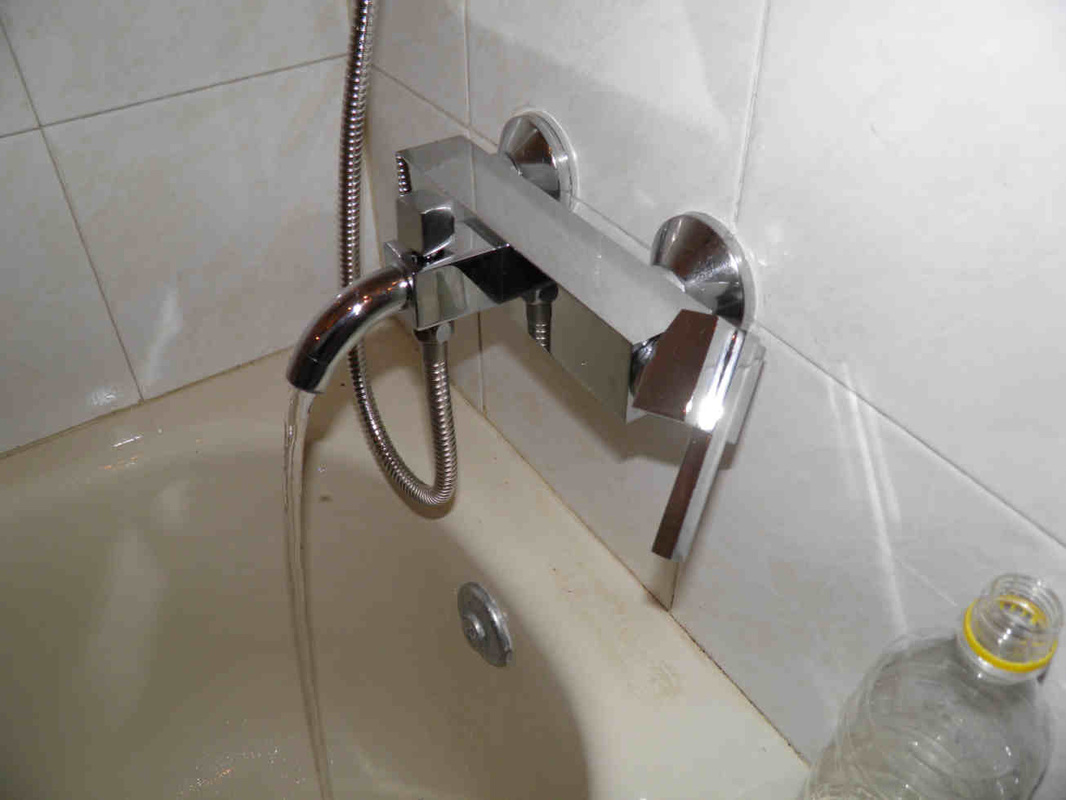
This shower mixer aged 21 years. Below pictures will show the extents of the damages resulting from an initial poor installation.
This adds to the difficulty to operate the mixer handles, which could be eventually stuck.
This shower mixer aged 21 years. Below pictures will show the extents of the damages resulting from an initial poor installation.
This adds to the difficulty to operate the mixer handles, which could be eventually stuck.


TIP: Do not attempt to renew or repair the existing mixer. This is totally not recommended as it is time consuming, requires some seals and grease that you don't have and will lead to the renewed mixer having a short lifetime of a couple of years.
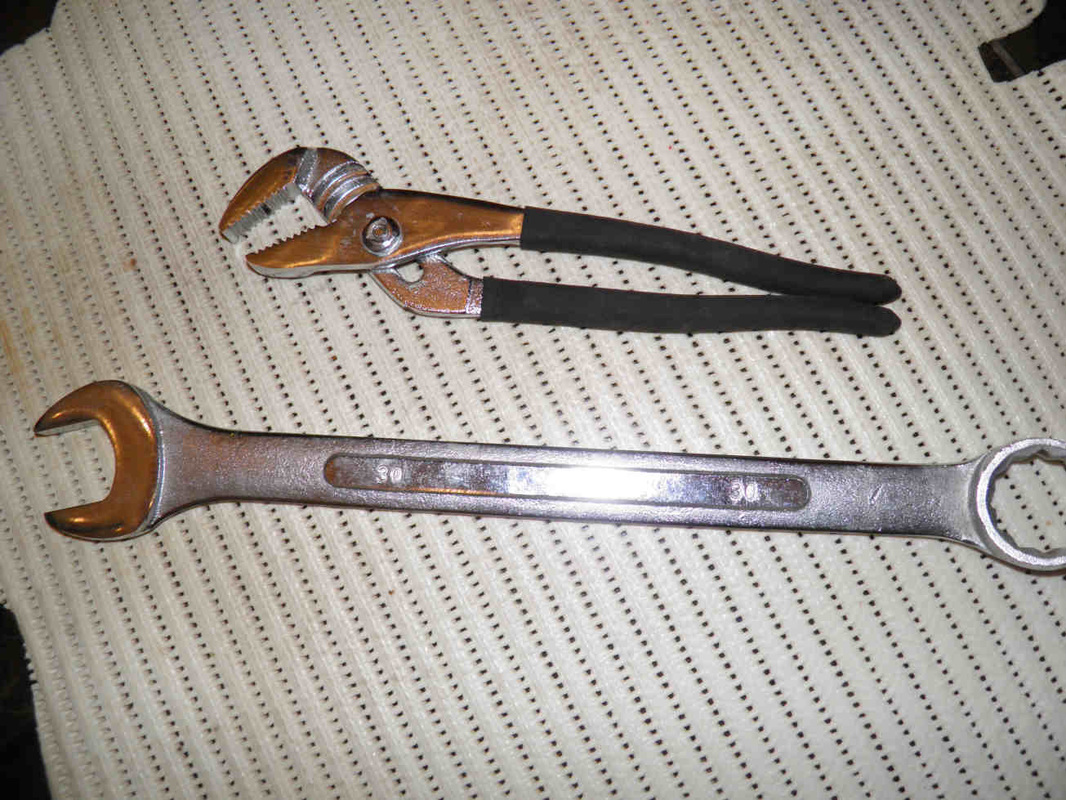
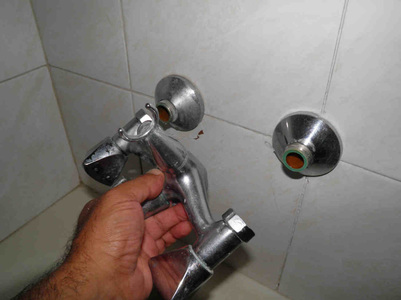
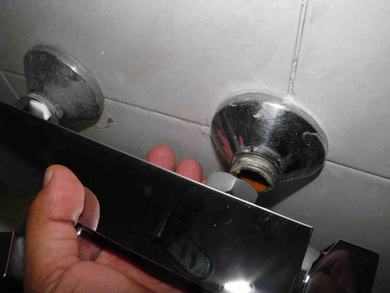
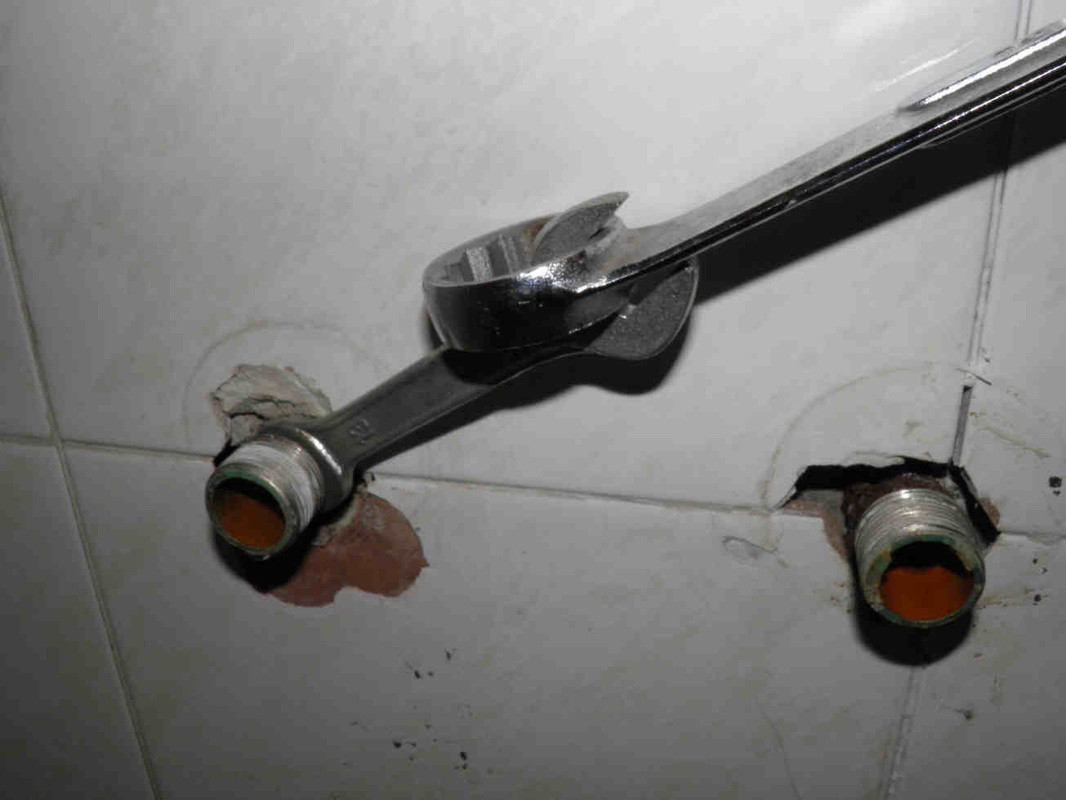
Old shower mixer tap removal
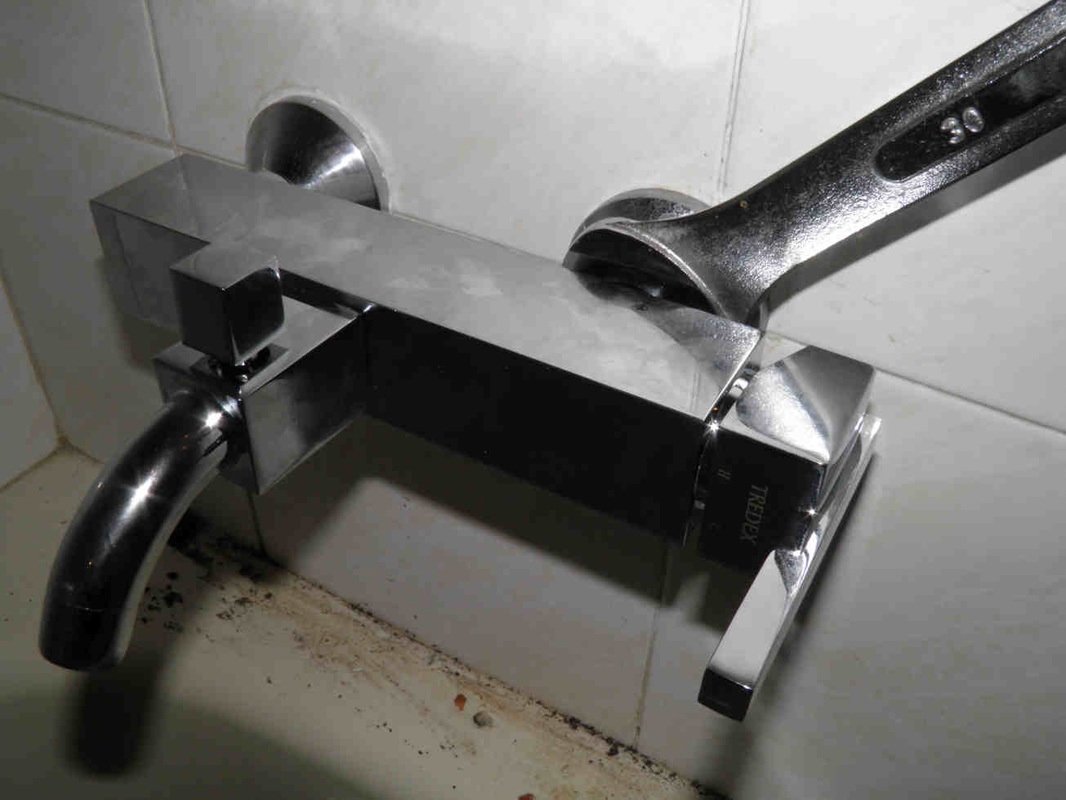
You need to have 12" monkey pliers and a 30 mm spanner.
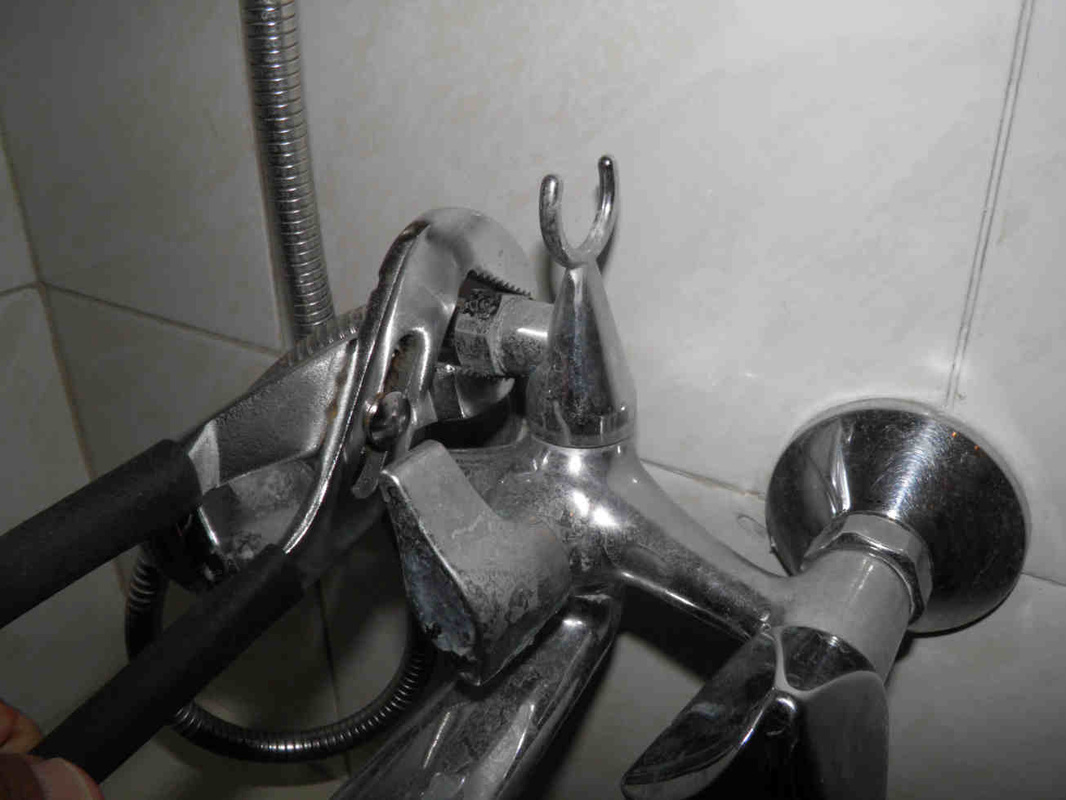
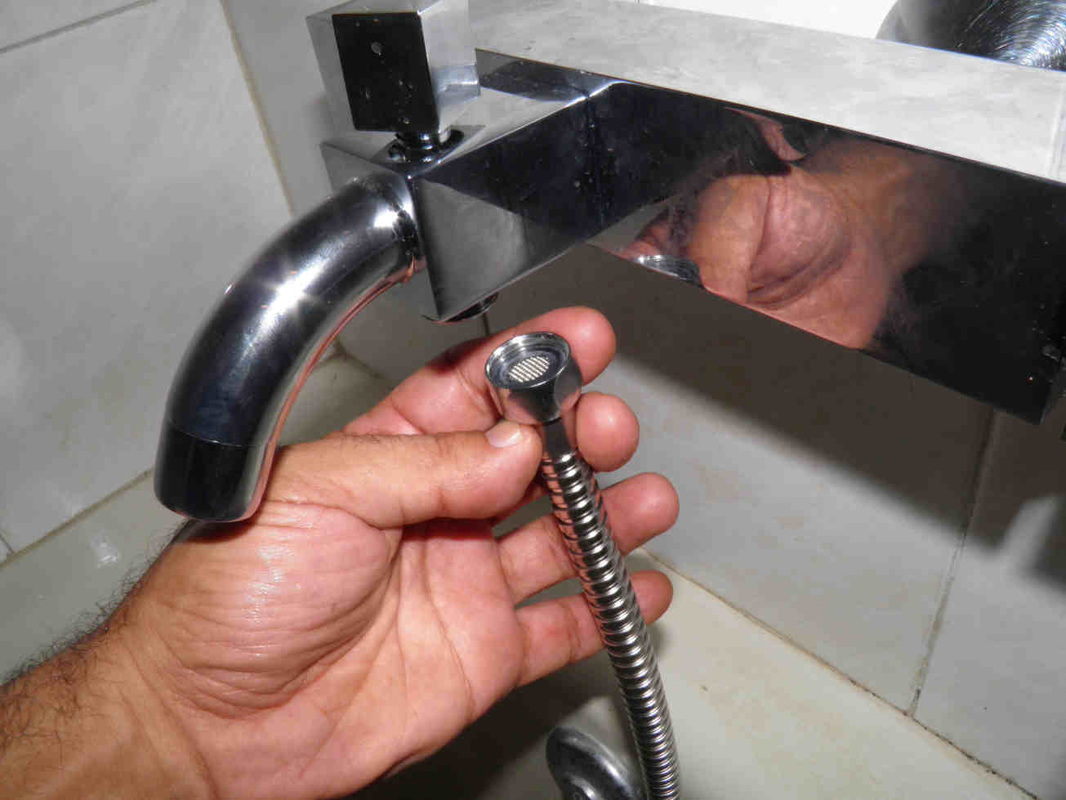
Simply unscrew the flexible shower tube then use the spanner to unscrew the two chrome plated nuts of the mixer.
Remove the mixer.
Simply unscrew the flexible shower tube then use the spanner to unscrew the two chrome plated nuts of the mixer.
Remove the mixer.
|
|
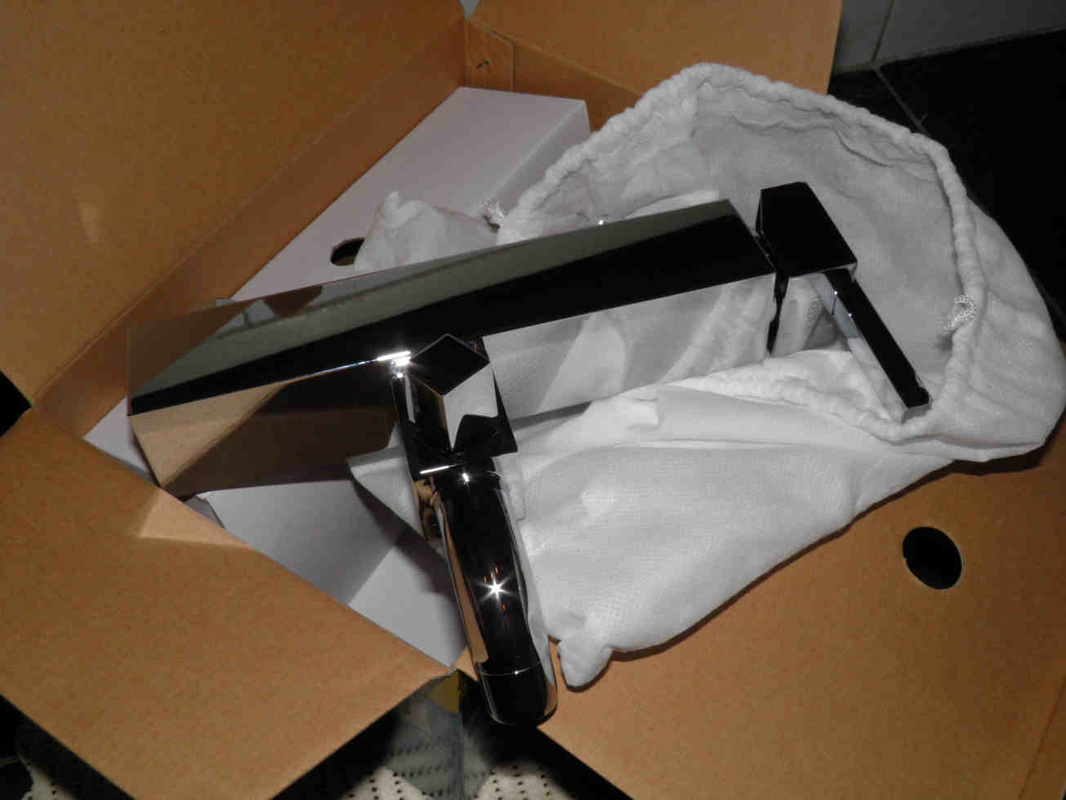
Trying the new mixer tap
Unpack your new mixer which is supplied inclusive of:
- The mixer
- Two chrome plated wall outlet covers
- Two eccentric 1/2" - 3/4" adapters
- Two 3/4" gaskets

Try the new mixer on the existing male threads.
You'd be lucky if it fits exactly on the same outlets in which case you just have to carefully tighten the mixer nuts and that's it!
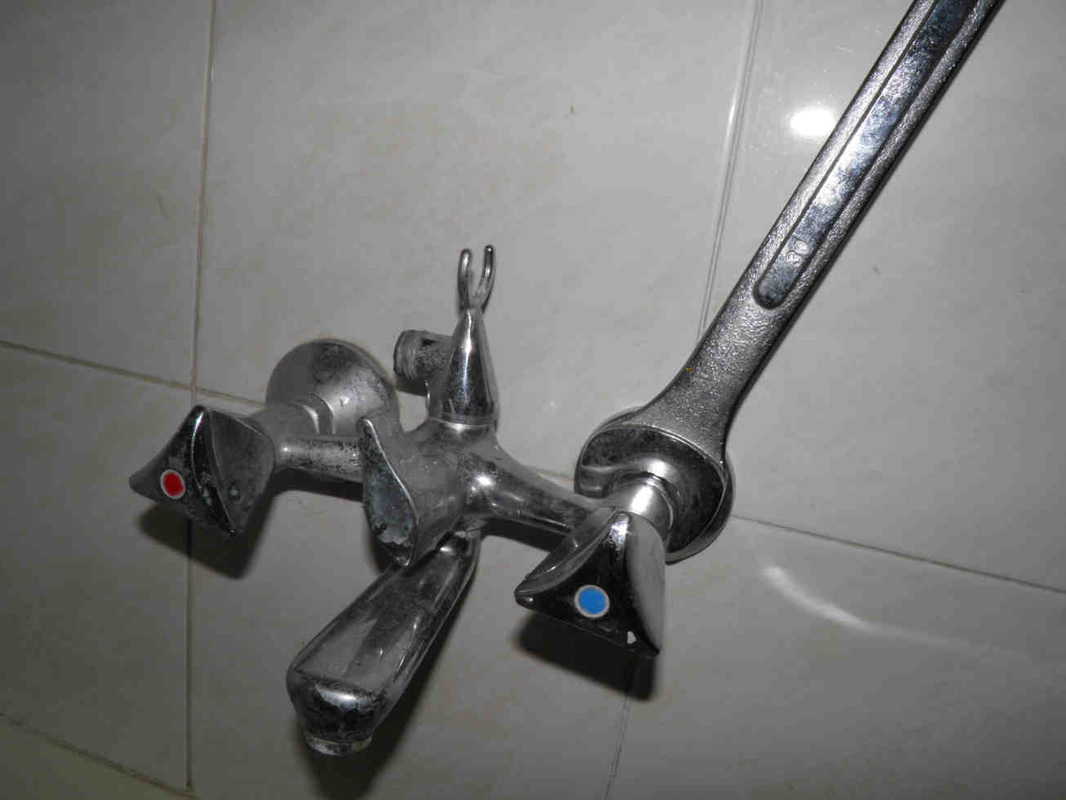
Most of the time the distance between the cold water and hot water tap connectors will not match the one of the existing mixer as shown in the below picture:
You'd be lucky if it fits exactly on the same outlets in which case you just have to carefully tighten the mixer nuts and that's it!
Most of the time the distance between the cold water and hot water tap connectors will not match the one of the existing mixer as shown in the below picture:
|
|
|
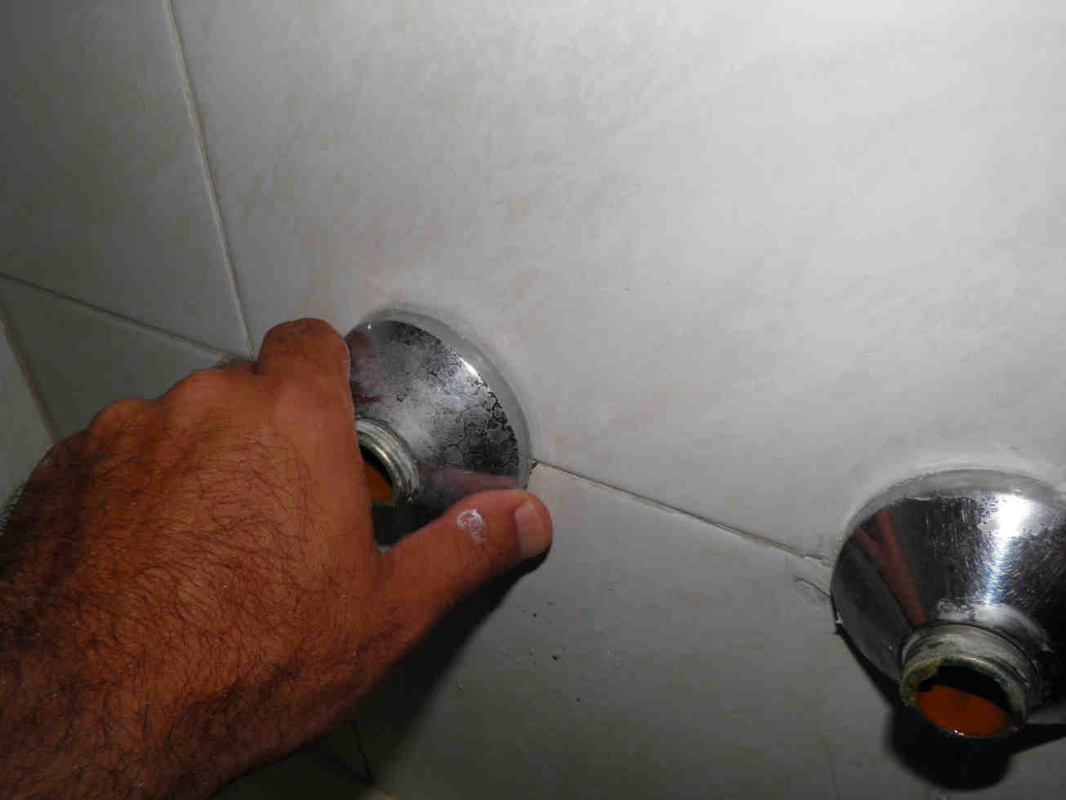
Preparing for the new tap installation
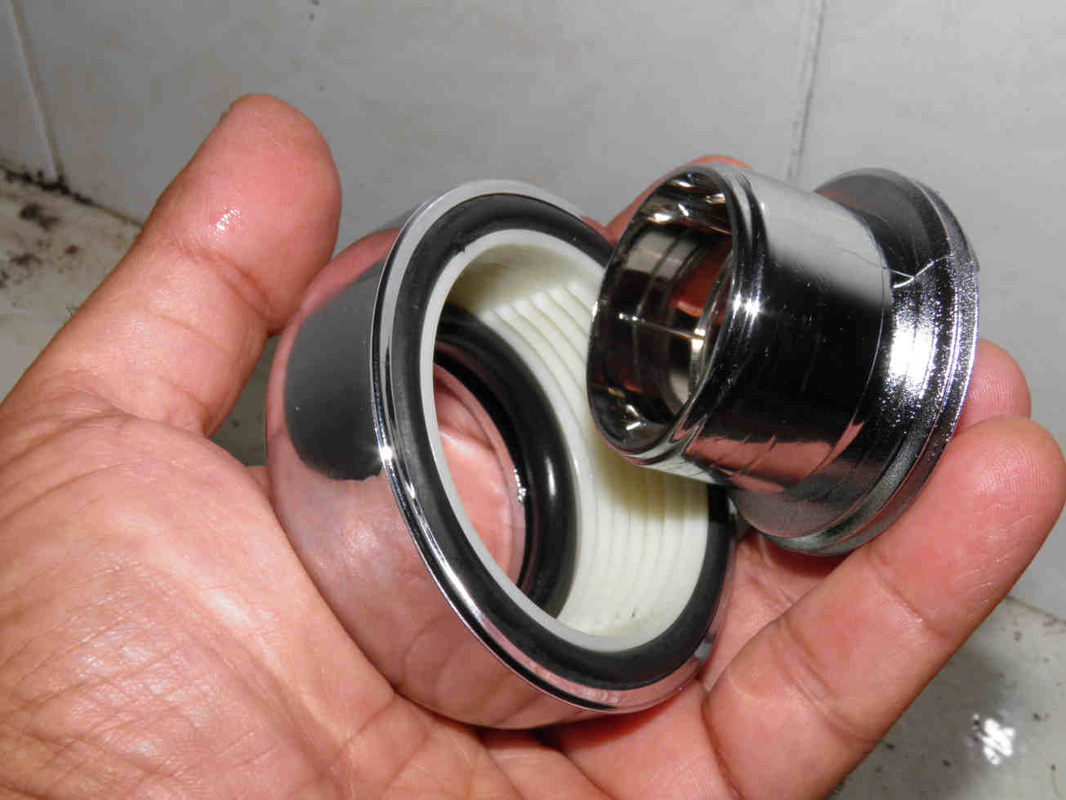
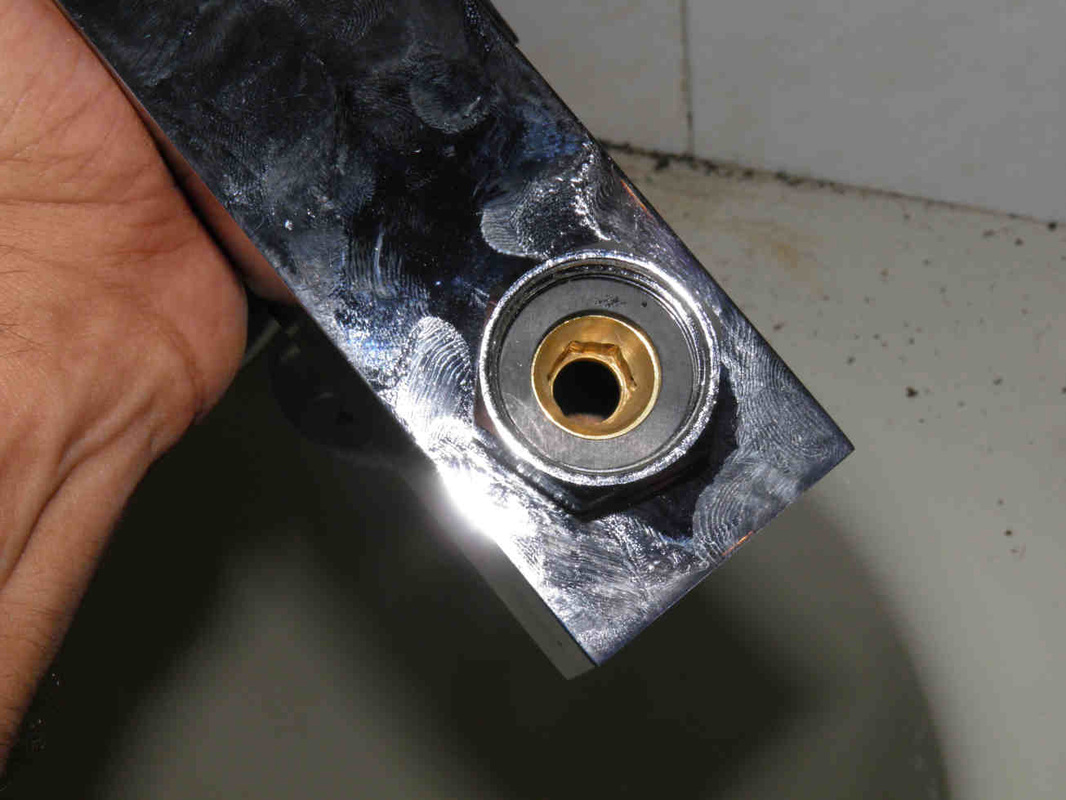
Start by unscrewing the chrome covers for removing them completely.
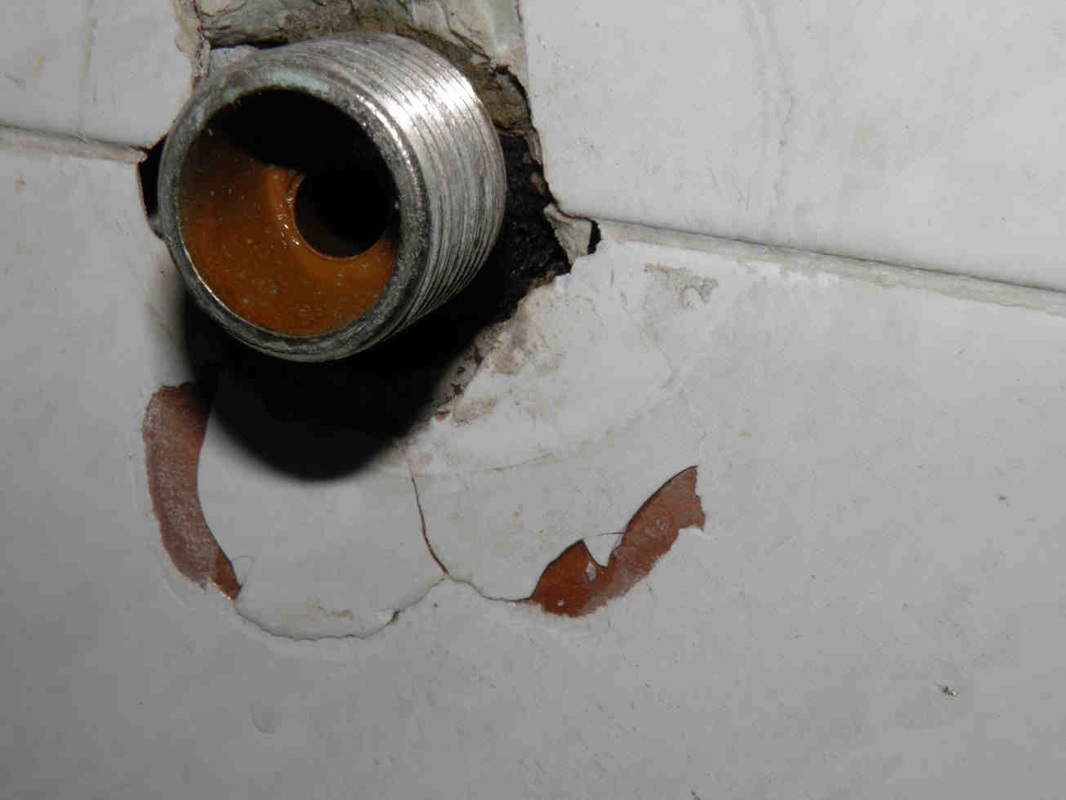
In this case, the holes inside the covers were not sealed by the plumber when installing the mixer, one can see the extents of the corrosion that has seriously damaged the water outlets. Such corrosion also led to the fracturing of the porcelain tiles.
In this case, the holes inside the covers were not sealed by the plumber when installing the mixer, one can see the extents of the corrosion that has seriously damaged the water outlets. Such corrosion also led to the fracturing of the porcelain tiles.
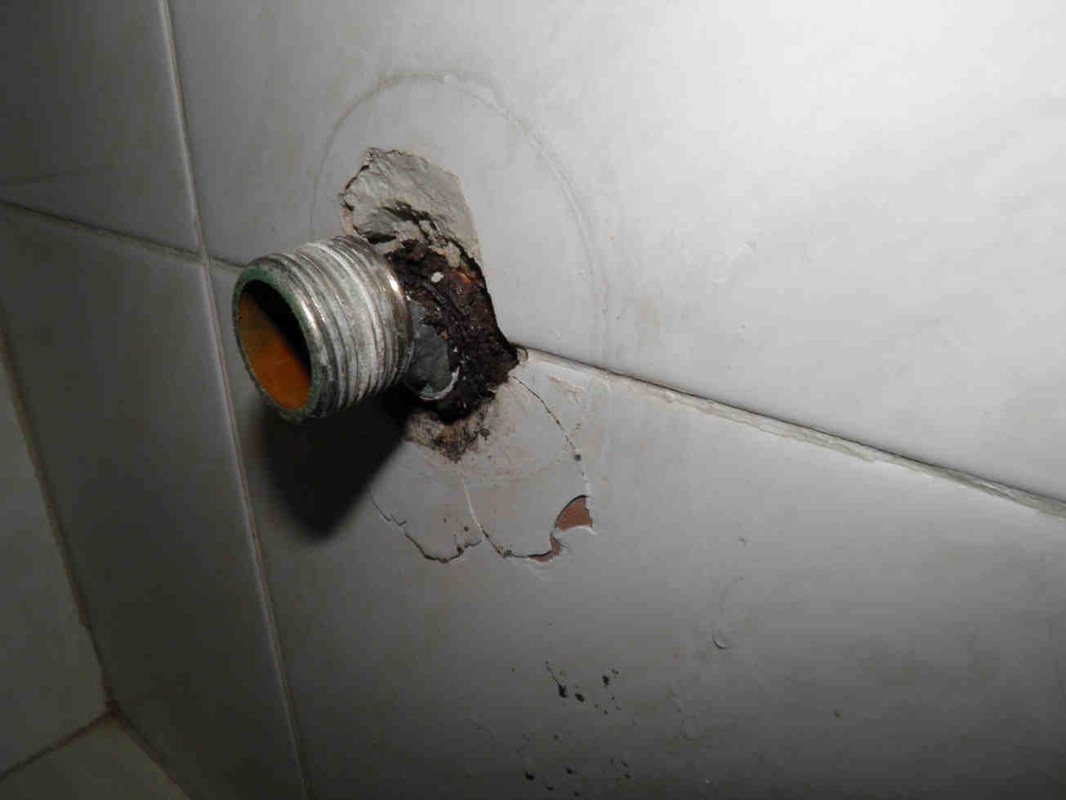

No need to panic if you face the same scenario...and check our specific page on how to replace the embedded water outlets.
Start by holding again the new mixer in front of the male threads for evaluating how much these have to be brought closer (or eventually farther). Follow the instructions in the below pictorial:
Start by holding again the new mixer in front of the male threads for evaluating how much these have to be brought closer (or eventually farther). Follow the instructions in the below pictorial:

1- Compare the mixer nuts to the existing male threads. In this case, the new mixer has a shorter distance between its connetcors.
|
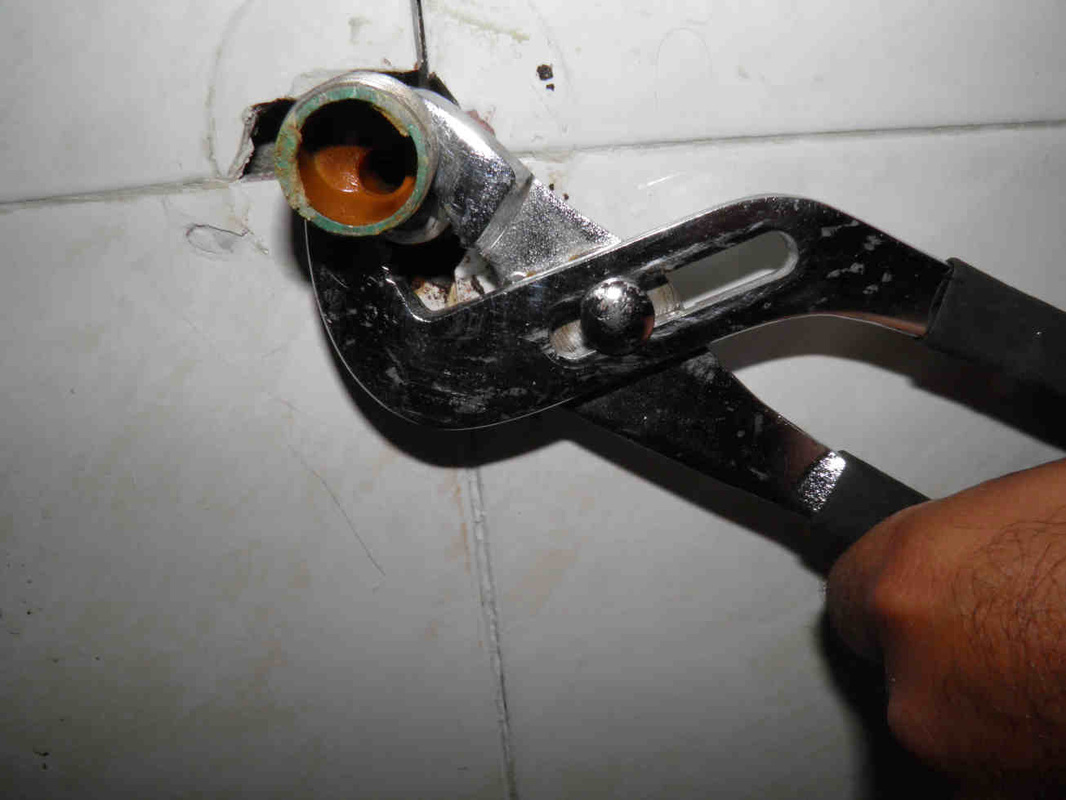
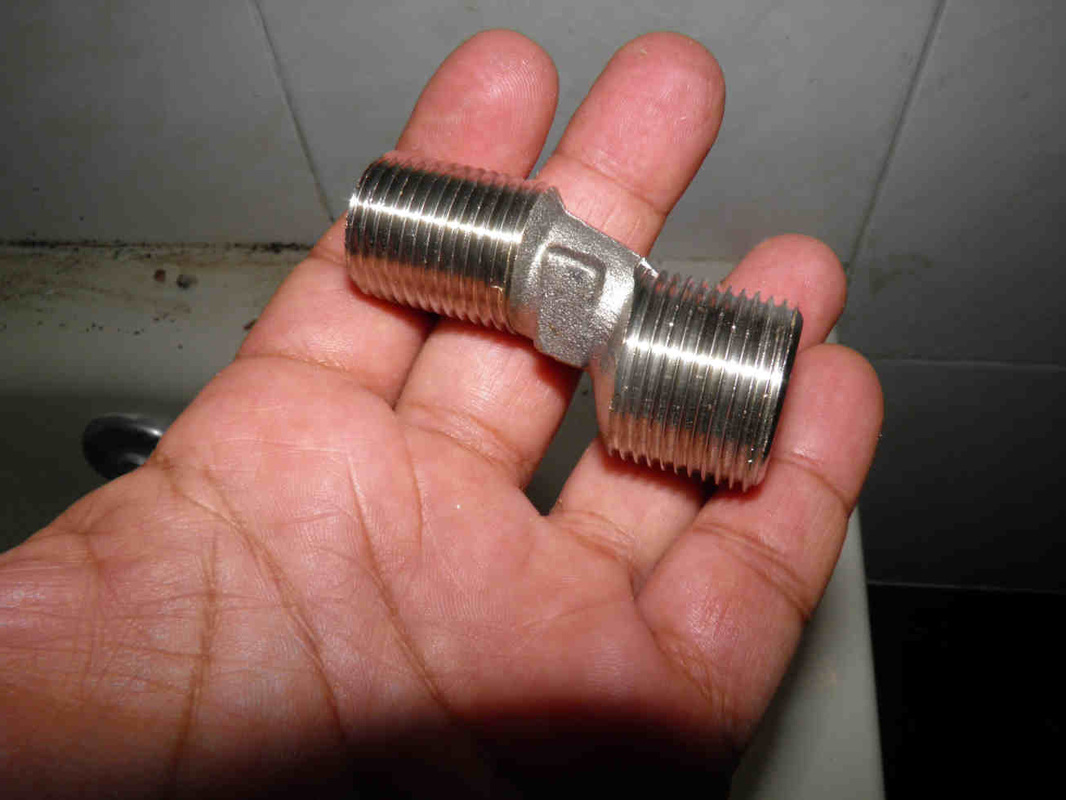
2- Using your monkey pliers, equally rotate each eccentric in opposite directions i.e. the left one clockwise, the right one counter clock wise for reducing the distance between them.
|
3- This could be quite difficult with the pliers, if so, use a size 13 spanner and extend it with another spanner to increase your force.
|
|
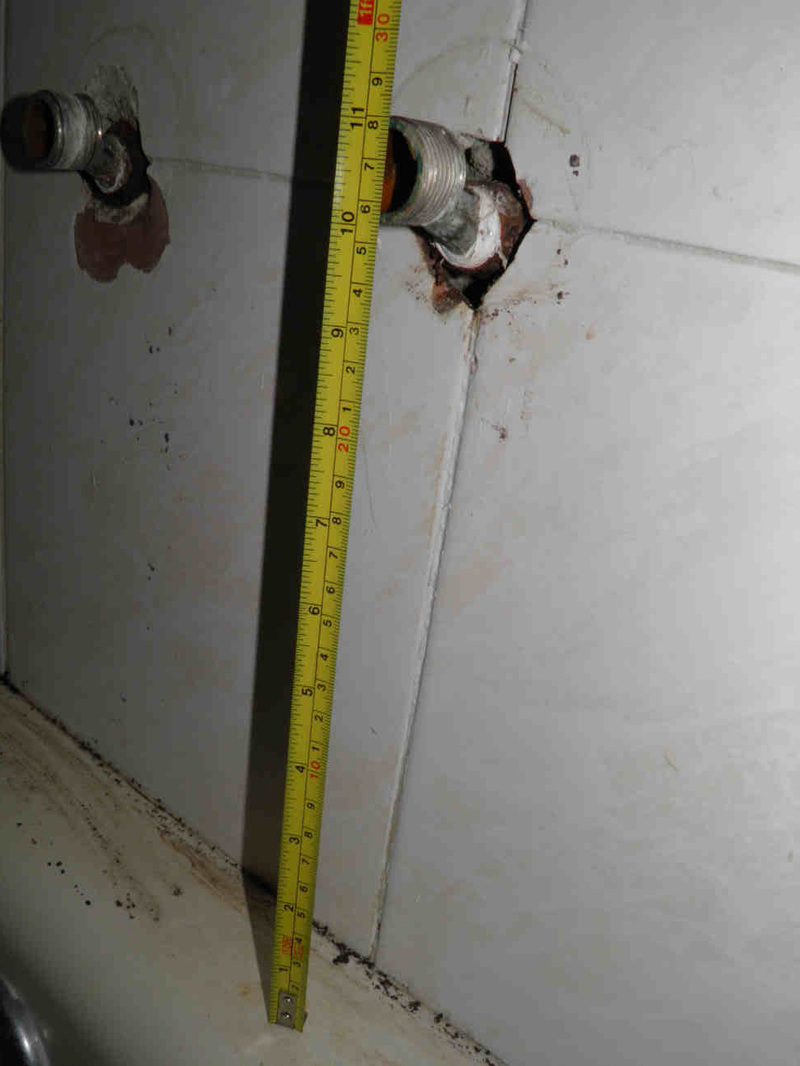
It is very important to equally adjust each of the threads for the mixer to remain horizontal.
Use a measuring tape if needed to check the distance to the shower tub. Keep trying the mixer and fit it in temporarily to make sure the nuts do turn by hand easily. |
|
Notes:
- This is the simplest way of re-adjusting the existing water outlets to the new tap but is not guaranteed as it depends on the type of sealant that was used by the plumber and the state of corrosion of the wall embedded fittings.
- In general, if you succeeded in rotating the eccentrics, then you just need to check for leaks as shown below. Eventually, completely remove the eccentric adapter, use some Teflon tape and refit it.
- The worst case scenario would be that the wall embedded outlets are so corroded that you need to replace them; this requires the removal of a few tiles and considerably complicates your intervention but remains within the medium difficulty DIY works that average DIYers can do.
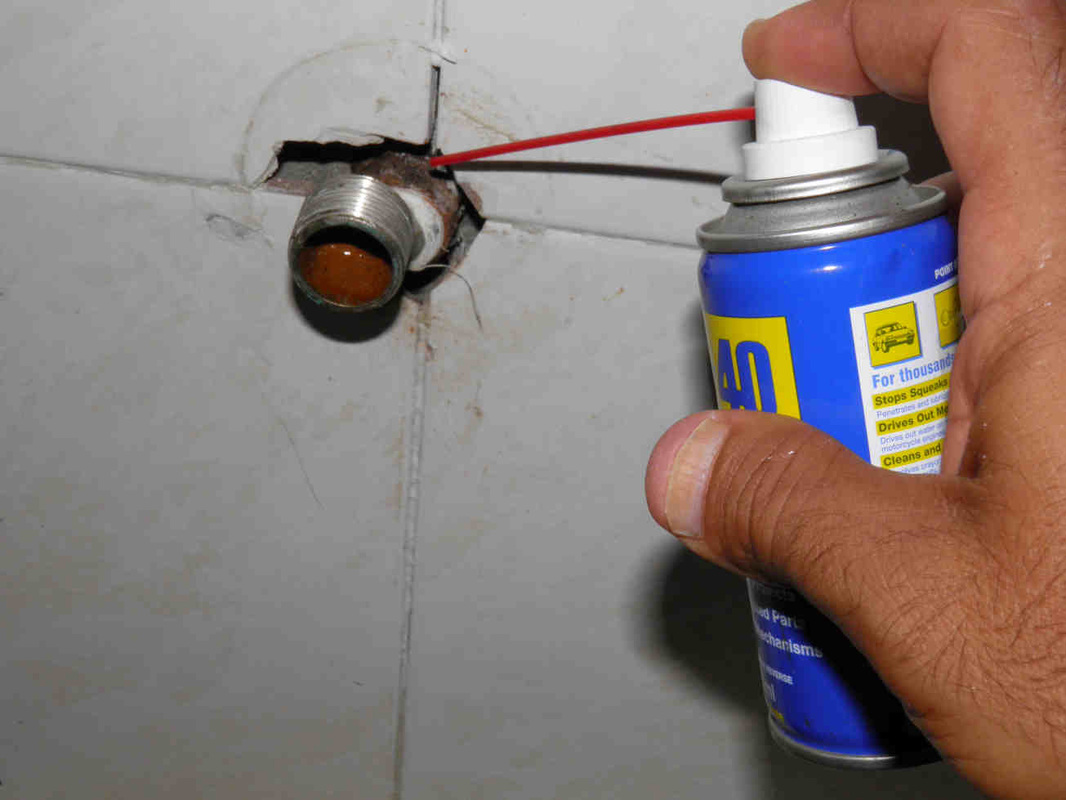
Now plug each of the water outlets and open the water supply to make sure there are no leaks (left image).
If a leak is found, remove the adapter, seal it with Teflon and fit it again.
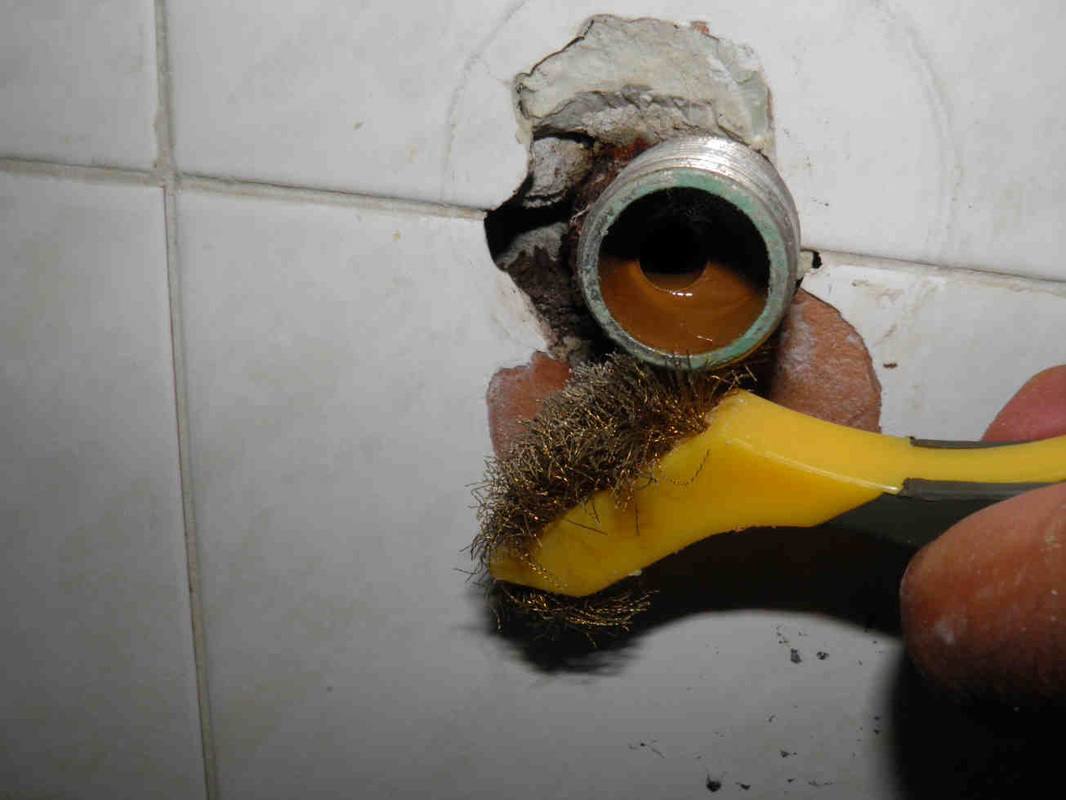
If not, clean the wall outlets as much as you can with a brush and a screwdriver and spray the corroded parts with WD40 at least or better a corrosion stopper.
If a leak is found, remove the adapter, seal it with Teflon and fit it again.
If not, clean the wall outlets as much as you can with a brush and a screwdriver and spray the corroded parts with WD40 at least or better a corrosion stopper.

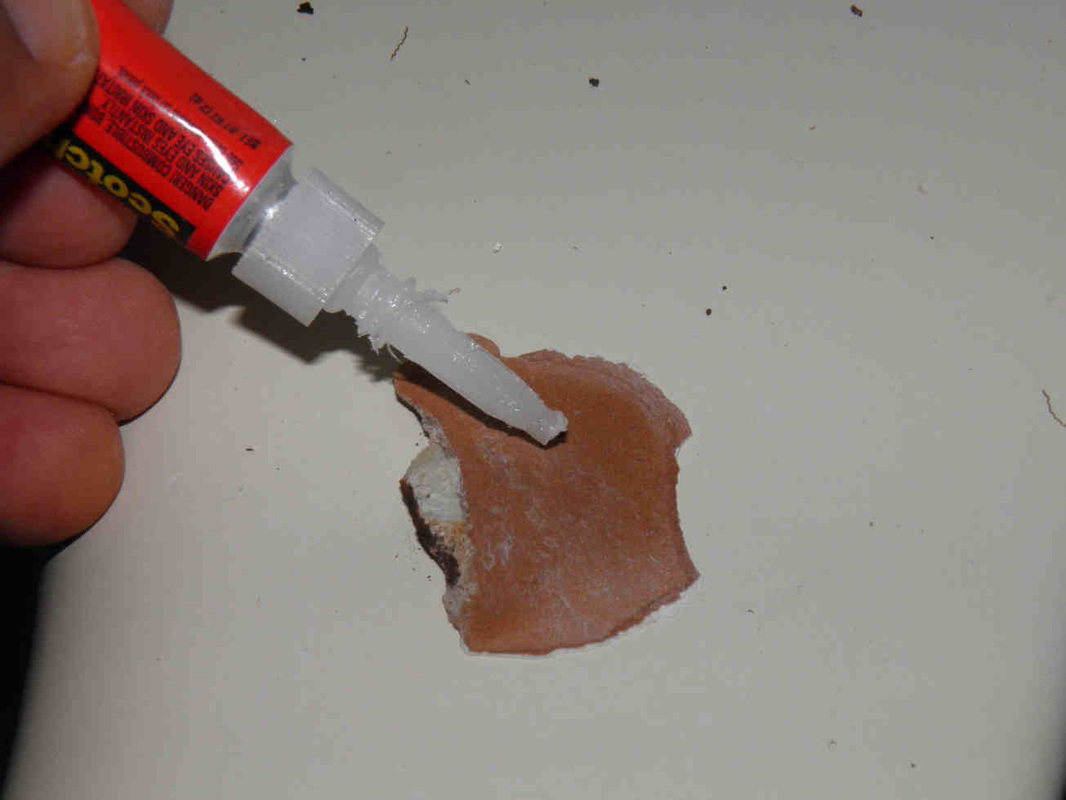
TIP: in case your tiles where cracked in surface, use some super glue to refit the largest fragments. You can later apply liquid porcelain chip repair on the remaining surface.
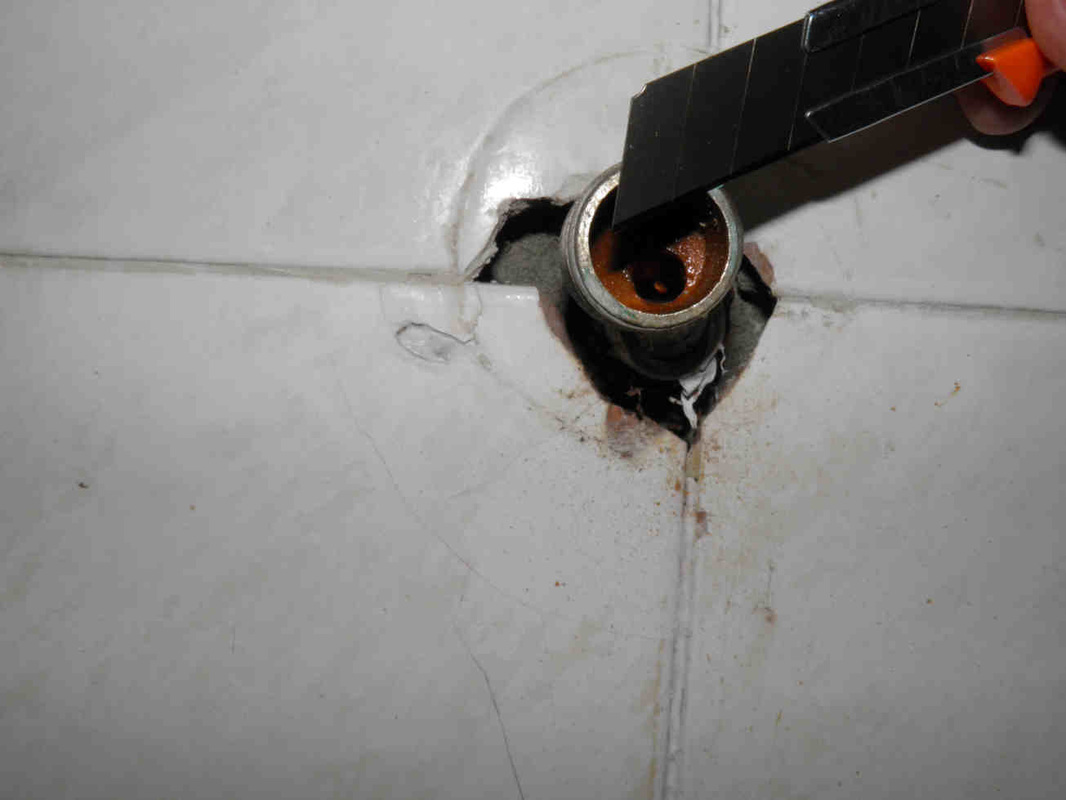
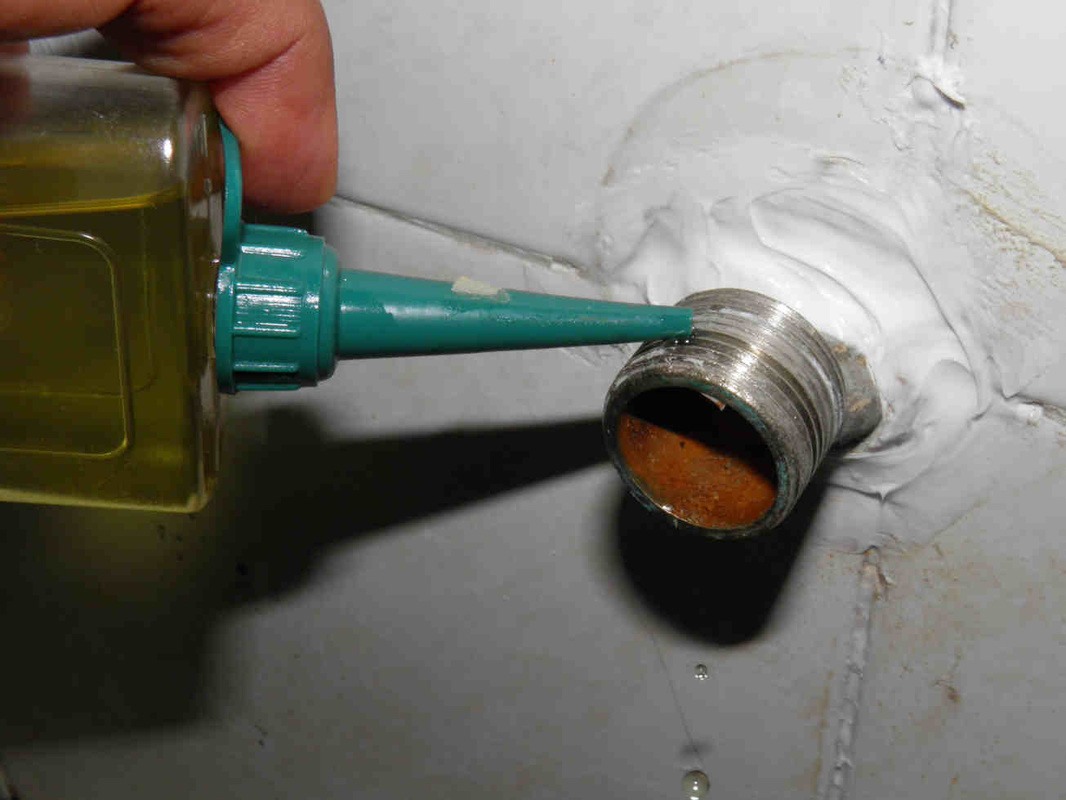
Clean well the threads with a brass brush, remove any remaining gasket with a cutter blade, seal the holes with silicone and apply one drop of oil to the thread:

Fitting the new tap and completing the installation
Try the covers that were supplied with the tap and use them if the space between the tap and the wall is enough.
If not refit the existing covers after thoroughly cleaning them.
Place the supplied seals in the tap nuts before fixing and carefully tightening these.
Complete the installation by fitting the flexible shower.
Clean all with white vinegar.
If not refit the existing covers after thoroughly cleaning them.
Place the supplied seals in the tap nuts before fixing and carefully tightening these.
Complete the installation by fitting the flexible shower.
Clean all with white vinegar.

TIP: If you want to fit the new covers for sure, then you need to try them at the beginning and eventually take out the adapters and re-screw them in just enough to leave sufficient gap between the wall and the mixer nuts.
|
|


