COPYRIGHT WARNING:
All pictures and texts in this web page are the property of nomaallim.com. Any use of any part of those contents without the written consent of nomaallim.com shall be subject to legal procedures as per international and local laws in the concerned country. Using the name "nomaallim" or "nomaallim com" or "nomaallim.com" in the text describing the unauthorized copied content shall not constitute an exception and shall be sanctioned in accordance to the effective laws and proceedings.
All pictures and texts in this web page are the property of nomaallim.com. Any use of any part of those contents without the written consent of nomaallim.com shall be subject to legal procedures as per international and local laws in the concerned country. Using the name "nomaallim" or "nomaallim com" or "nomaallim.com" in the text describing the unauthorized copied content shall not constitute an exception and shall be sanctioned in accordance to the effective laws and proceedings.
|
|
BEFORE YOU START
- The below repair remains valid even for cheap crank umbrellas.
- If the plastic fittings of your patio umbrella seem deformed, broken, or loose, consider replacing those along with the cord, to save both time and money and prolong the lifetime of your umbrella.
DISCLAIMER:
Our pictorials are of informative nature and do illustrate works carried out by ourselves at our own premises for our own use and satisfaction.
Readers who envisage to carry out similar works inspired by the below method shall do this at their own risks and liability.
Our pictorials are of informative nature and do illustrate works carried out by ourselves at our own premises for our own use and satisfaction.
Readers who envisage to carry out similar works inspired by the below method shall do this at their own risks and liability.
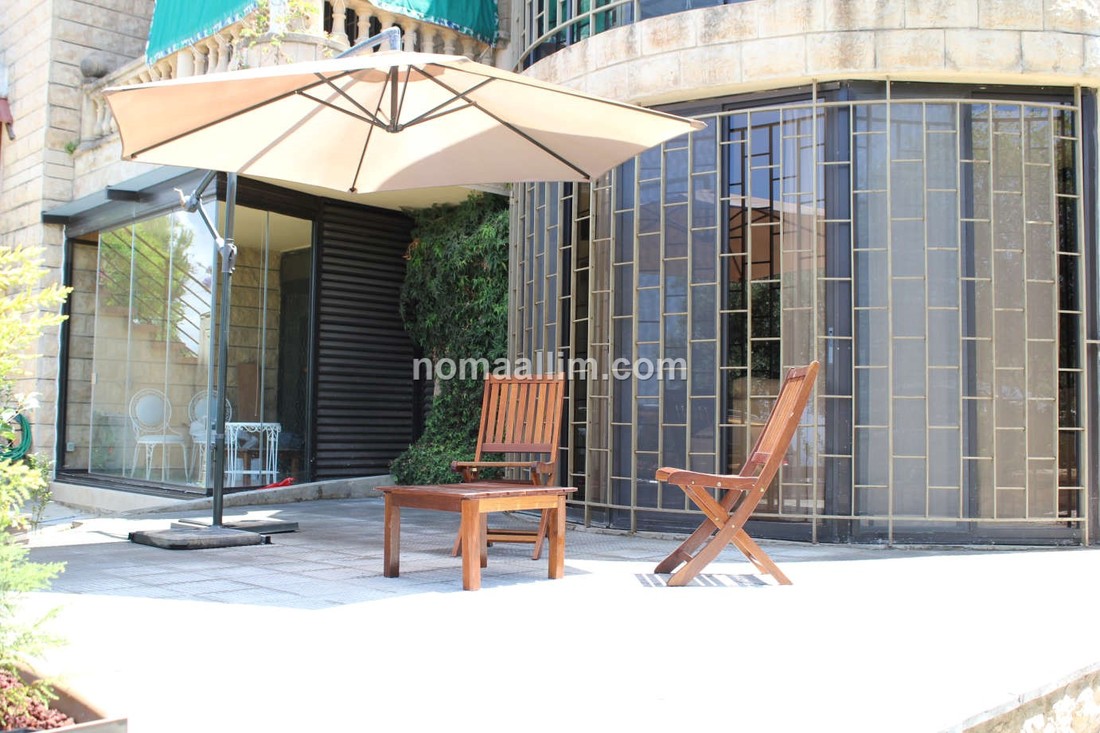
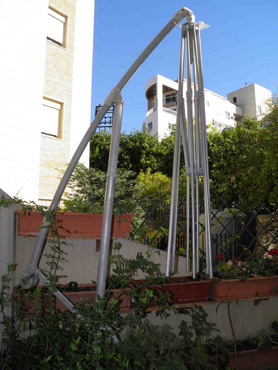
Patio umbrella broken cord repair explained
|
The rope of this crank umbrella broke after 3 years of use.
The repair consists of replacing the rope and some parts of the crank mechanism. This remains the major obstacle to this intervention: -If the cord only is damaged then fine, you can find a rope to buy in any supermarket. -If other components like springs or screws are corroded and broken, then you need to have these spares before completing your repair.  |
|
|
|
|
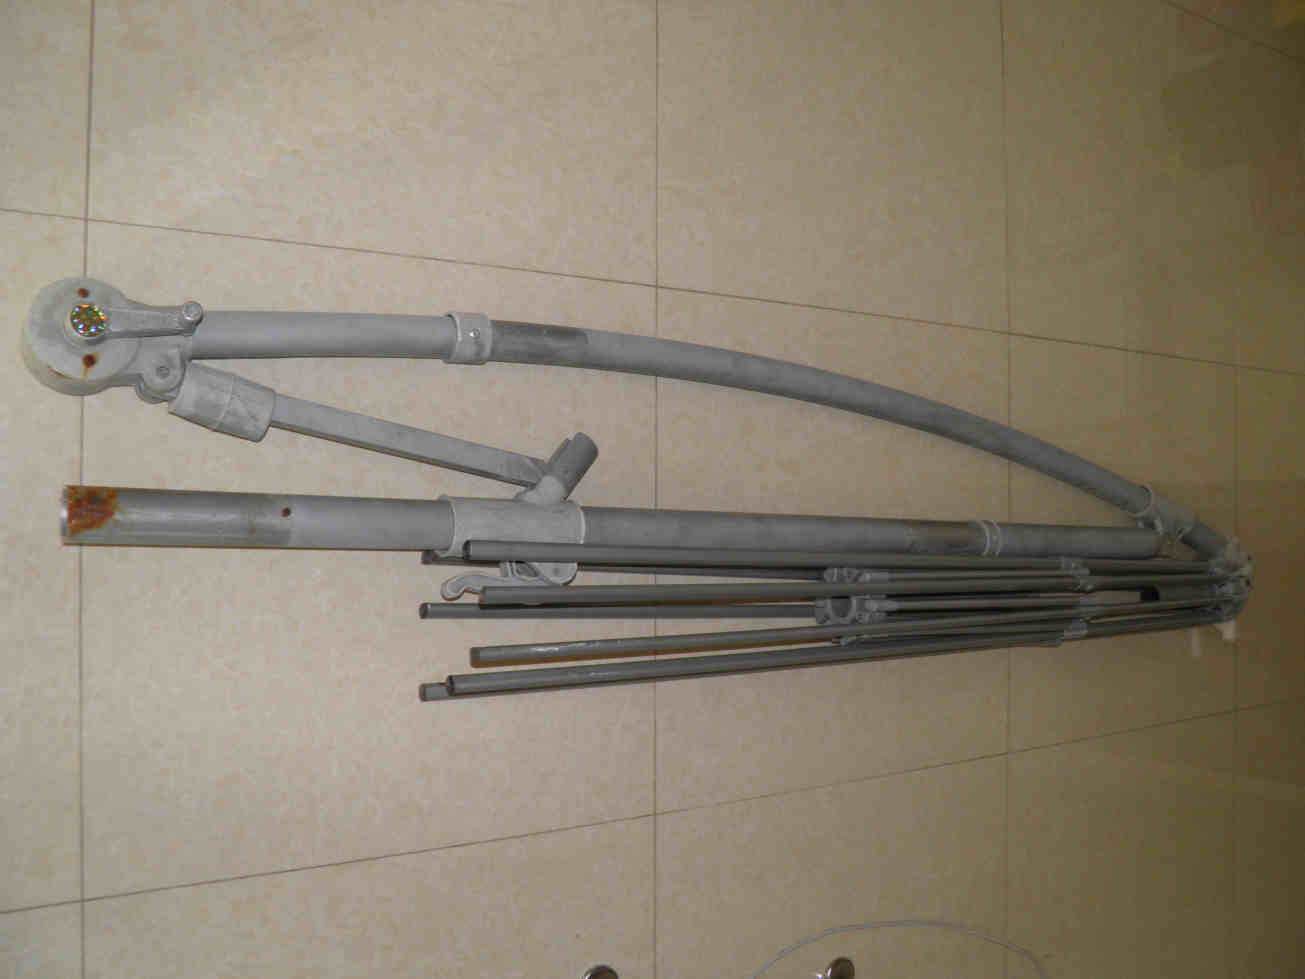
Dismantling the cantilever umbrella crank
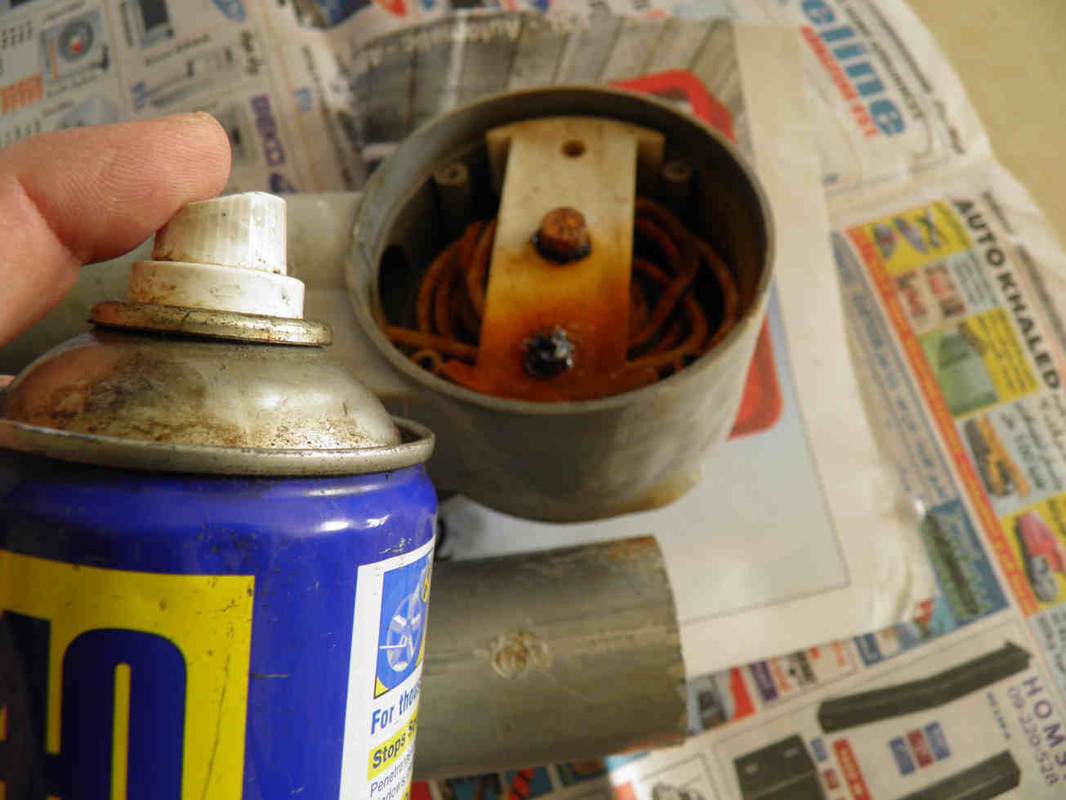
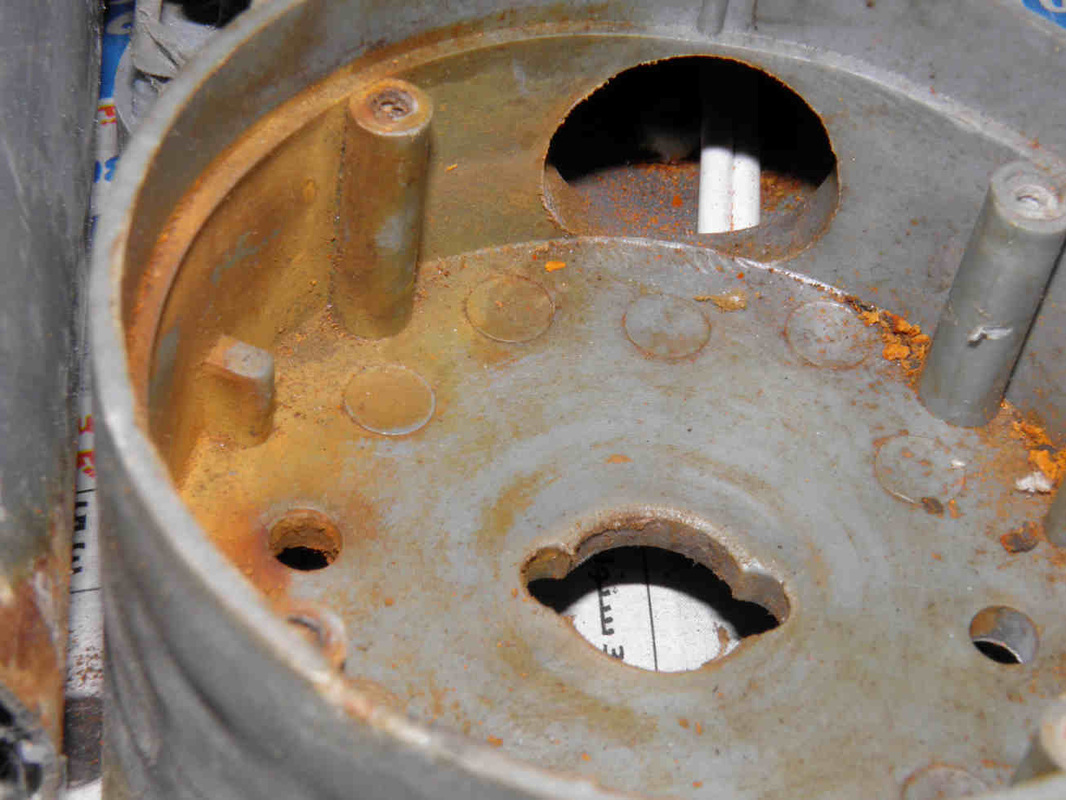
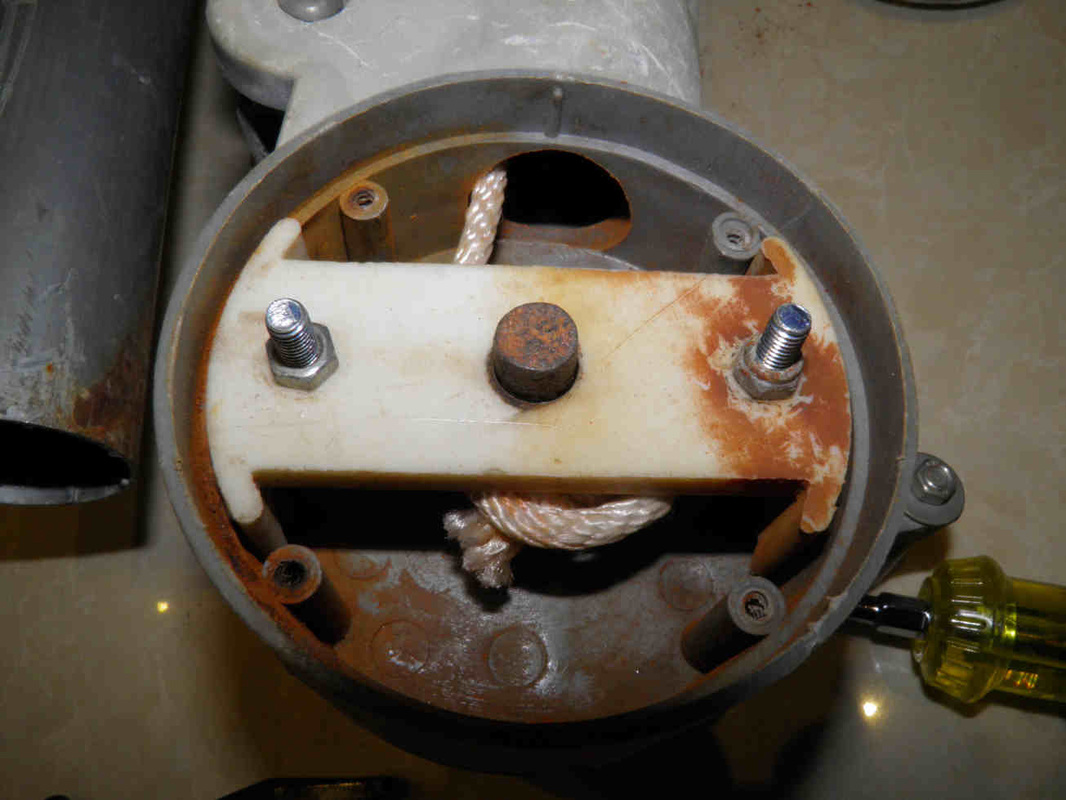
Remove the crank box cover screws.
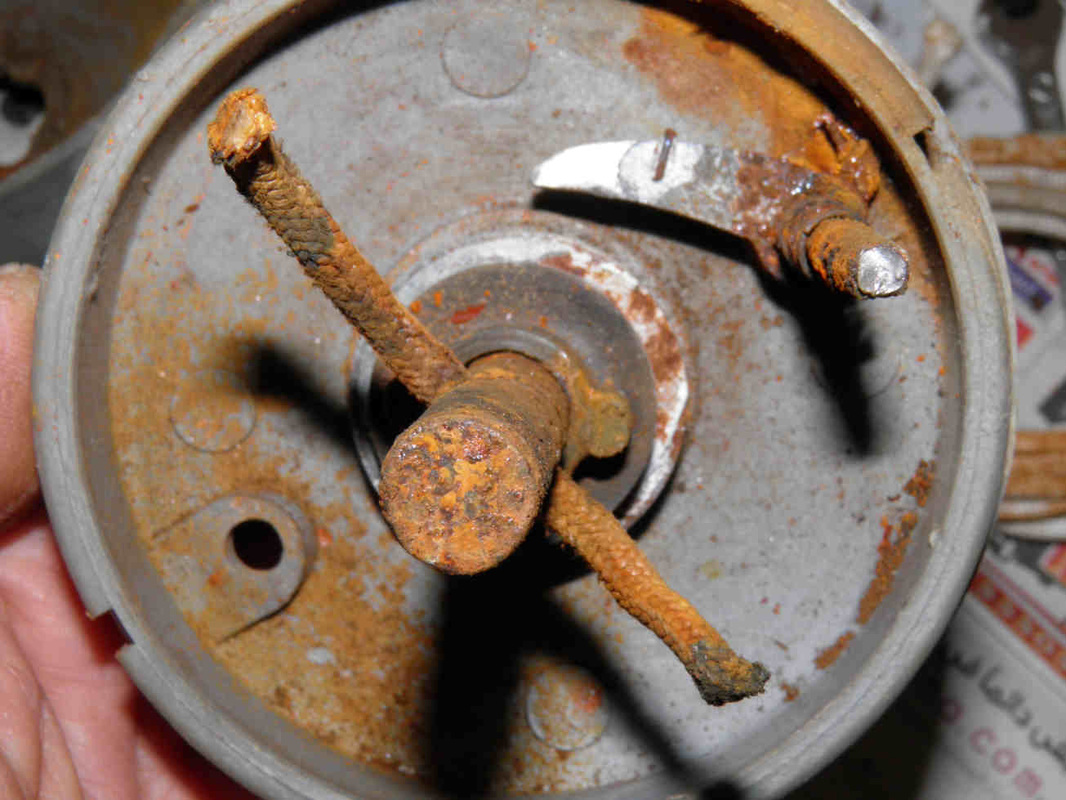
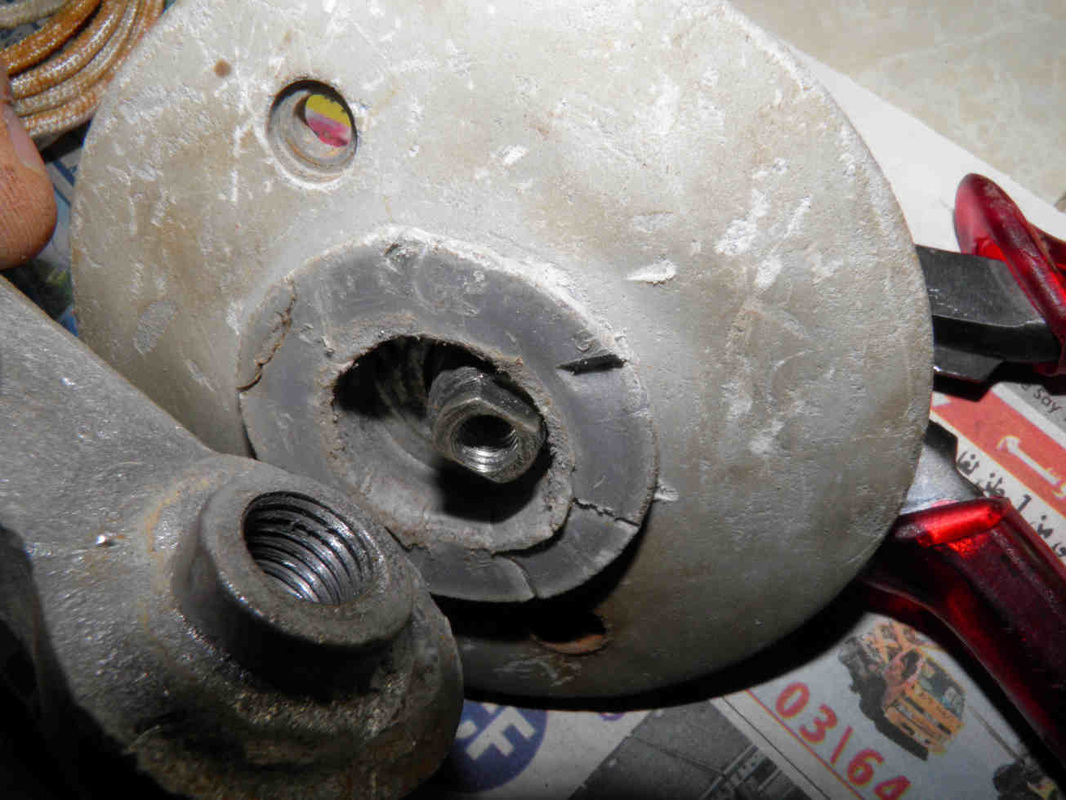
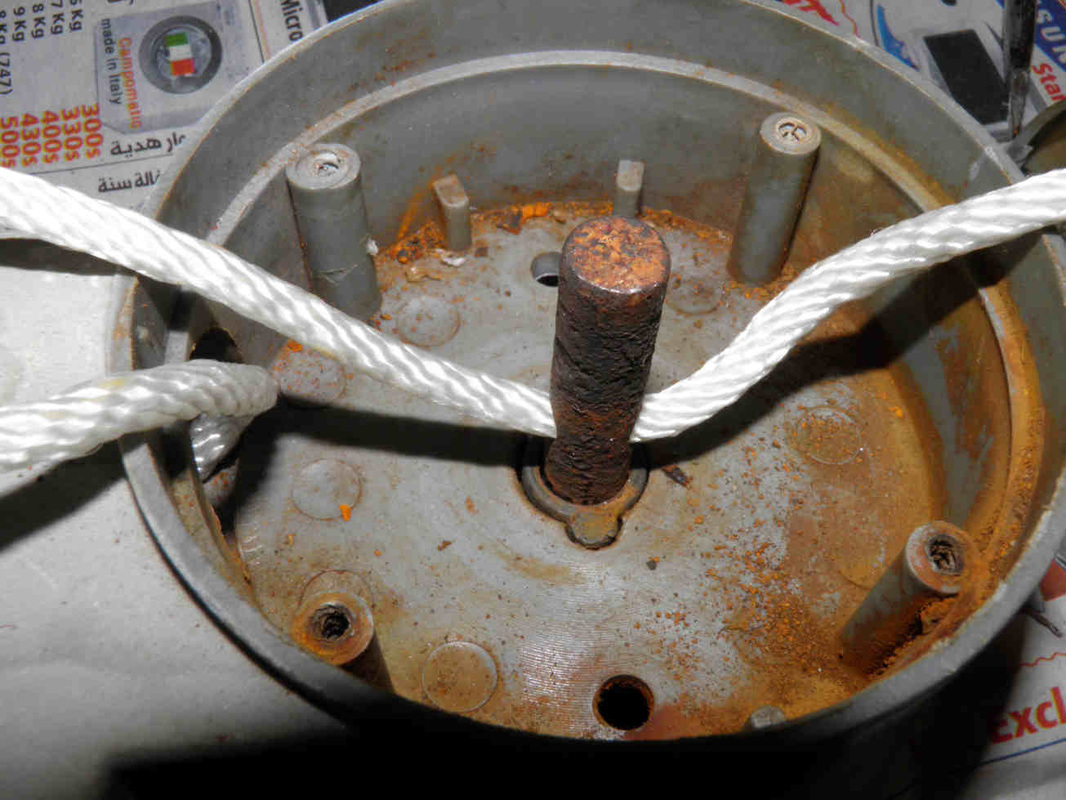
The rope is found stiff, the nuts and bolts inside the box completely corroded.
Start by spraying some WD40 on these prior to any attempt to loosen the nuts.
The rope is found stiff, the nuts and bolts inside the box completely corroded.
Start by spraying some WD40 on these prior to any attempt to loosen the nuts.


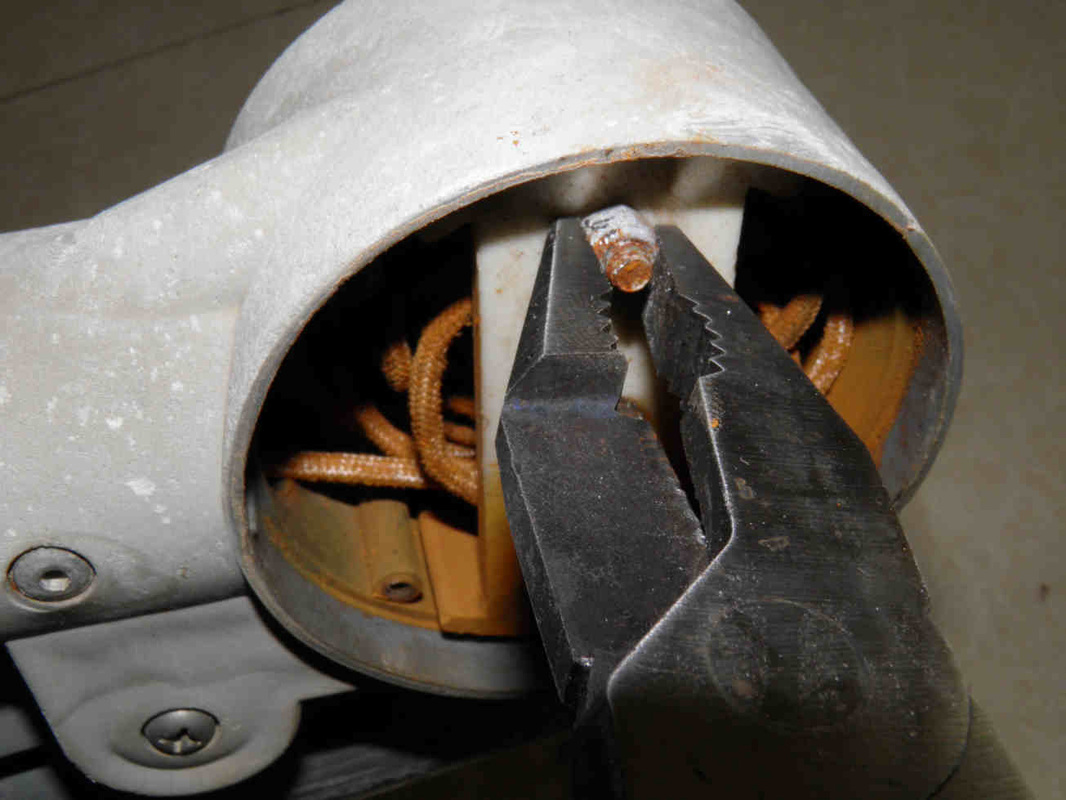
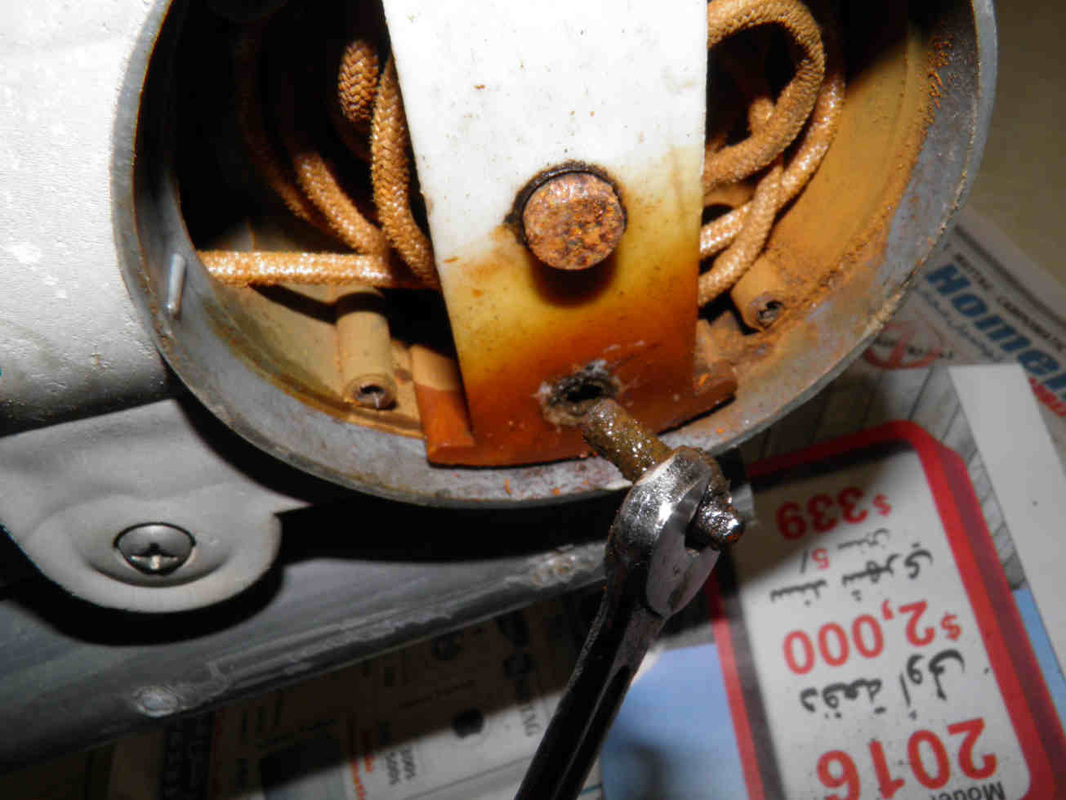
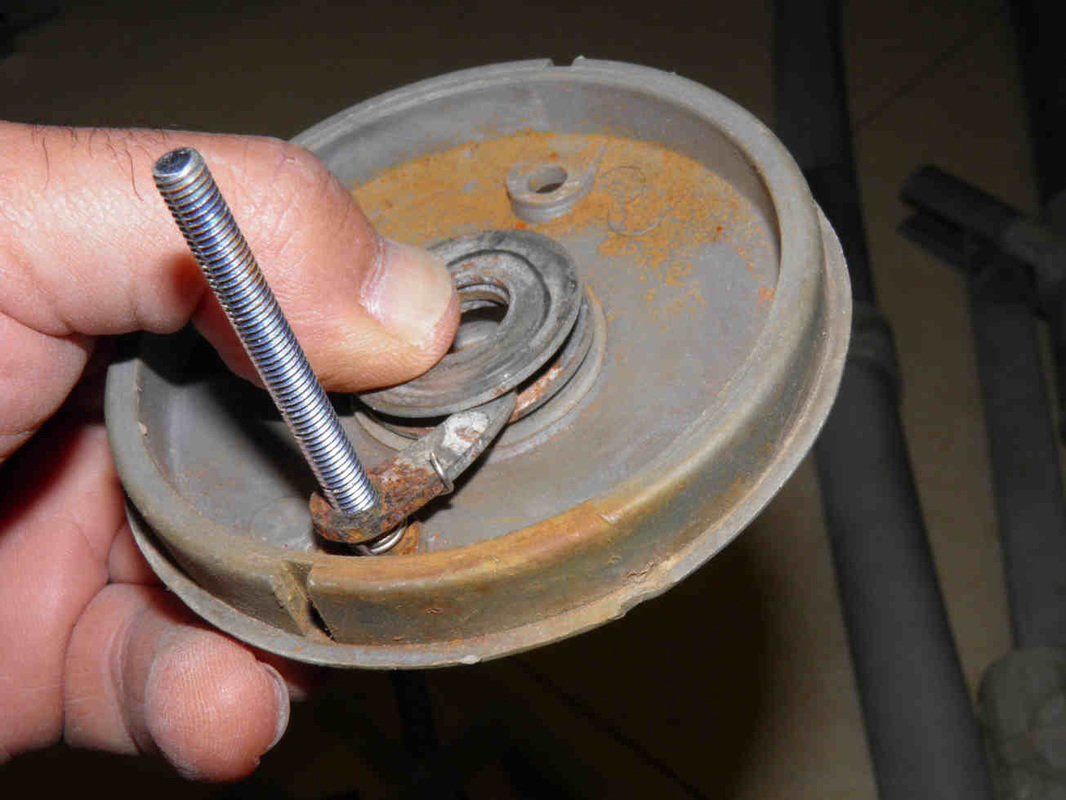
Unscrew the nuts knowing you could end up with a broken screw (middle up).
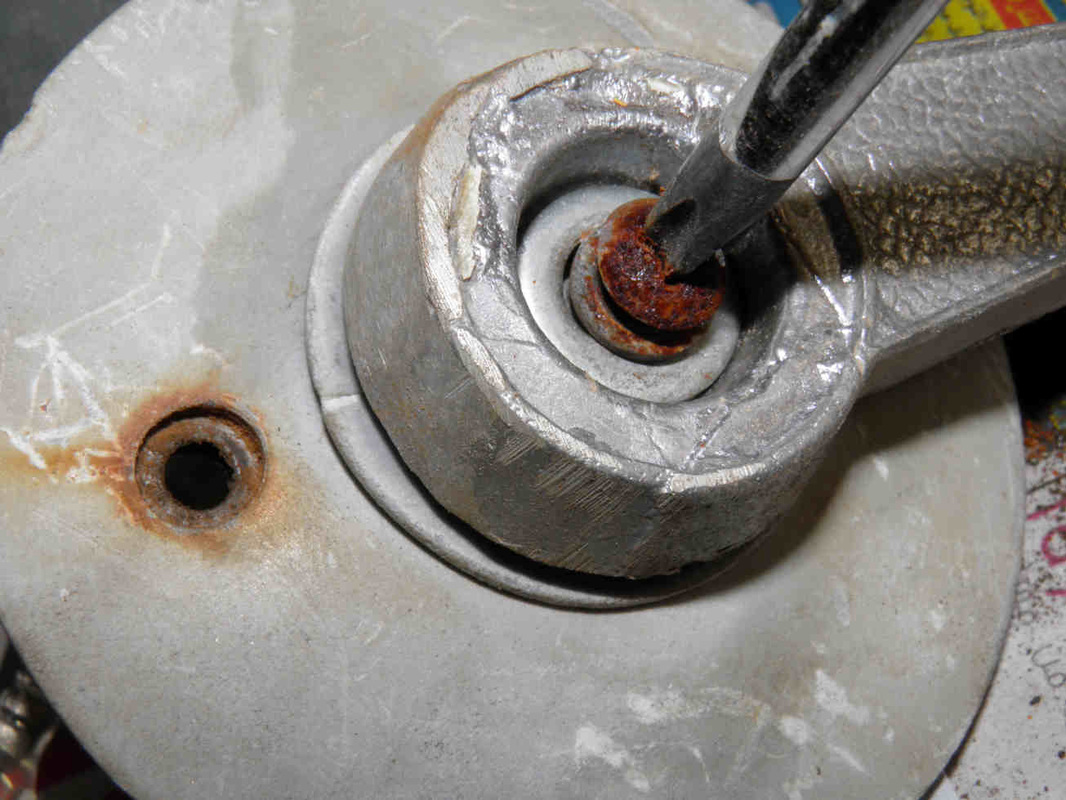
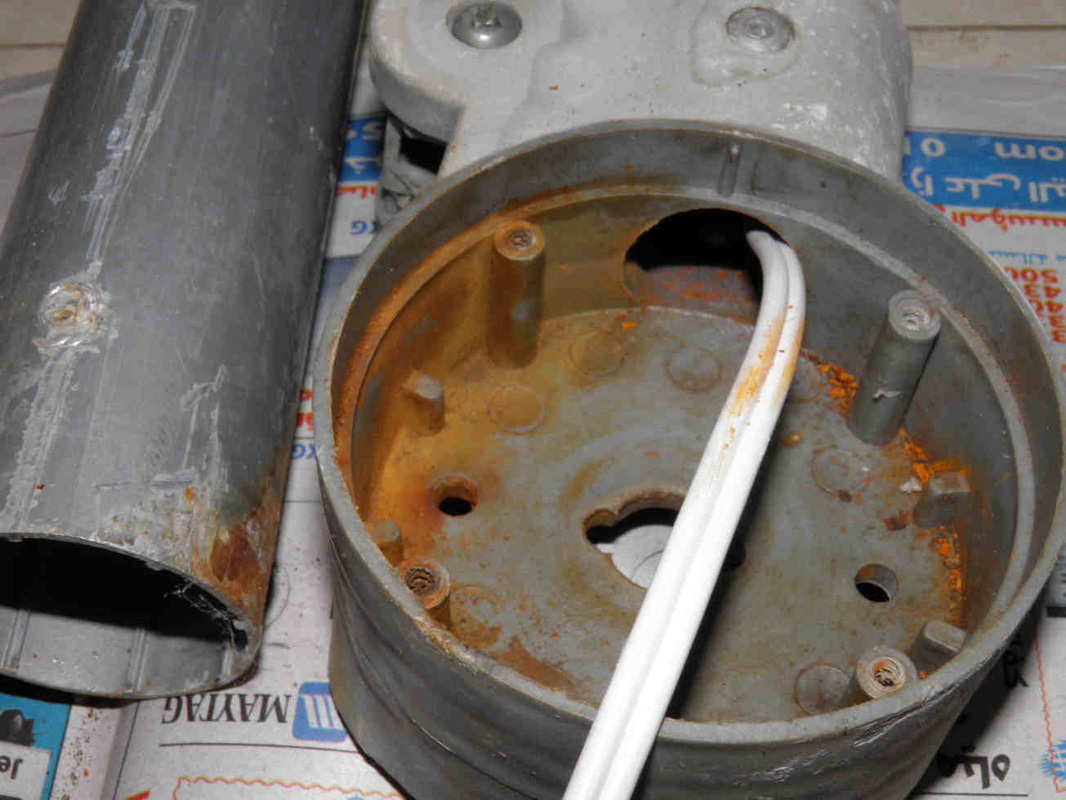
Take out the plastic accessory to uncover the rope.
It might be difficult or impossible to pull out the rope out of the axle, just cut it.
Make sure not to lose the pawl. Its spring is completely corroded and broken but the pawl itself will be reused.
Take out the plastic accessory to uncover the rope.
It might be difficult or impossible to pull out the rope out of the axle, just cut it.
Make sure not to lose the pawl. Its spring is completely corroded and broken but the pawl itself will be reused.

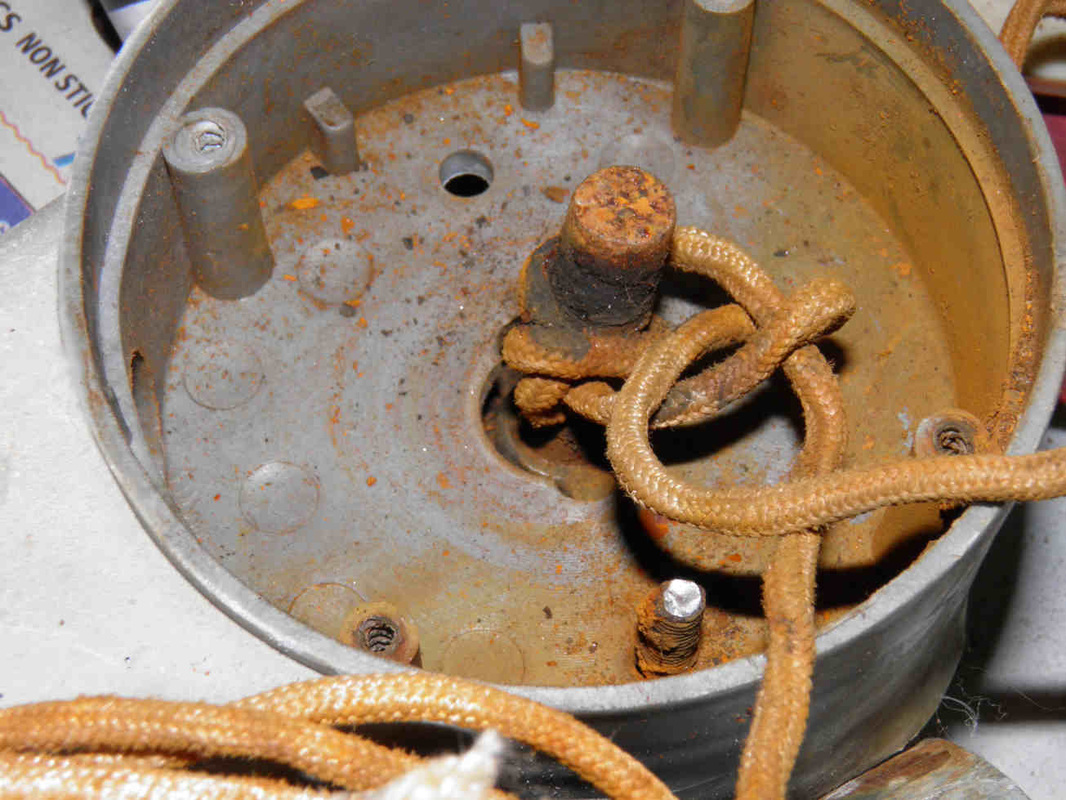

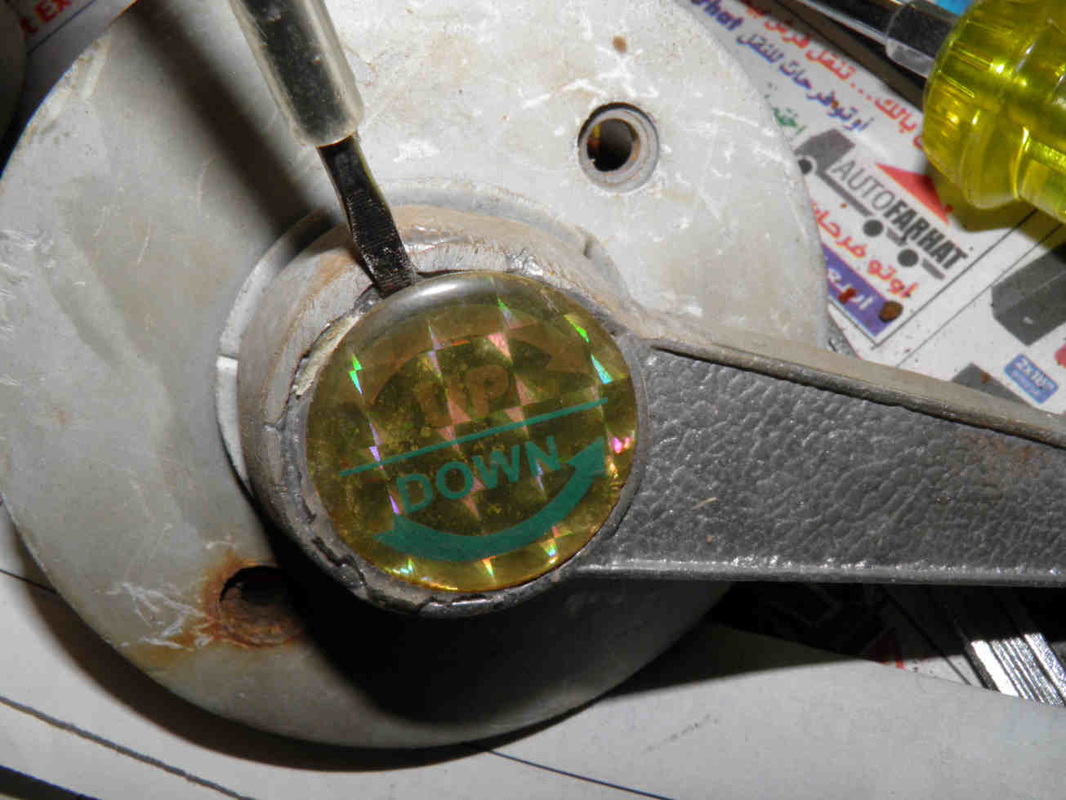
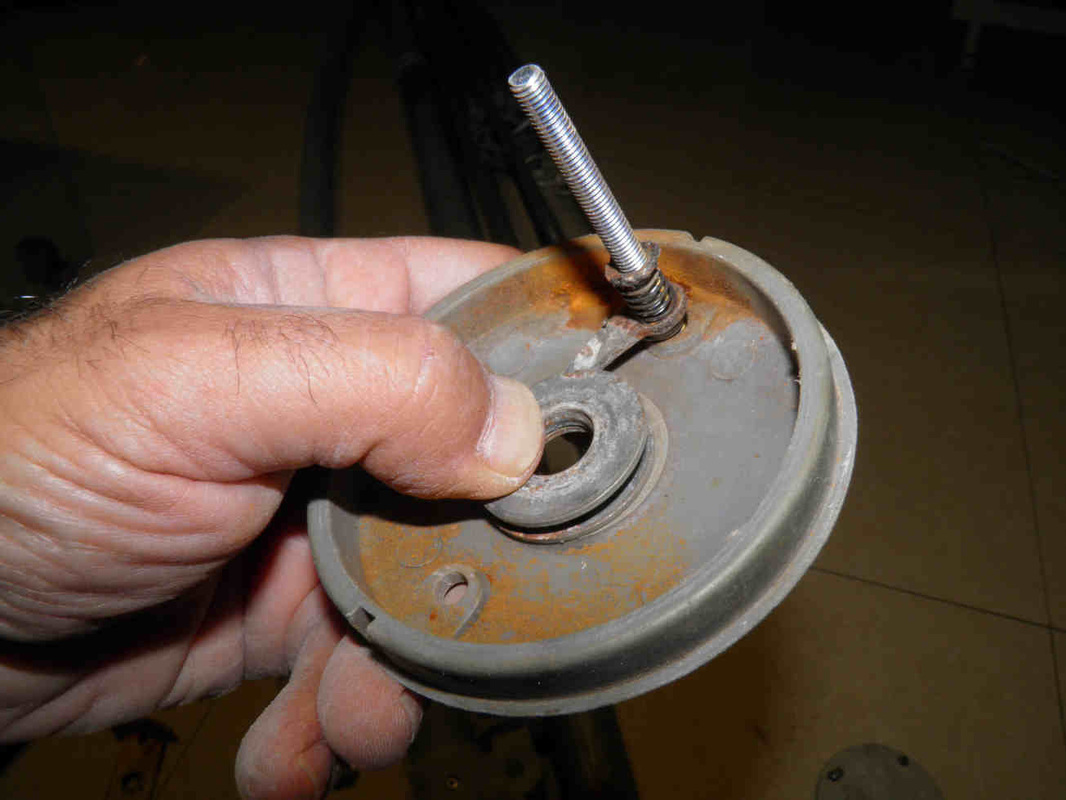
Now remove the pin (crank axle).
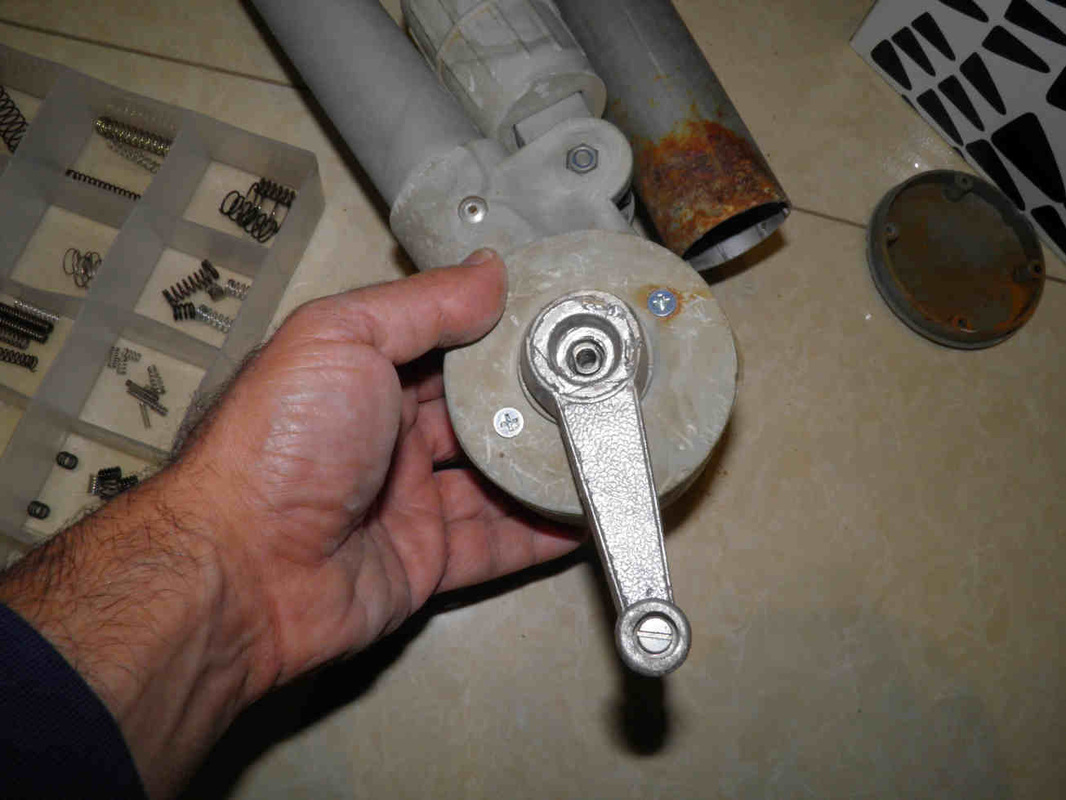
Start by removing the screw that holds the crank handle then the handle itself by rotating it counter clockwise.
Start by removing the screw that holds the crank handle then the handle itself by rotating it counter clockwise.
|
|
|
Refitting a new rope (cord) and reassembling the crank
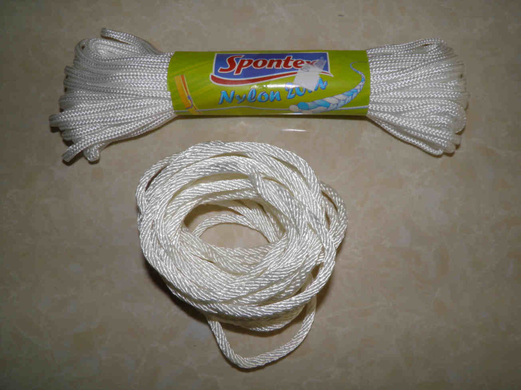
Start by buying a good nylon rope of the closest diameter to the one existing
|
|
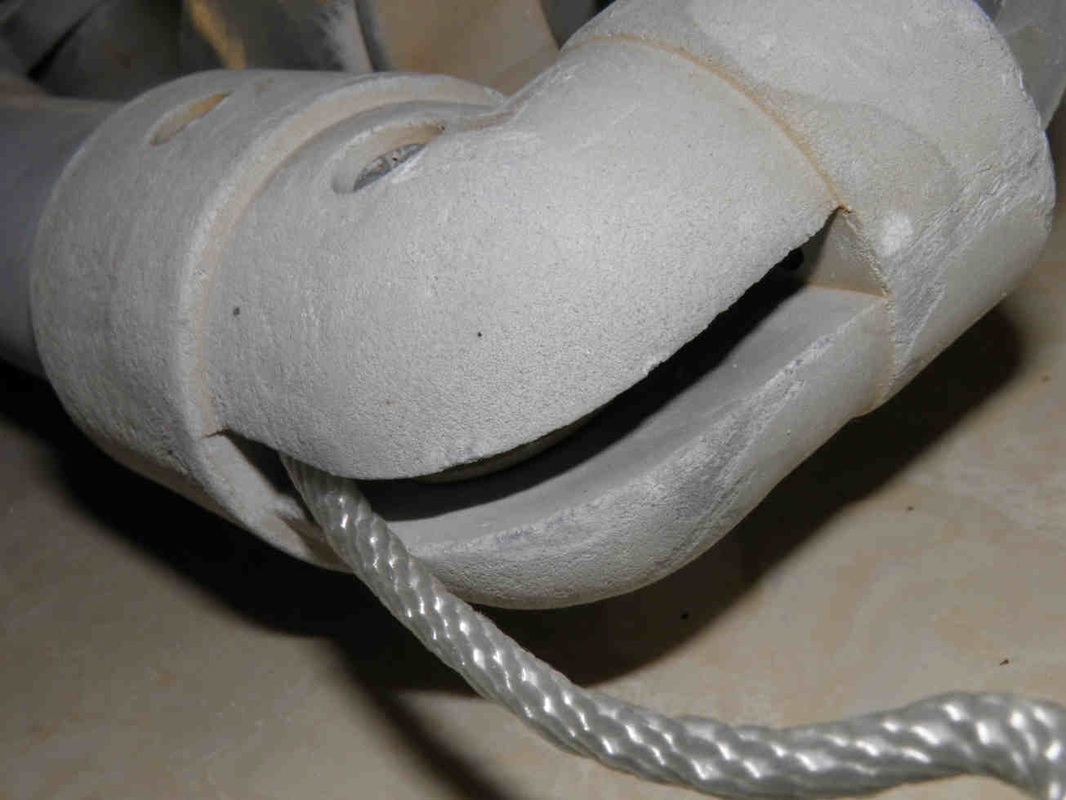
Insert the rope from the other side progressing towards the crank box and up to the first elbow.
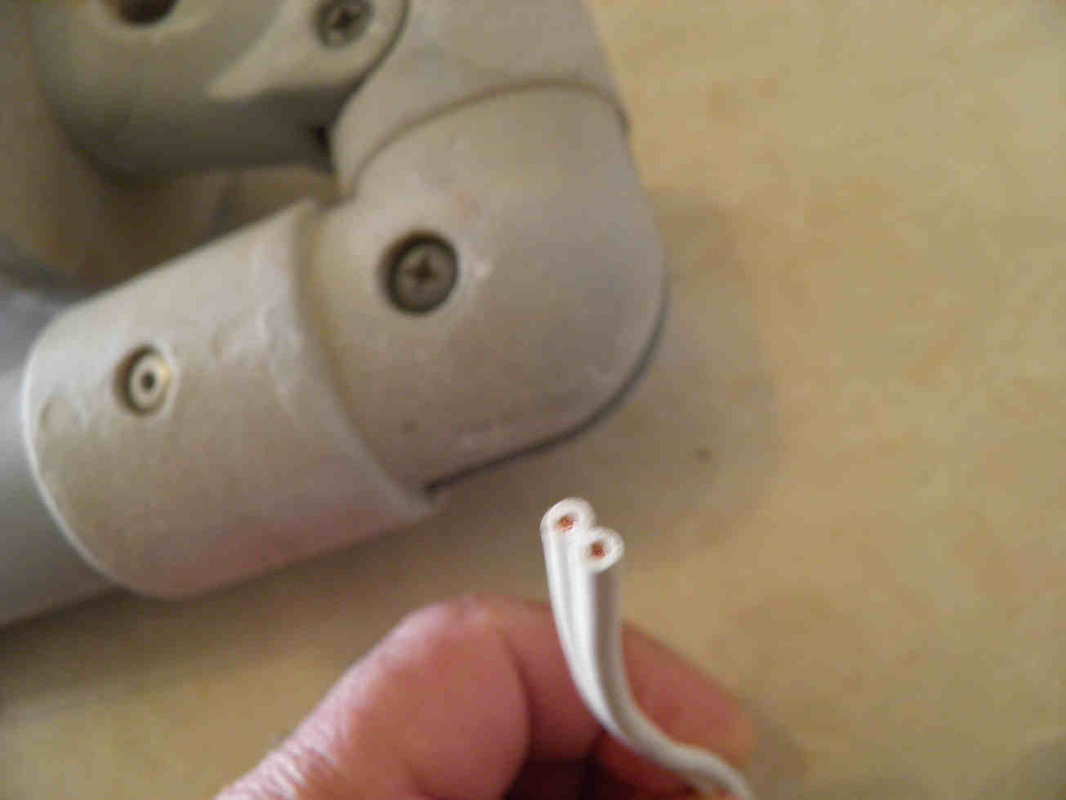
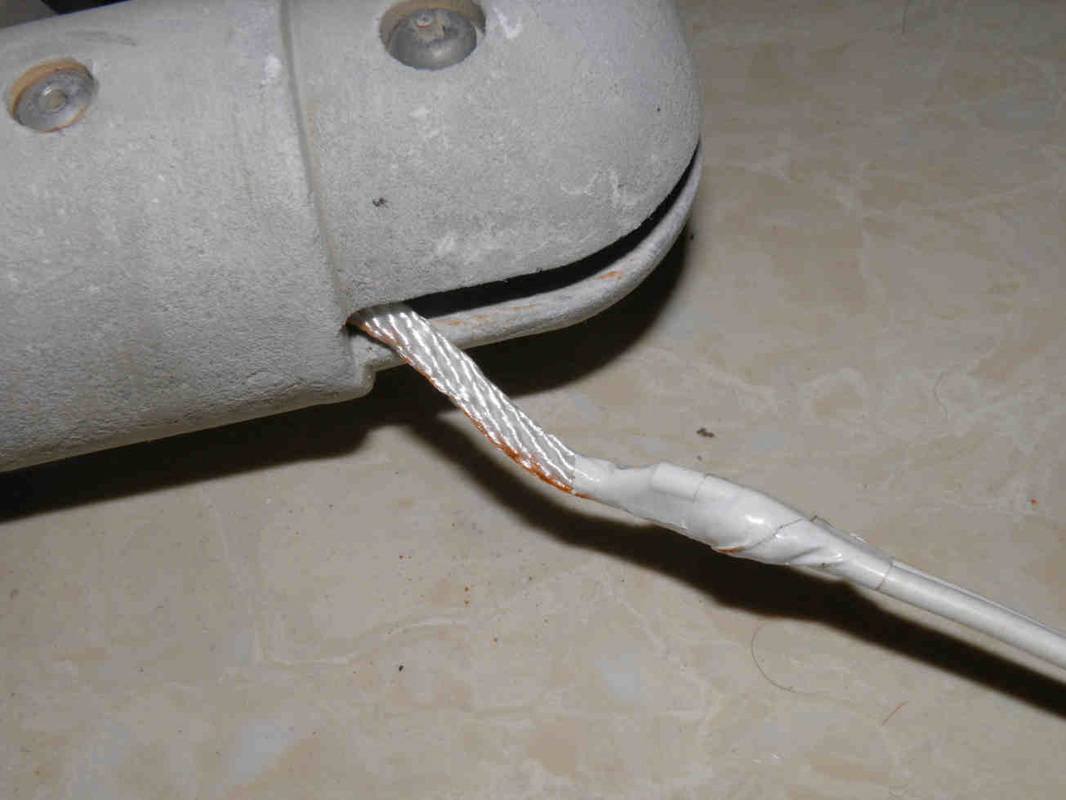
Use an electric wire or cable to pull the cord through the remaining (and longest) part.
Attach the rope to the wire with tape.
Use an electric wire or cable to pull the cord through the remaining (and longest) part.
Attach the rope to the wire with tape.

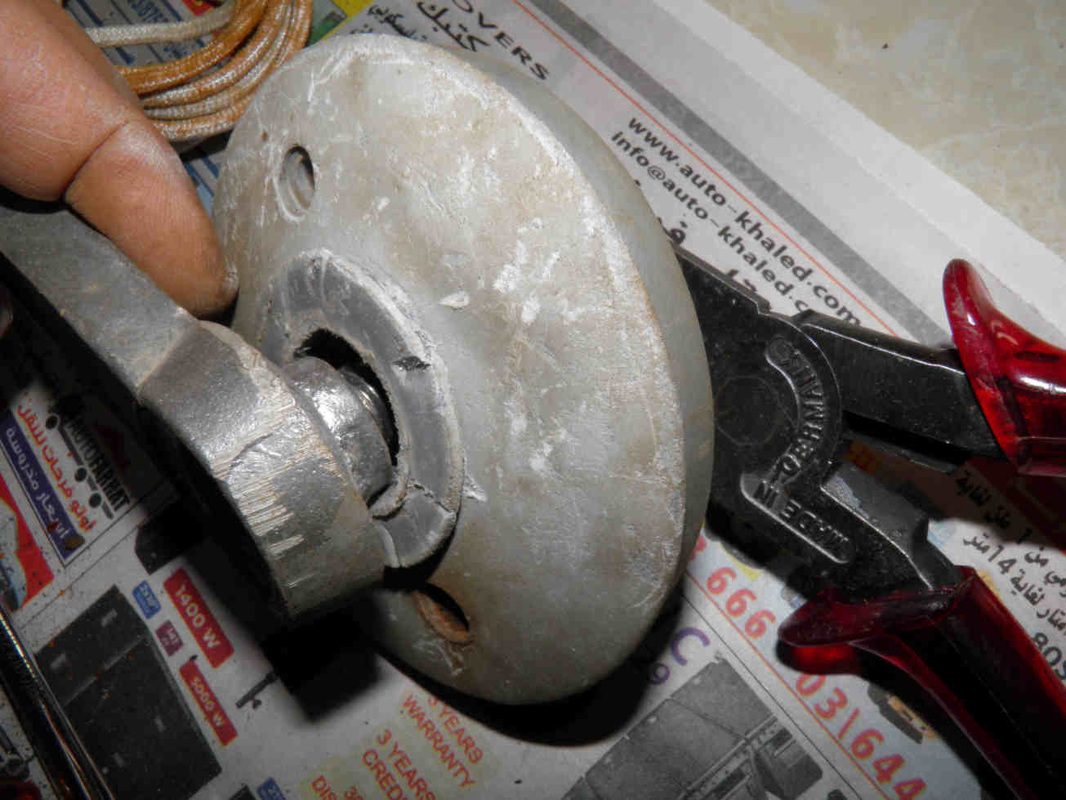
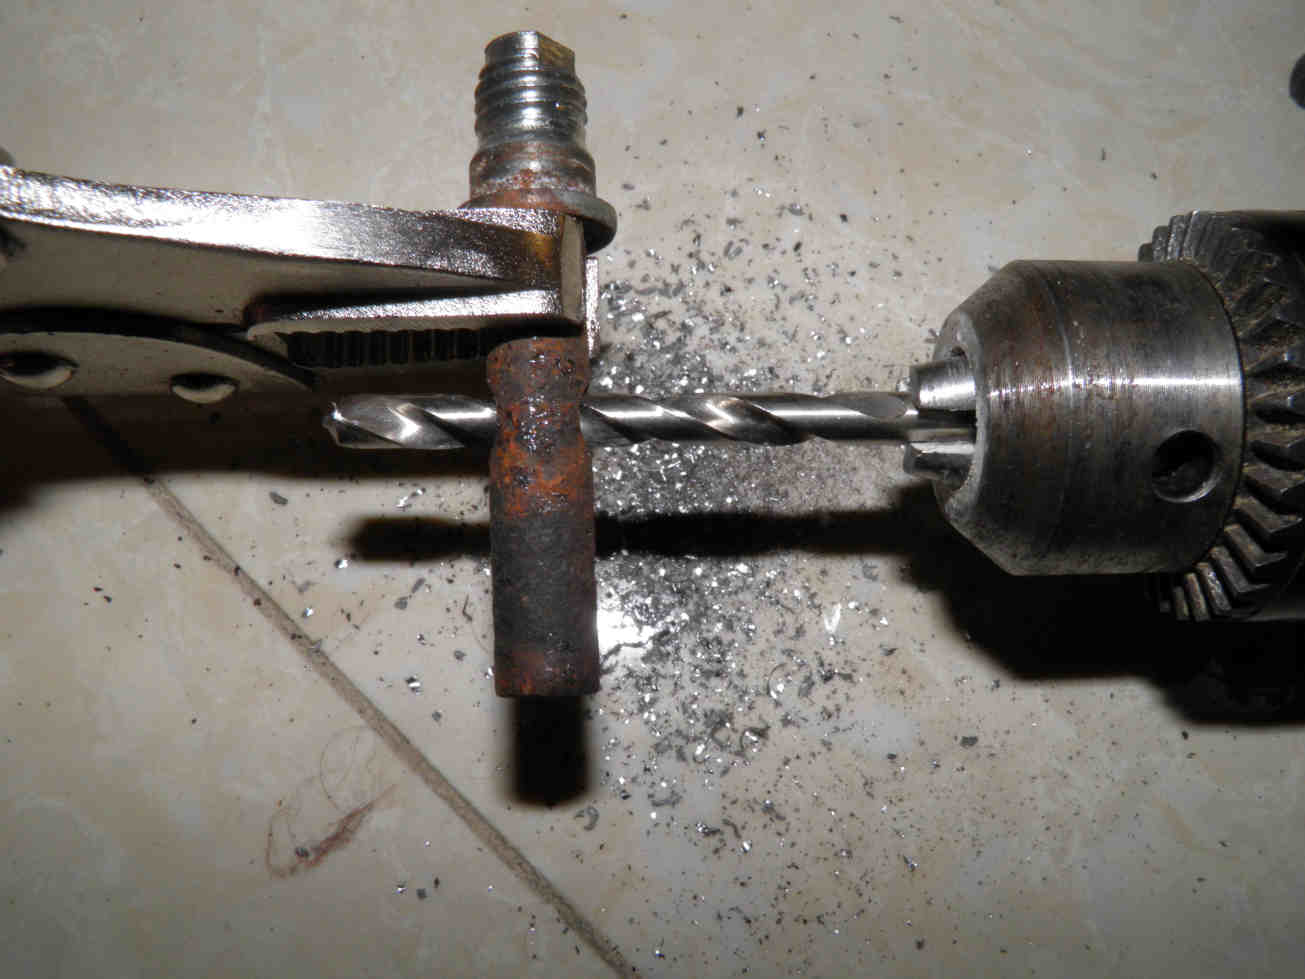
If your rope is of a bigger diameter than the existing one, use a drill to enlarge the pin hole:
|
 |
 |
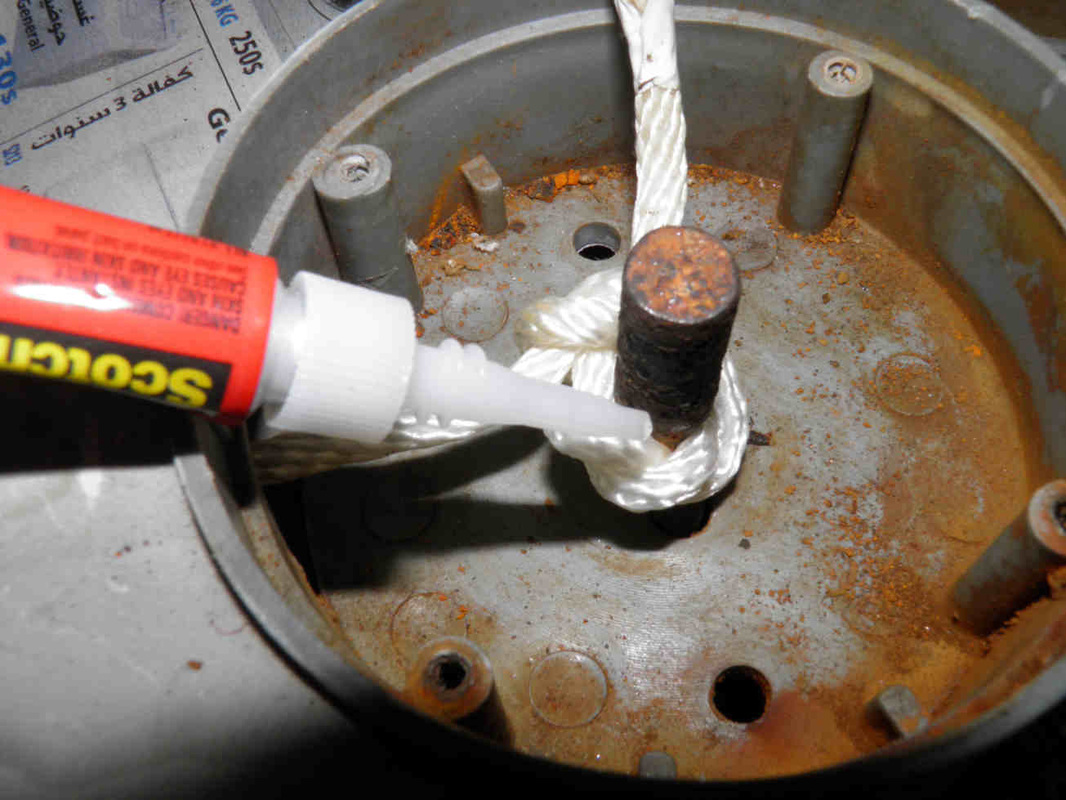
Make it pass through the hole, make a knot and add a drop of super glue to fix it:

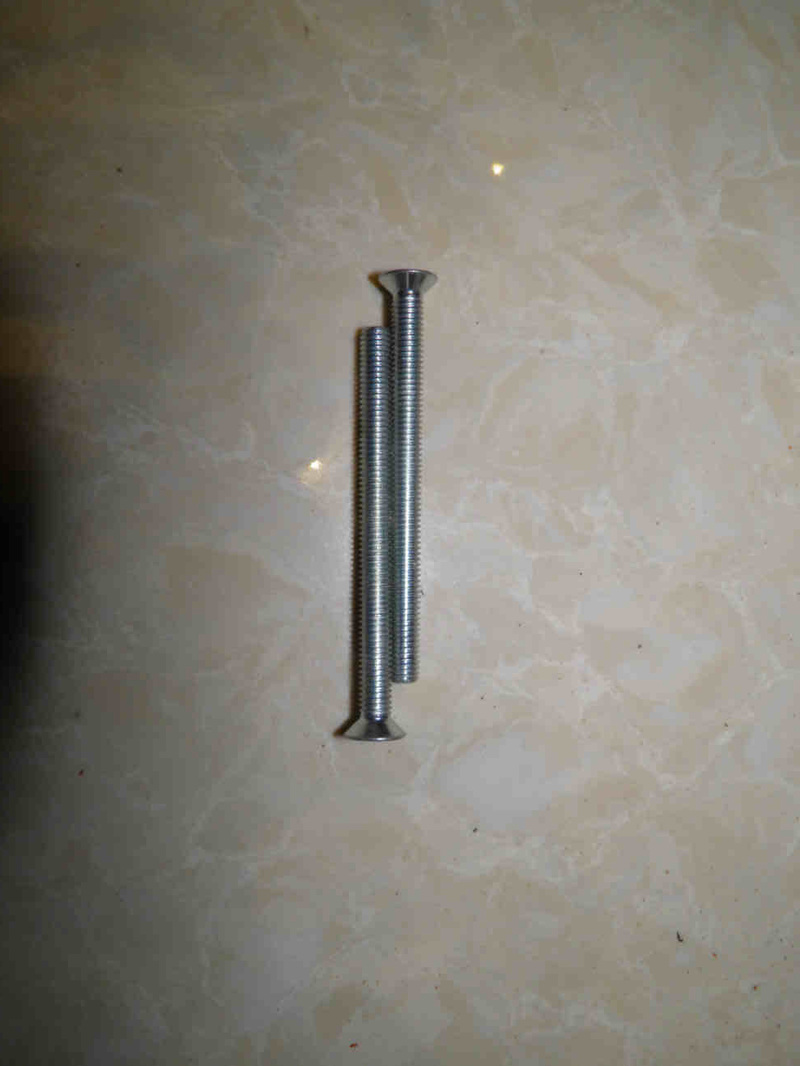
In this case, the bolts and the springs of the crank had to be replaced.
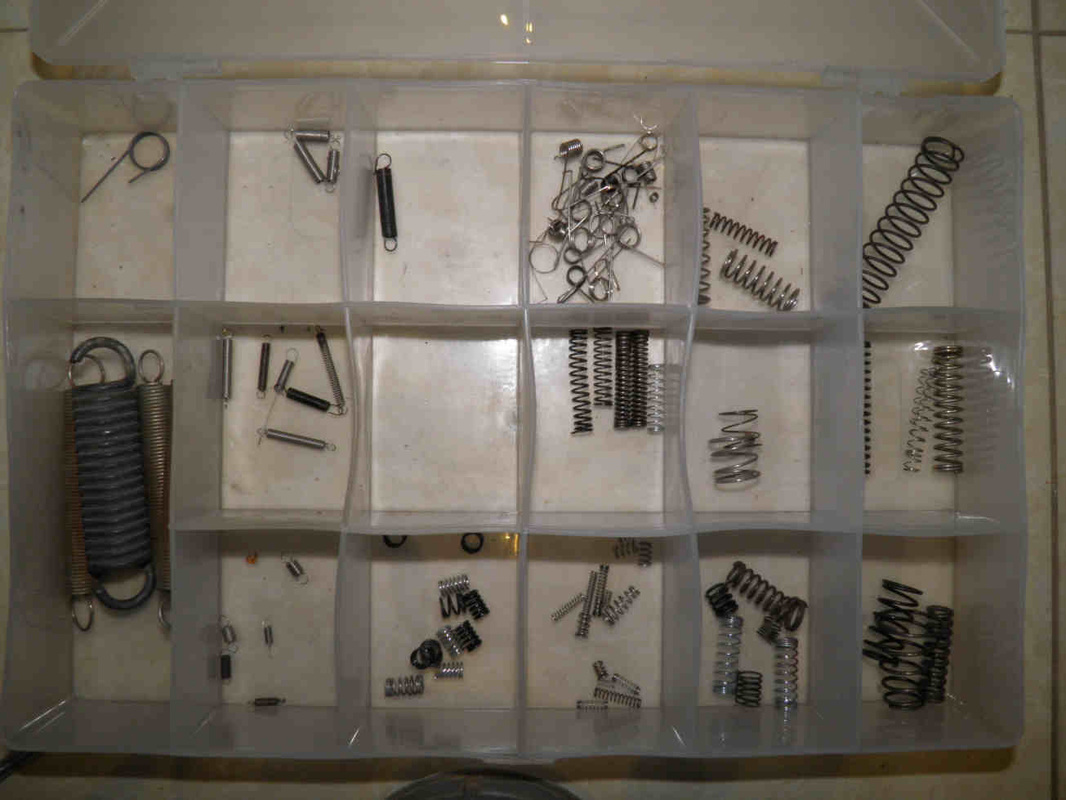
The bolts are easy to purchase while for the springs, I use my own magic box containing a choice of springs I had dismantled from so many broken devices. You may however buy a spring as explained further below.
The bolts are easy to purchase while for the springs, I use my own magic box containing a choice of springs I had dismantled from so many broken devices. You may however buy a spring as explained further below.
Reassemble the crank mechanism

Refit the nuts, the crank handle, the crank box cover.
|
|
|
|
Redo the knot at the other side of the umbrella and try it before refitting the fabric cover, to make sure:
|
|


Refit the fabric canopy of your umbrella and enjoy it again!

Patio cantilever umbrella parts:
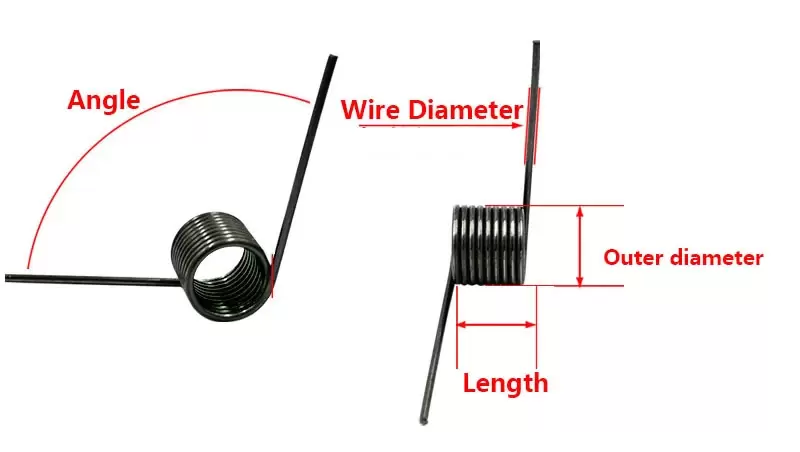
How to buy a replacement spring for the umbrella's crank
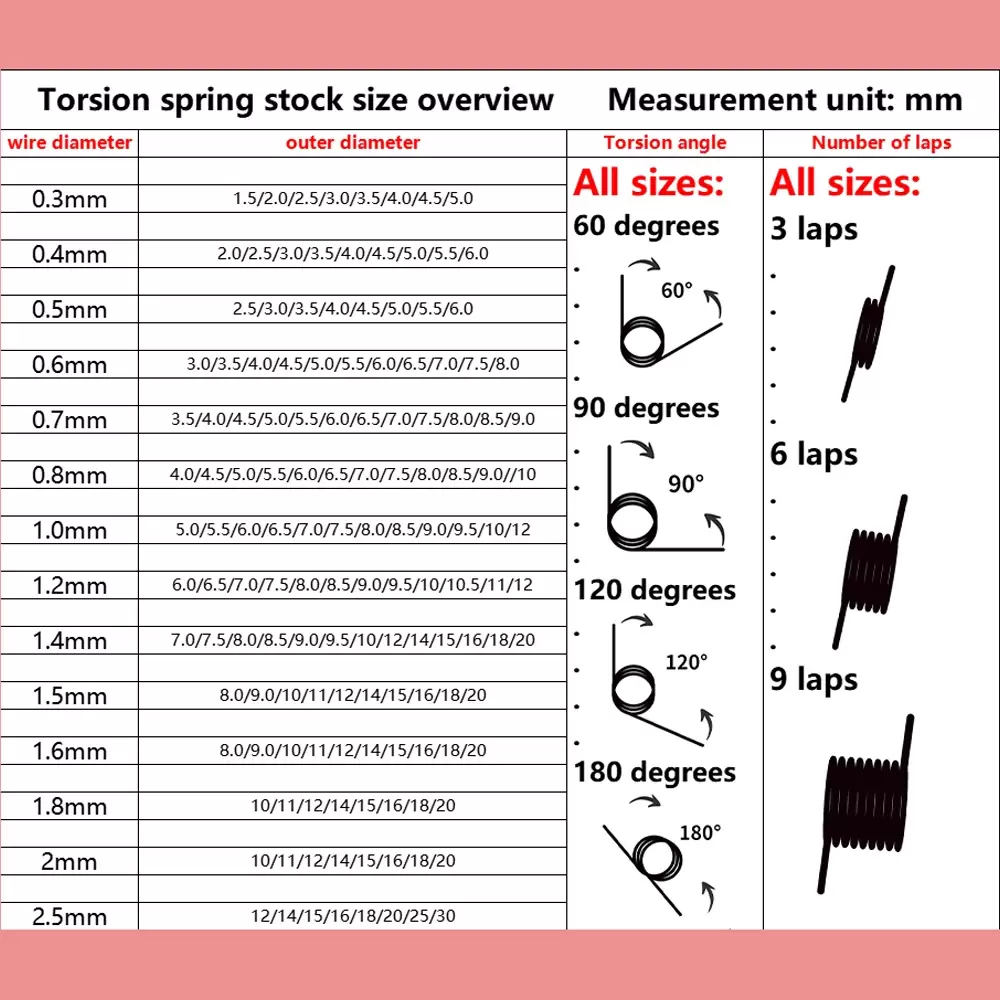
Click on the below "torsion spring" or "V shaped" spring images, and select the size of the spring based on the below guidelines; alternatively, you may click on our direct links to our partners' store further below, for buying a complete crank mechanism.
- Get one with a wire dia of 0.5-0.6mm so it resists corrosion
- Select the 3-coil (laps) version as spring length and 90 degrees angle and place your order
- Once received, bend one leg so it catches the pawl and cut the other one as needed.
|
|


