COPYRIGHT WARNING:
All pictures and texts in this web page are the property of nomaallim.com. Any use of any part of those contents without the written consent of nomaallim.com shall be subject to legal procedures as per international and local laws in the concerned country. Using the name "nomaallim" or "nomaallim com" or "nomaallim.com" in the text describing the unauthorized copied content shall not constitute an exception and shall be sanctioned in accordance to the effective laws and proceedings.
All pictures and texts in this web page are the property of nomaallim.com. Any use of any part of those contents without the written consent of nomaallim.com shall be subject to legal procedures as per international and local laws in the concerned country. Using the name "nomaallim" or "nomaallim com" or "nomaallim.com" in the text describing the unauthorized copied content shall not constitute an exception and shall be sanctioned in accordance to the effective laws and proceedings.
BEFORE YOU START
DISCLAIMER:
Our pictorials are of informative nature and do illustrate works carried out by ourselves at our own premises for our own use and satisfaction. Readers who envisage to carry out similar works inspired by the below method shall do this at their own risks and liability. |
|
Symptoms of worn control arm (lower arm) bushings
Control arm bushes degrade with time as a slow and normal wear. This is not a defect or a failure.
The below pictures show how the rubber bushes (bushings) tear apart, get dry, and become too soft to hold the lower suspension arm in place. As a result, the below suspension arm symptoms are noticed:
The below pictures show how the rubber bushes (bushings) tear apart, get dry, and become too soft to hold the lower suspension arm in place. As a result, the below suspension arm symptoms are noticed:
- Inaccuracy felt at the steering wheel when driving on straight roads
- Metal-to-metal hammering noise on uneven surfaces
- Metal-to-metal hammering noise on steep curves
|
|
|
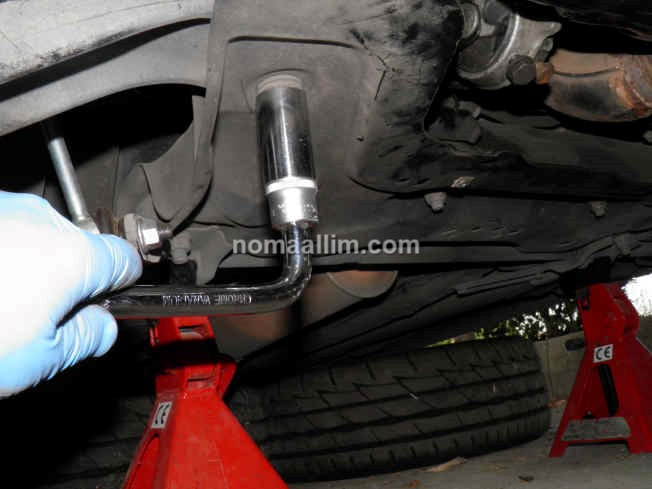
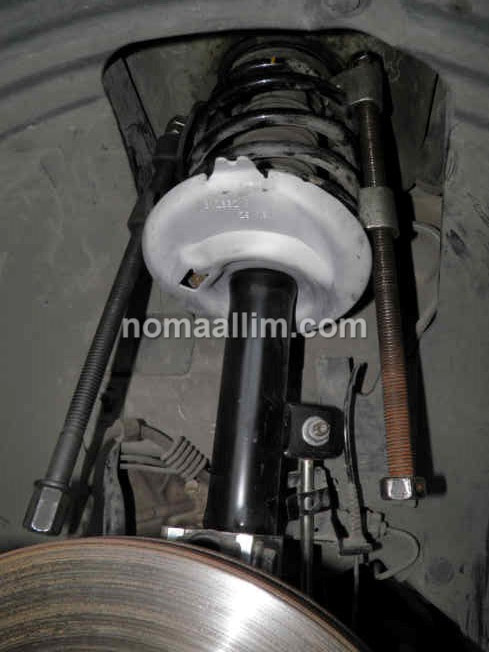
Preparatory works for removing the suspension control arms from vehicle
Lift the car on both sides and put it on jack stands.
Remove the front wheels.
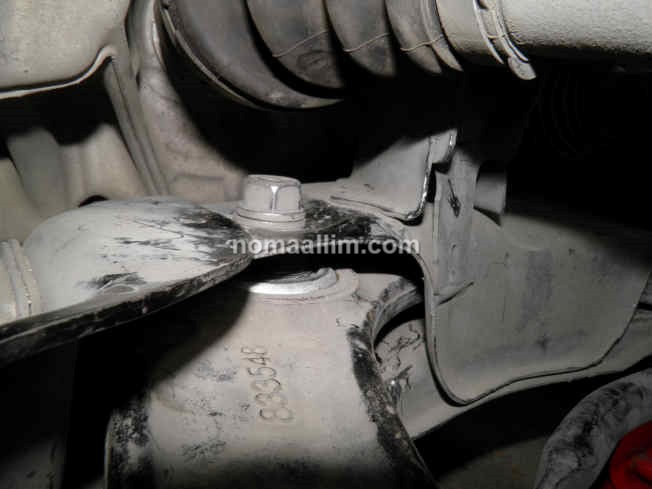
The lower arms of this Peugeot 5008 are boomerang shaped (so not the usual triangle) and are held in place by the means of two M14 bolts. Slacken the bolts by holding the nut or the bolt head with a tool.
Loosen the bolt of the lower ball joint as well.
Do not attempt to dislodge any bolt from its seat yet.
Remove the front wheels.
The lower arms of this Peugeot 5008 are boomerang shaped (so not the usual triangle) and are held in place by the means of two M14 bolts. Slacken the bolts by holding the nut or the bolt head with a tool.
Loosen the bolt of the lower ball joint as well.
Do not attempt to dislodge any bolt from its seat yet.
|
|
|
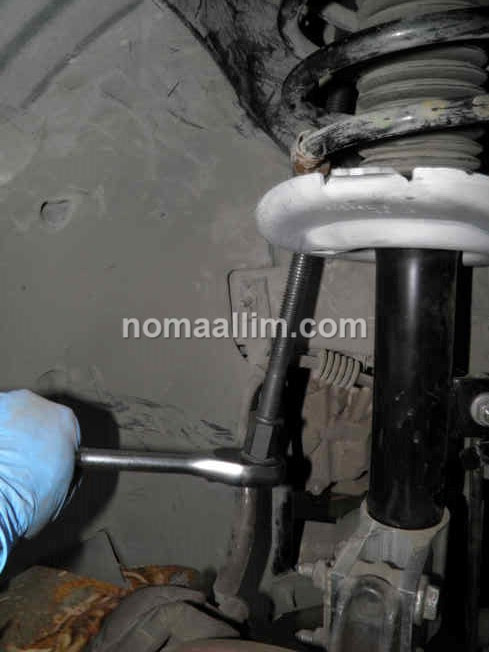
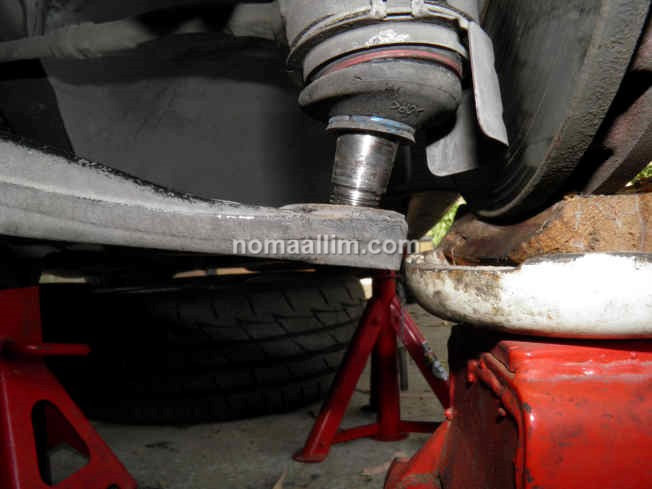
Lower arm (control arm) dismantling
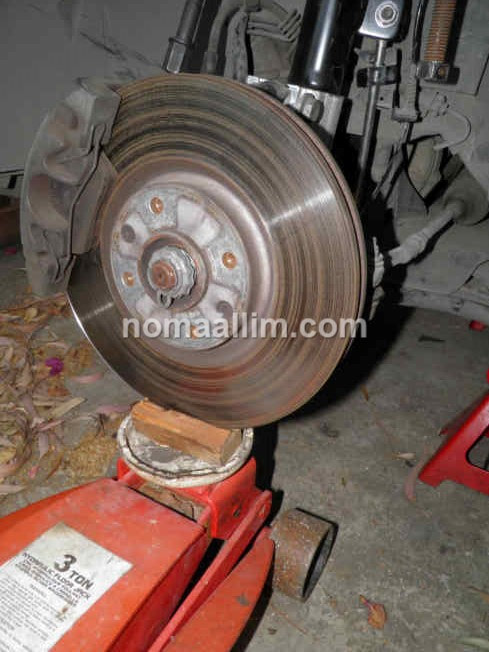
Place a hydraulic jack under the brake disc using a piece of wood in between and start compressing the spring.
Lift the brake disk from time to time to help yourself with the compression and apply less force to the spring compressing tool.
Continue until the MacPherson suspension spring is no more applying any force on the wheel hub.
Lift the brake disk from time to time to help yourself with the compression and apply less force to the spring compressing tool.
Continue until the MacPherson suspension spring is no more applying any force on the wheel hub.
|
|
|
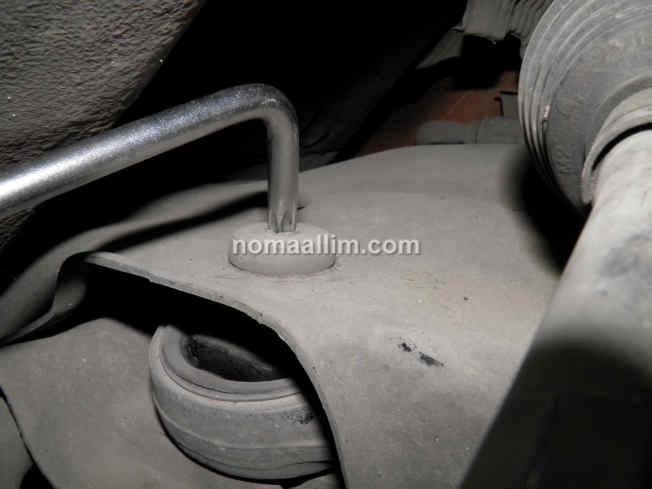
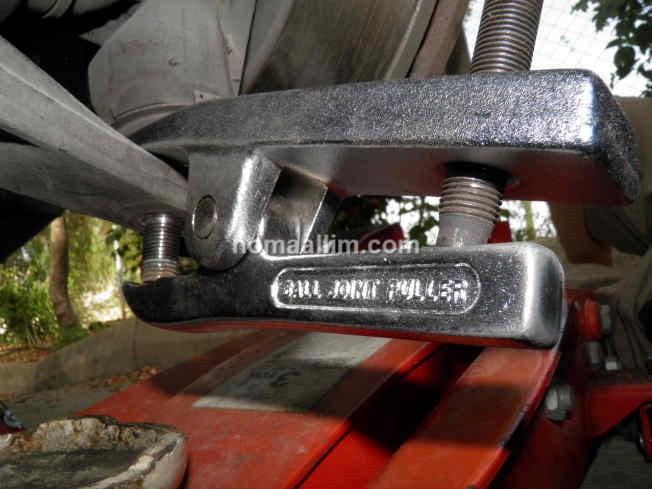
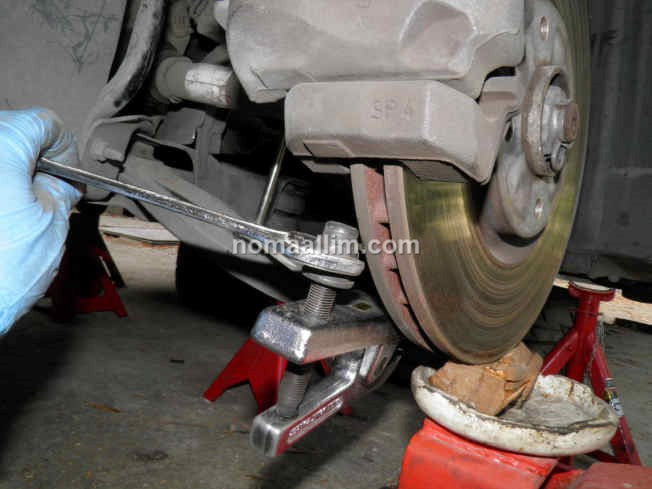
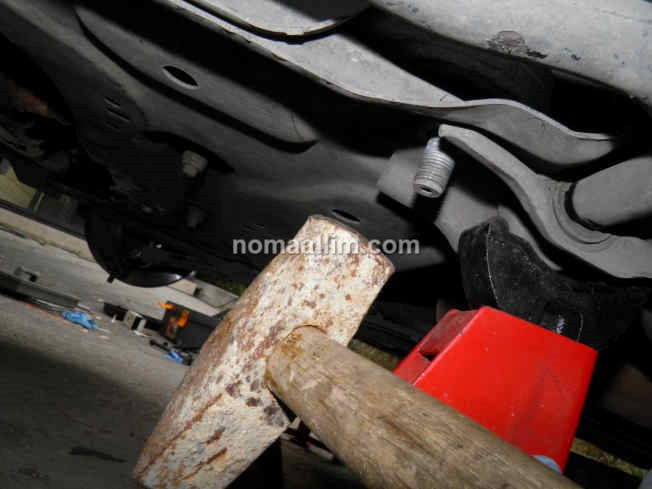
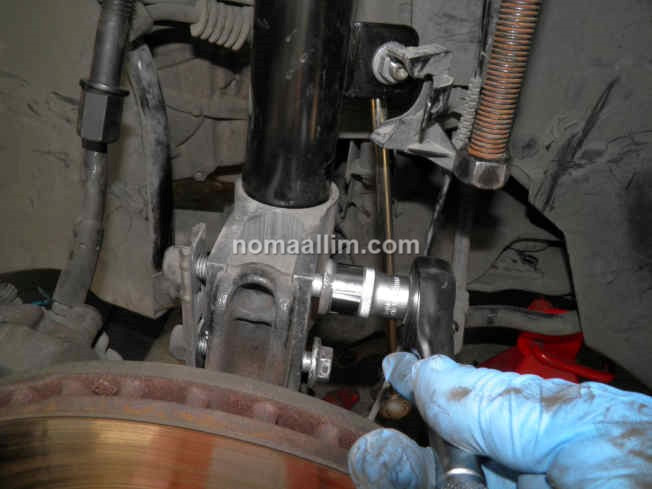
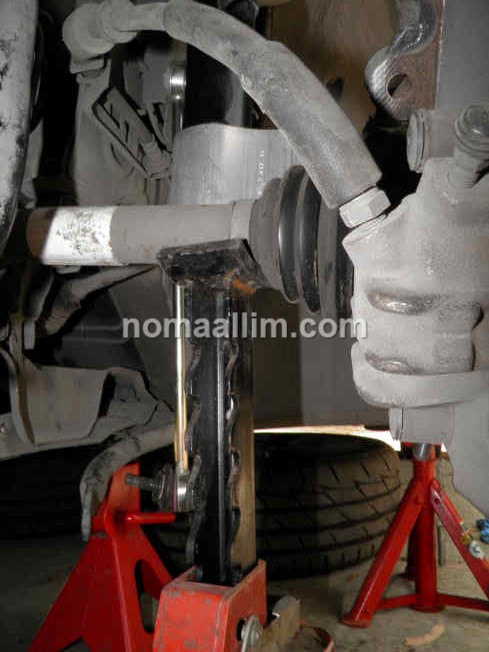
Fit the ball joint removal tool to the lower ball joint that holds the control arm to the wheel hub and separate the hub from the lower arm.

Dislodge the bolts of the lower arm.
To note that on the Peugeot 5008, it is not possible to remove both bolts.
The rear one only can be taken out as shown here while the front lower arm bolt gets stuck in the transmission.
To note that on the Peugeot 5008, it is not possible to remove both bolts.
The rear one only can be taken out as shown here while the front lower arm bolt gets stuck in the transmission.


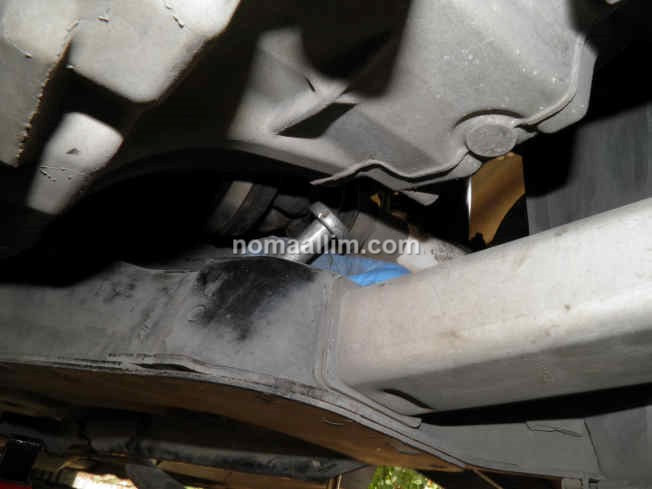
Cut the front control arm bolt with an angle grinder taking care not to hit the car chassis.
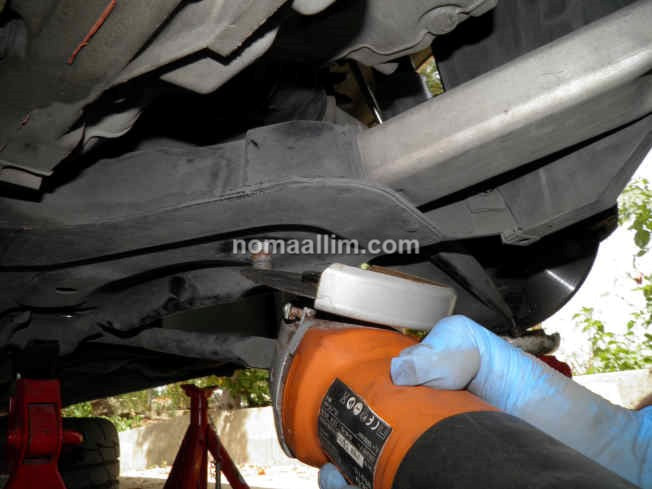
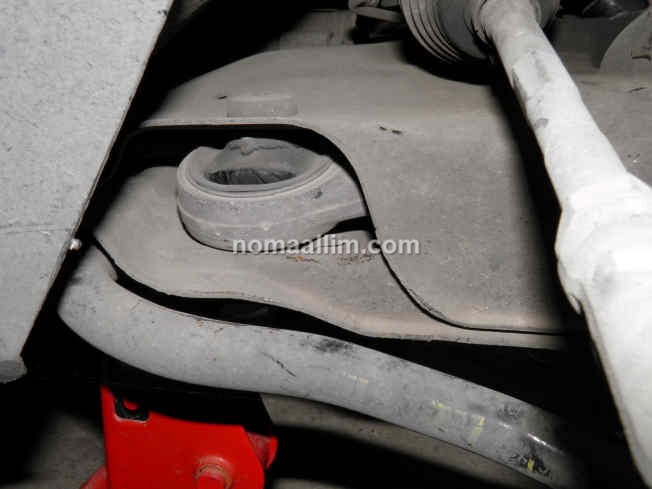
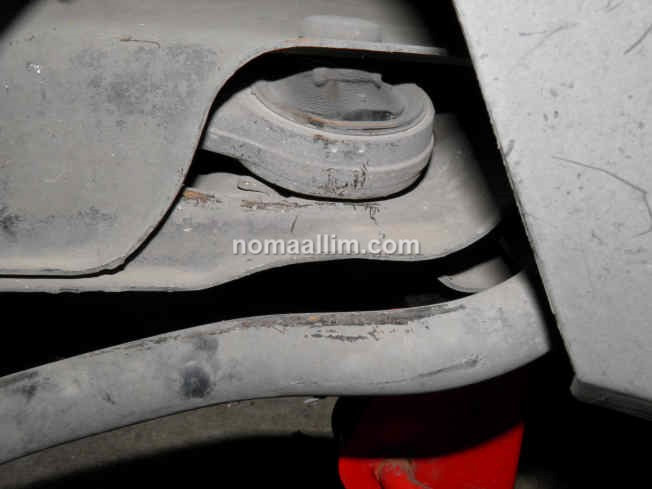
Separate the MacPherson strut from the wheel hub and disconnect the stabilizer bar linkage as well, then lift the disc brake to the max in a manner to raise the transmission as much as possible. This creates enough space to take out the from control arm bolt (pictures to the right).


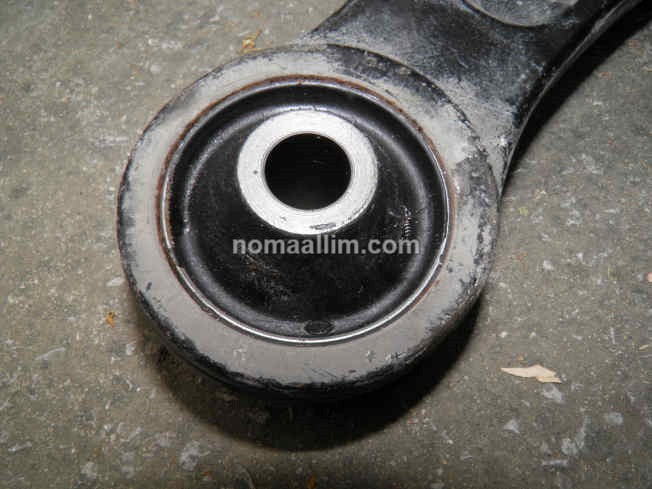
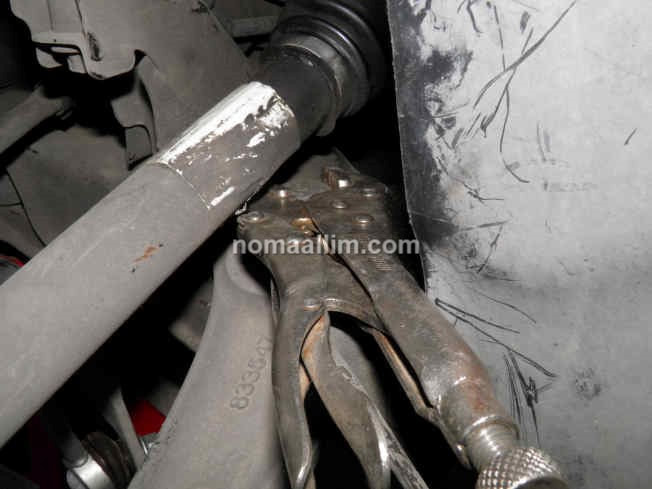
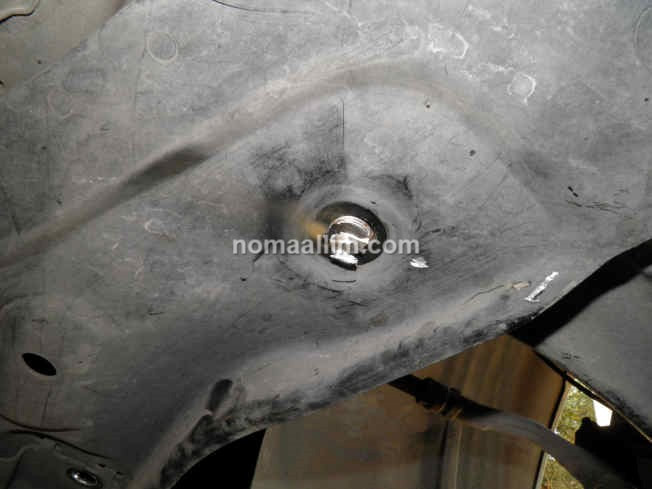
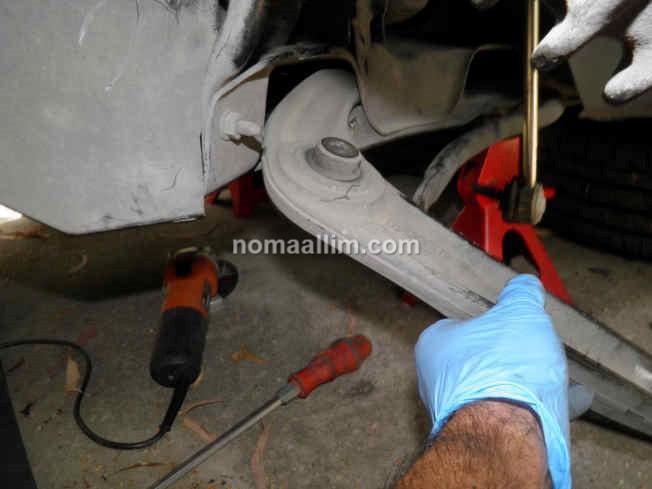
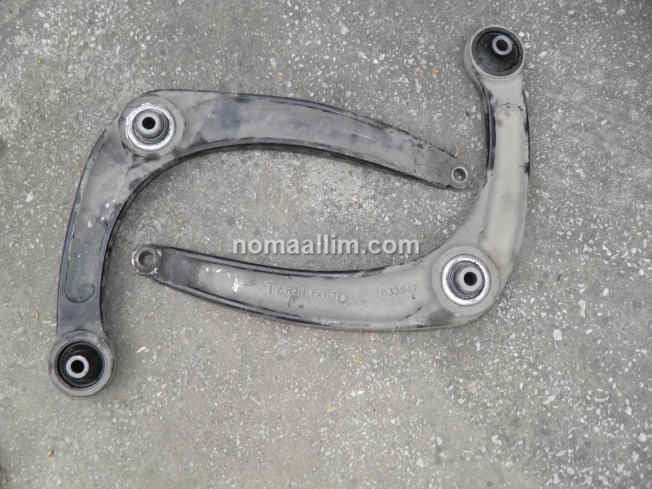
Once both bolts are out and the ball joint is freed from the control arm, it can be extracted by hand as shown in the left picture.
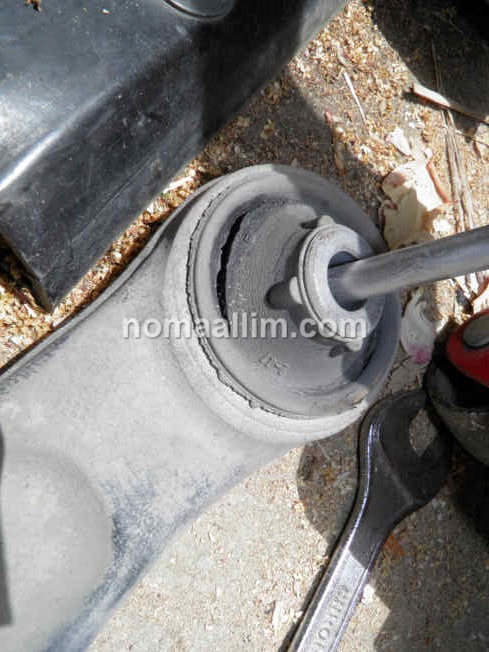
The middle picture confirms the diagnostic of worn bushes (bushings).
Make sure to support the transmission as shown in the right picture.
In no case you should pull out the transmission as this requires to drain the gearbox first.
If your vehicle is equipped with an automatic gearbox like the case of this Peugeot 5008 fitted with an AT6 AISIN gearbox, this could lead to unnecessary and costly oil level adjustment of the gearbox.
Do not disconnect the steering rack ball joint. This will help keeping the transmission shaft in place.
|
|
|
|
|
|
Control arm (lower arm) renewal and refitting
Take your lower arms to a workshop that has a press and replace the bushings.
The bushes are press-mounted, you cannot replace them by yourself.
The bushes are press-mounted, you cannot replace them by yourself.

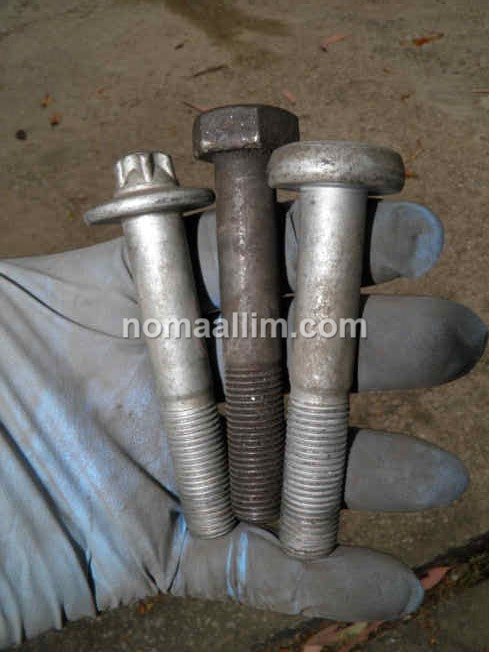
Make sure to buy similar bolts to the ones you have cut with the angle grinder.
In particular, make sure to get bolts of the same class (10.9 for example).
In particular, make sure to get bolts of the same class (10.9 for example).
|
Buy your 3008 / 5008 lower arm ball joint or complete arm or its bushings here:
|


Refit the new bolts the other way i.e. upside down, the bolt from beneath and the nut from top so you can take them out easily upon the next intervention. Reverse above steps to complete your repair.