COPYRIGHT WARNING:
All pictures and texts in this web page are the property of nomaallim.com. Any use of any part of those contents without the written consent of nomaallim.com shall be subject to legal procedures as per international and local laws in the concerned country. Using the name "nomaallim" or "nomaallim com" or "nomaallim.com" in the text describing the unauthorized copied content shall not constitute an exception and shall be sanctioned in accordance to the effective laws and proceedings.
All pictures and texts in this web page are the property of nomaallim.com. Any use of any part of those contents without the written consent of nomaallim.com shall be subject to legal procedures as per international and local laws in the concerned country. Using the name "nomaallim" or "nomaallim com" or "nomaallim.com" in the text describing the unauthorized copied content shall not constitute an exception and shall be sanctioned in accordance to the effective laws and proceedings.
BEFORE YOU START
|

|
DISCLAIMER:
Our pictorials are of informative nature and do illustrate works carried out by ourselves at our own premises for our own use and satisfaction.
Readers who envisage to carry out similar works inspired by the below method shall do this at their own risks and liability.
Our pictorials are of informative nature and do illustrate works carried out by ourselves at our own premises for our own use and satisfaction.
Readers who envisage to carry out similar works inspired by the below method shall do this at their own risks and liability.
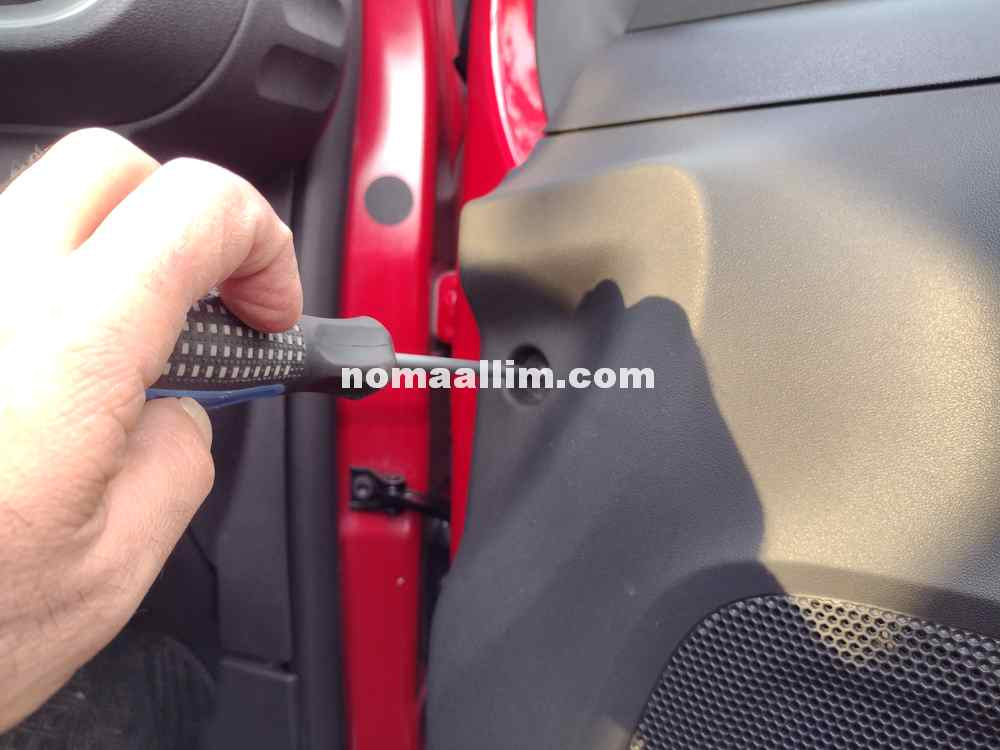
Removing the screws on the bottom and sides of the door panel
Find first the few screws that are visible only when the door is open (left and middle pictures) or that are located at the bottom of the car door panel (right) and remove them.

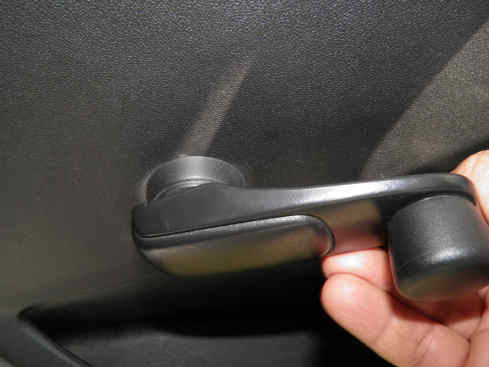
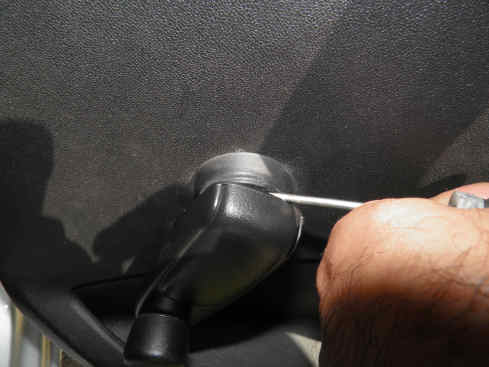
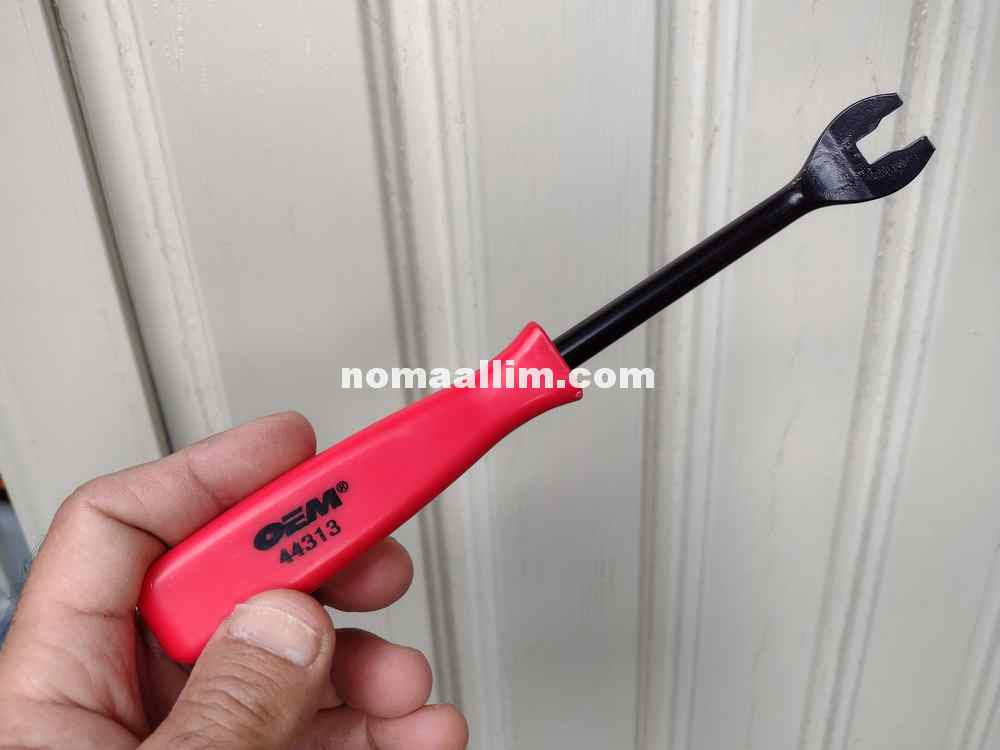
Removing a manual car door window lifting handle (crank handle)
Insert the U-shaped tools in their intended holes then gently pull out your car radio unit.
The picture to the left shows how the tool eliminates the effect of the car stereo holders.
The picture to the left shows how the tool eliminates the effect of the car stereo holders.
 |
 |
|
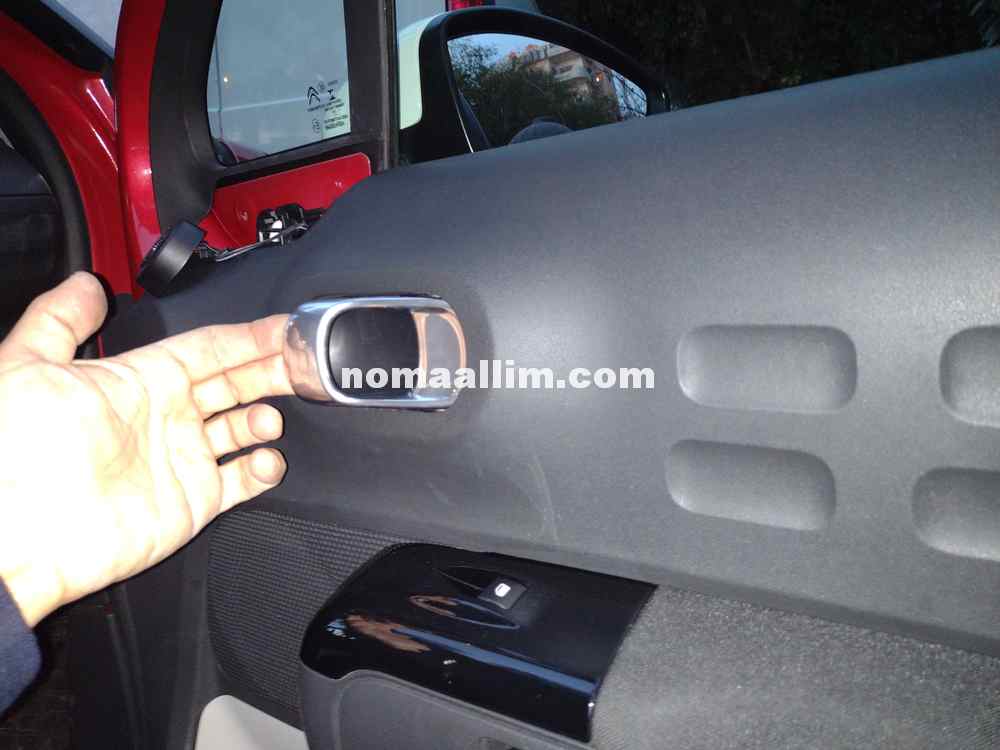
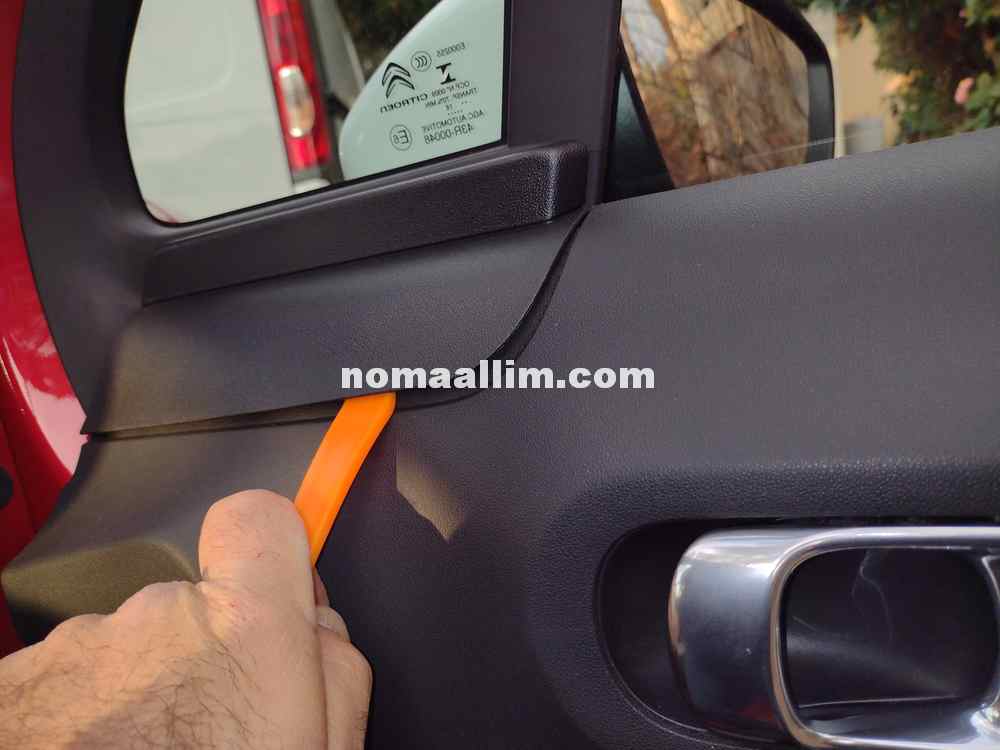
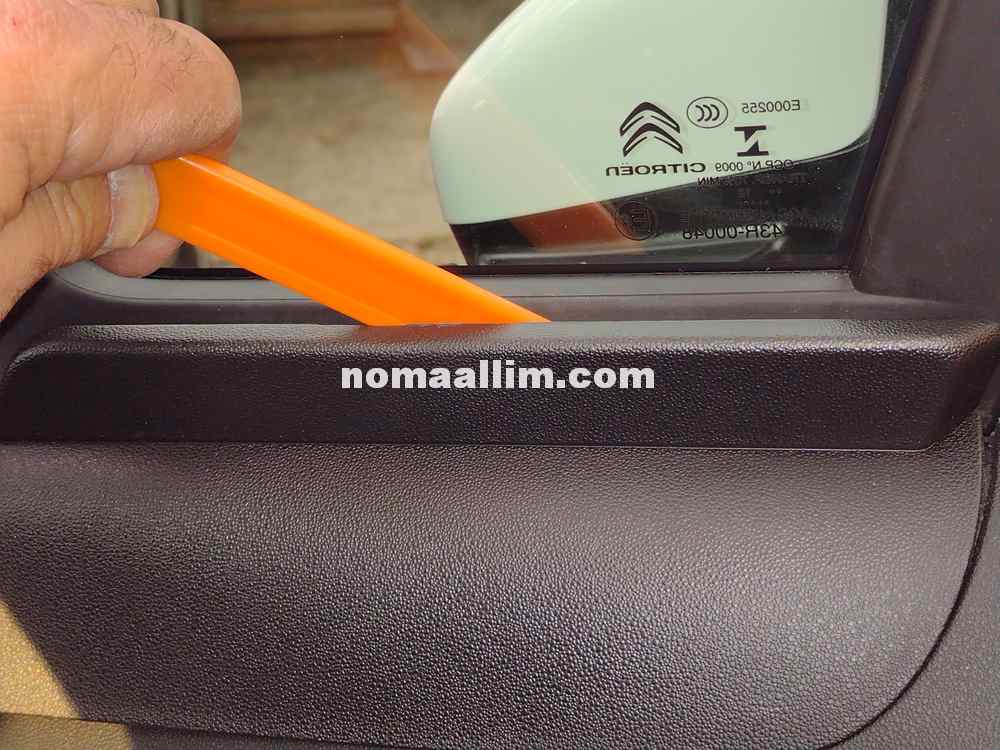
Removing any separable panel like the door mirror cover
If your door panel has a separable part like this door mirror cover, start by taking it out using the door panel plastic tools.
If you're using a screwdriver, make sure not to damage the plastics, work slowly and carefully.
If you're using a screwdriver, make sure not to damage the plastics, work slowly and carefully.


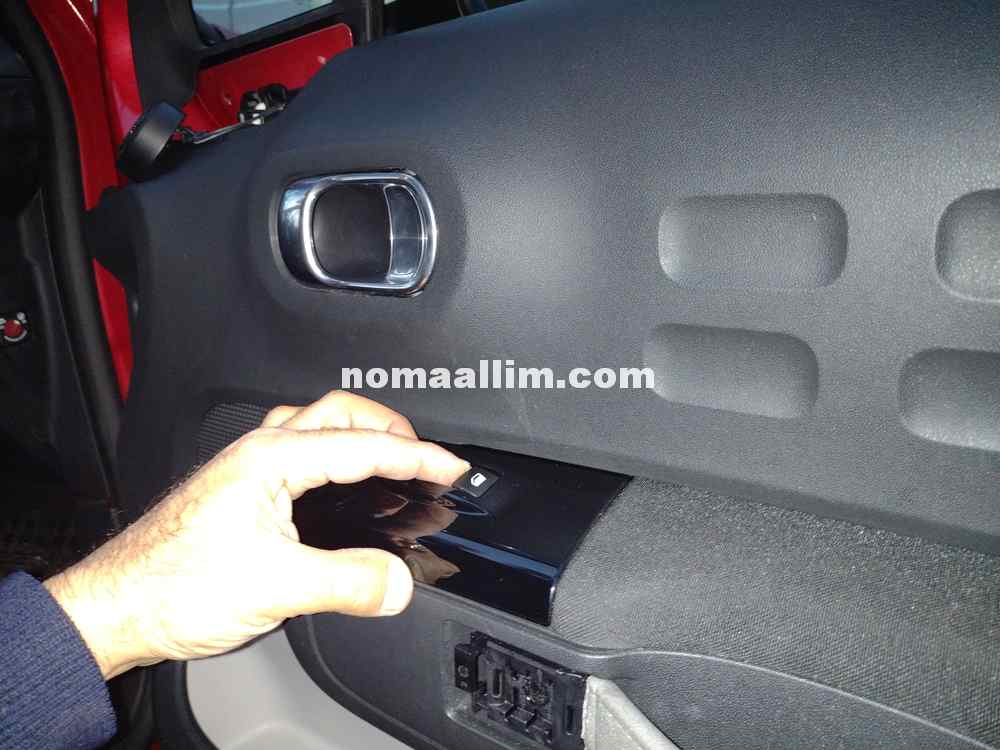
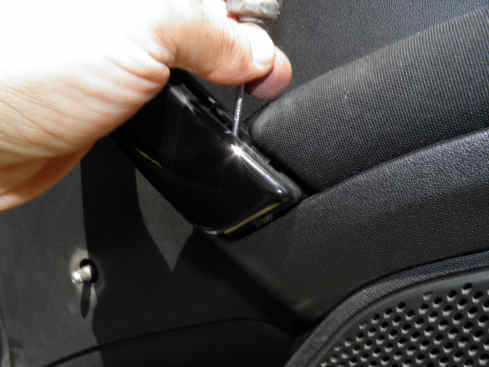
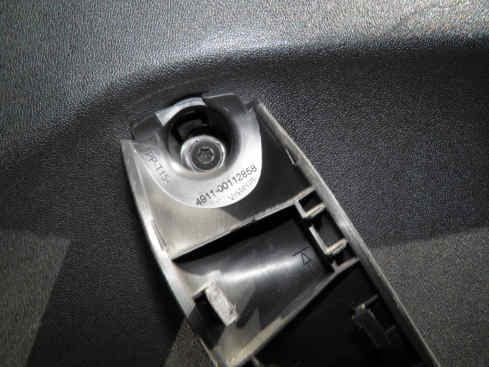
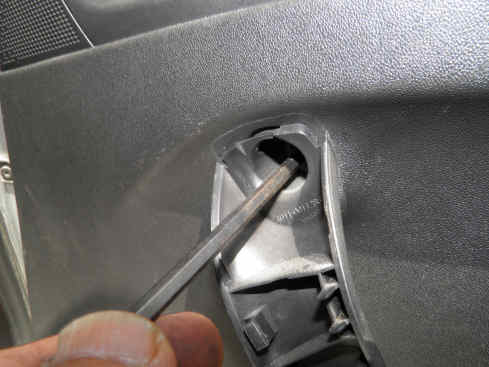
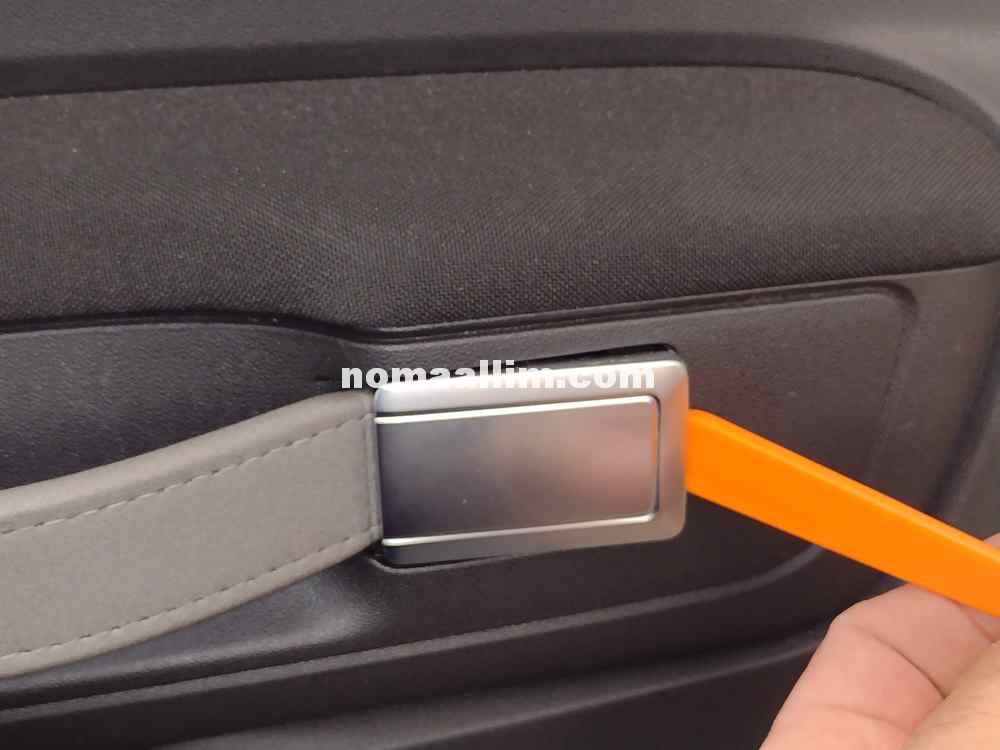
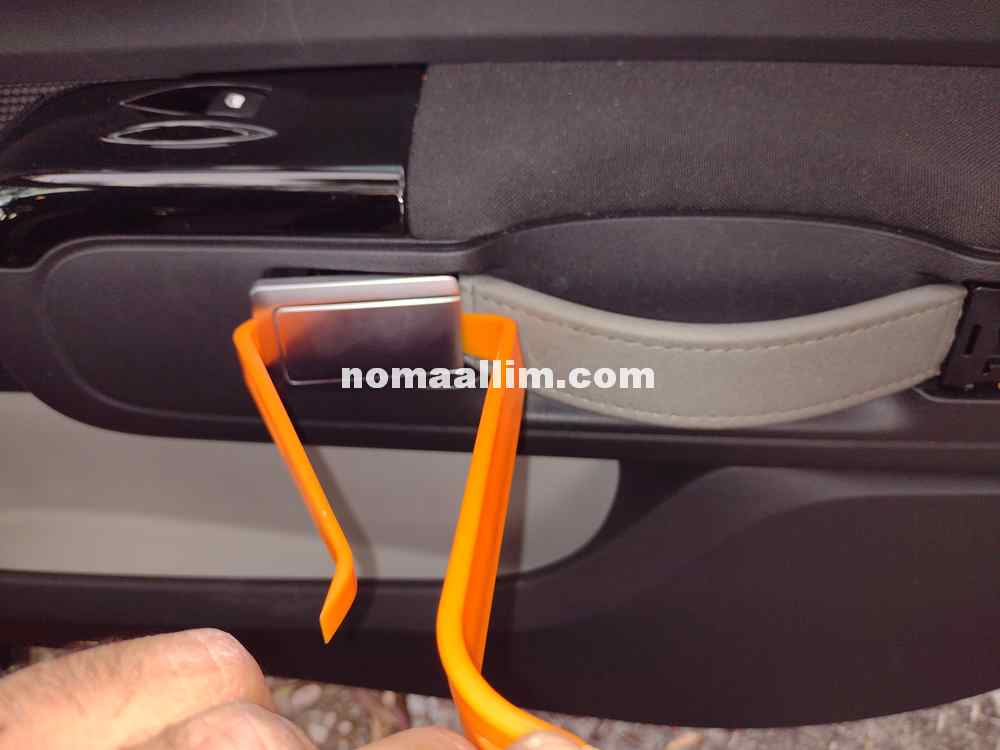
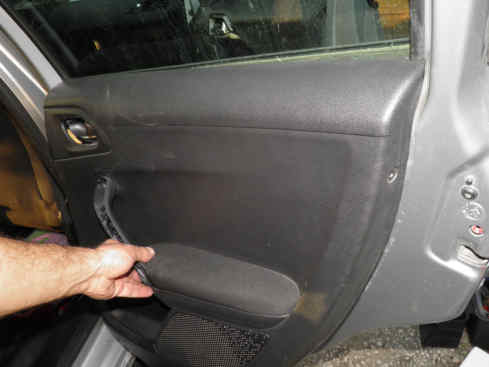
Removing the car door main handle and armrest
Take out the armrest handle cover with the door panel removal tools, or, a small flat screwdriver, but in this case, be very much careful not to damage the plastic or metal part that you remove.
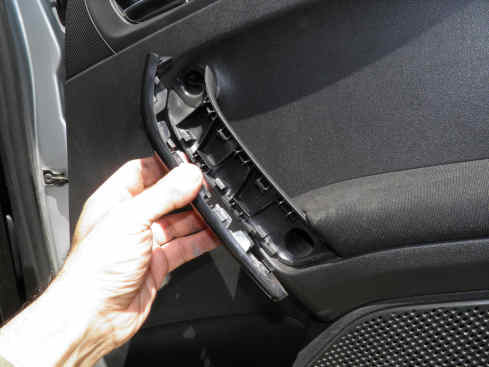
This uncovers the fixing screws of the handle which you need to remove. These are large Torx screws that require some force to be slackened at the beginning.
This uncovers the fixing screws of the handle which you need to remove. These are large Torx screws that require some force to be slackened at the beginning.

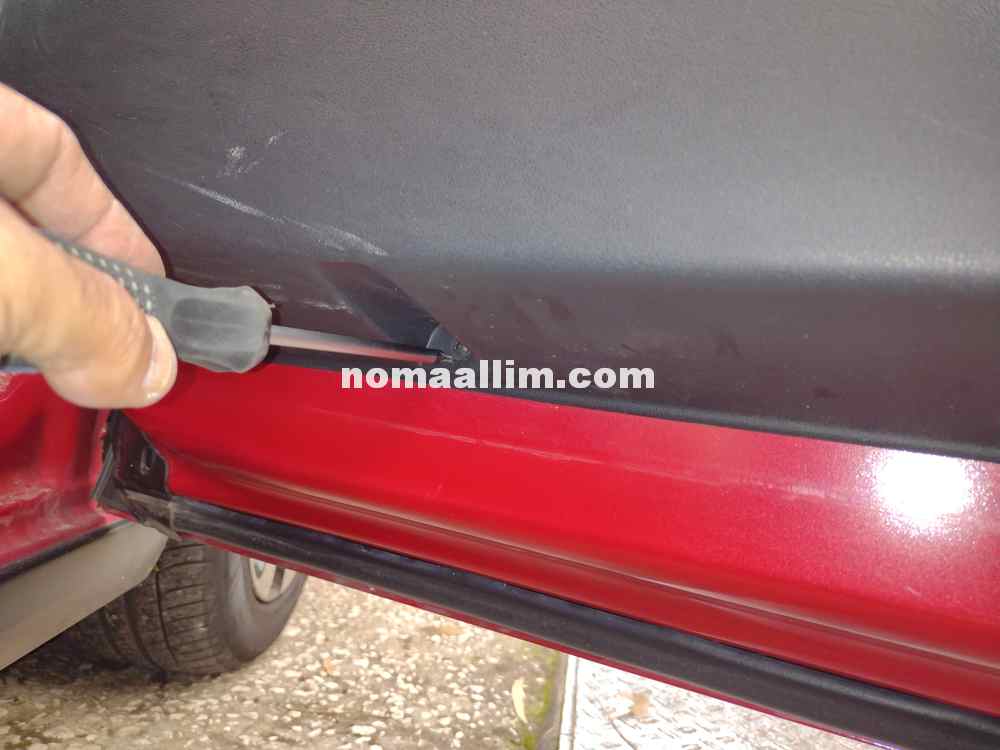
Removing the car door panel
|
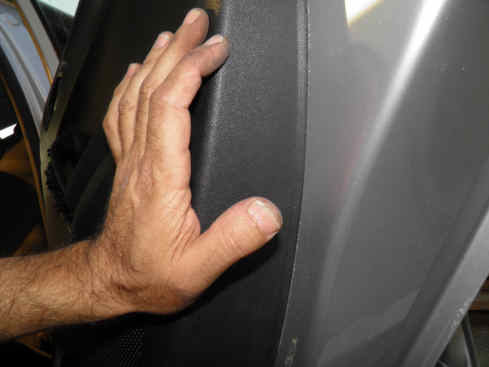
All tools are not as good as your own hand to pull out a car door panel for the below reasons:
|
|
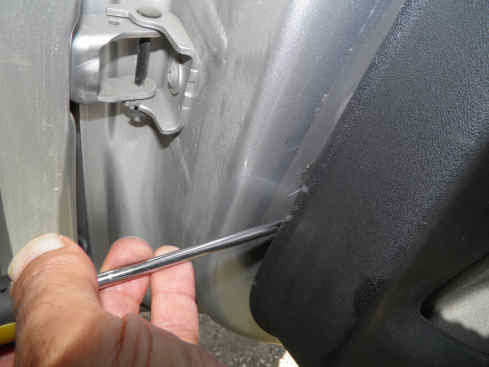
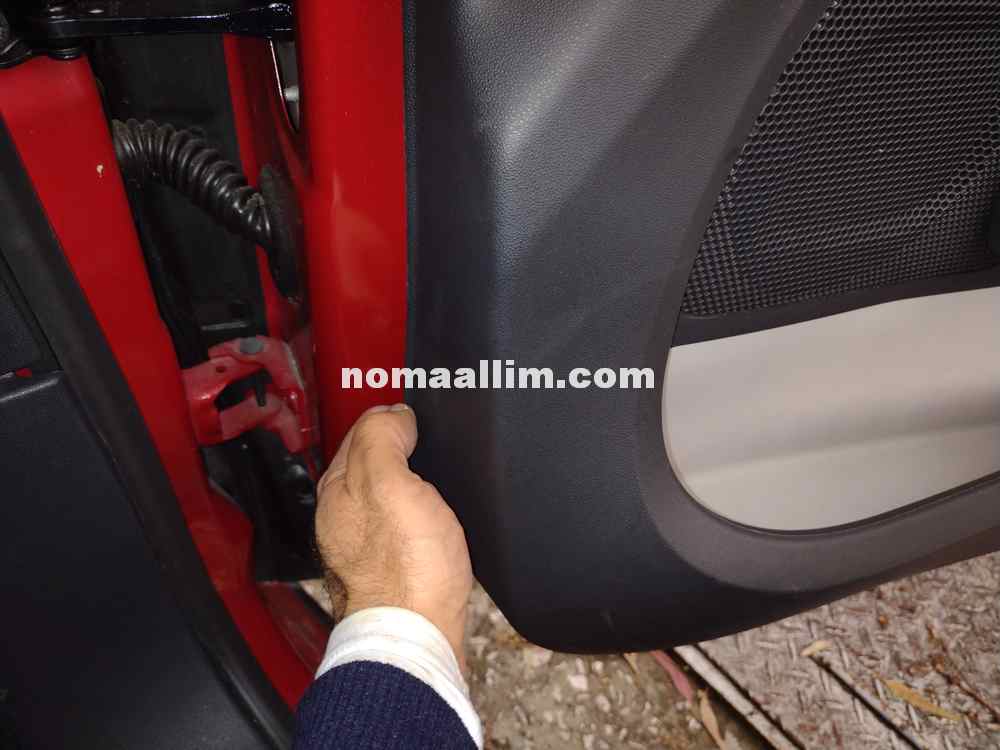
Use a car panel removal tool or a large flat screwdriver that you insert gently between the door panel (bottom, see left picture) and the metal part of the door itself to lift out the panel in a manner that you can insert your fingers as shown.
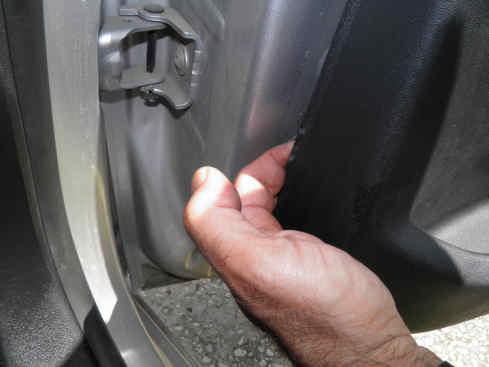
Pull the car door panel out with your hand using all four fingers at the same time then move your hand all along the door panel contour at the bottom and the sides while repeating the same.
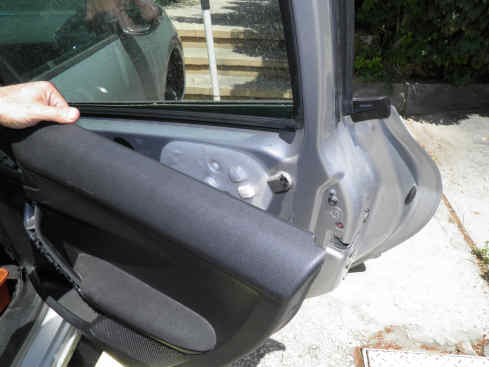
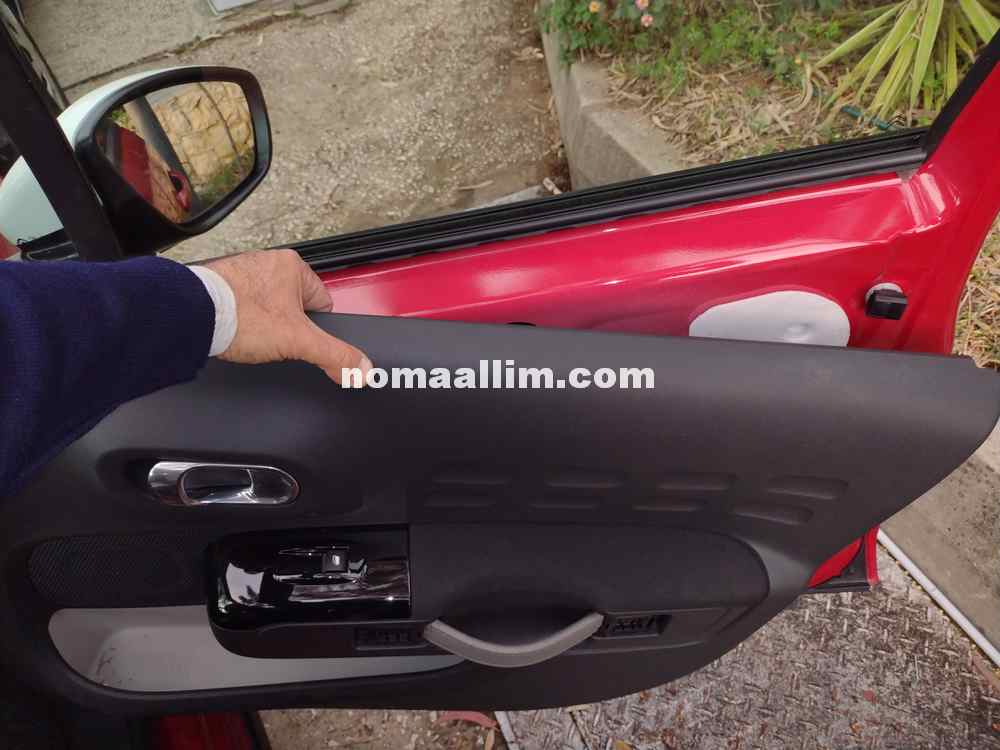
Once all clips are freed, lift the plastic door panel up to take it out as shown in the right picture.
Be careful however, one or more connectors or door opening cables may be attached to the panel, see further below.
Pull the car door panel out with your hand using all four fingers at the same time then move your hand all along the door panel contour at the bottom and the sides while repeating the same.
Once all clips are freed, lift the plastic door panel up to take it out as shown in the right picture.
Be careful however, one or more connectors or door opening cables may be attached to the panel, see further below.

Disconnecting all connectors and cables from the car door panel
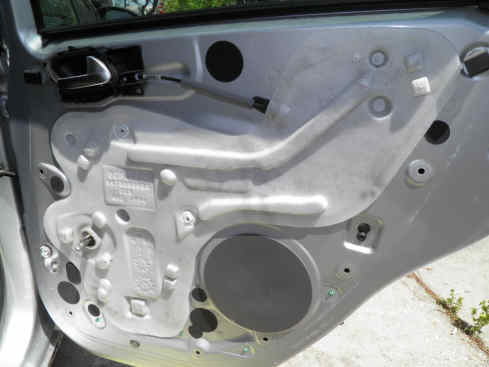
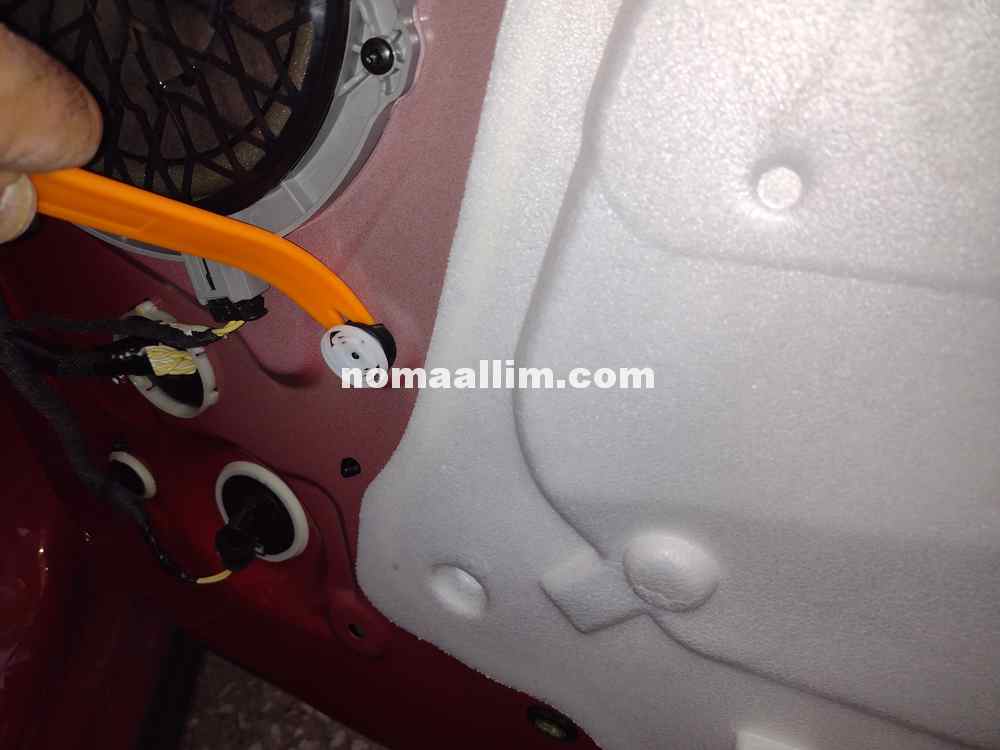
This uncovers the door.
In this case, you can see:
In this case, you can see:
- the anti-condensation barrier, molded in white foam material
- the plugs of the different openings, shown in black in this picture
- the plug of the speaker location in grey color at the bottom right corner of the door.
|
 |
 |
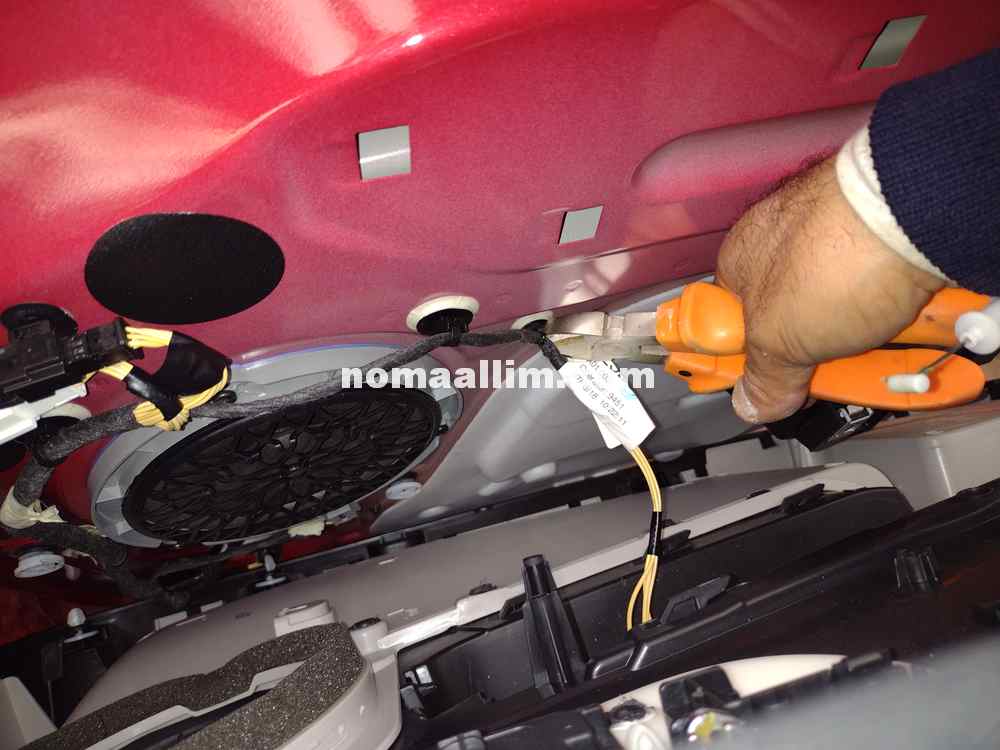
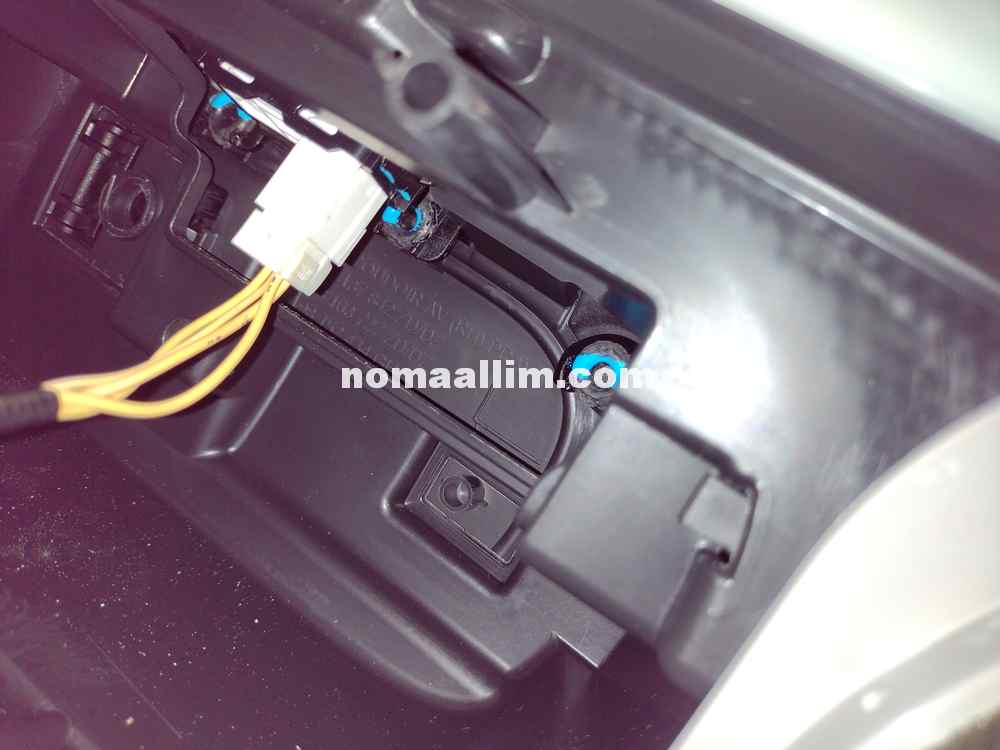
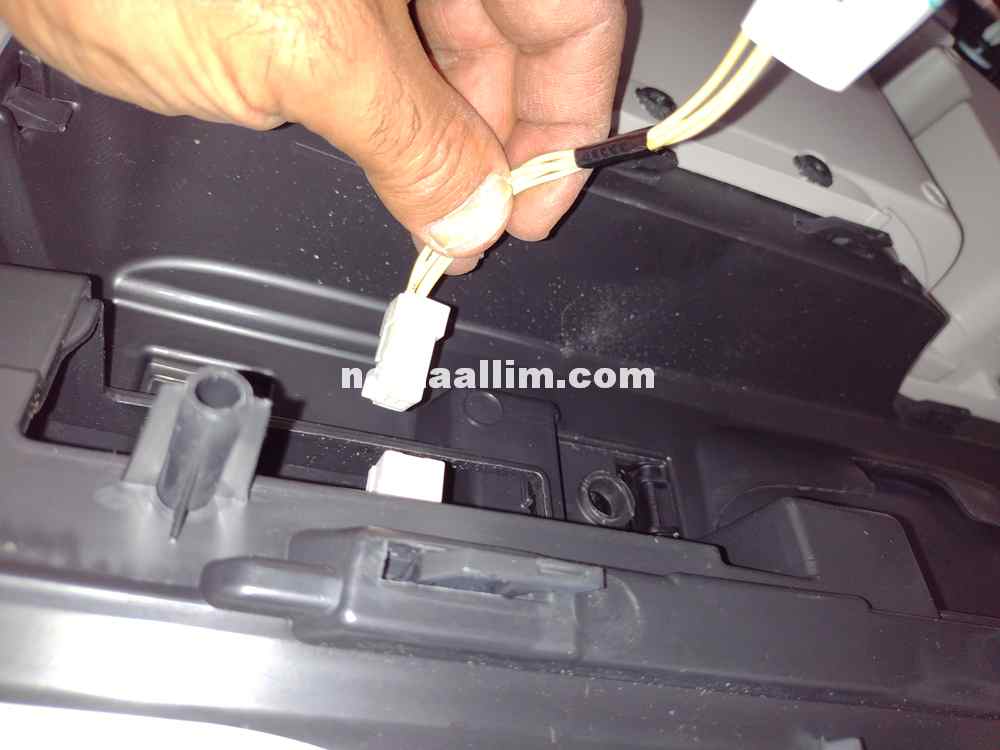
In most cases however, you still have to disconnect the electrical wires and cables that link to the car door panel.
Do not hesitate to cut the cable ties that attach the wire harness to the door, so you can reach the connector of the power window switch for example, and disconnect it. Such connectors are particularly hard to separate and you will need a good access to be able to remove them.
Do not hesitate to cut the cable ties that attach the wire harness to the door, so you can reach the connector of the power window switch for example, and disconnect it. Such connectors are particularly hard to separate and you will need a good access to be able to remove them.
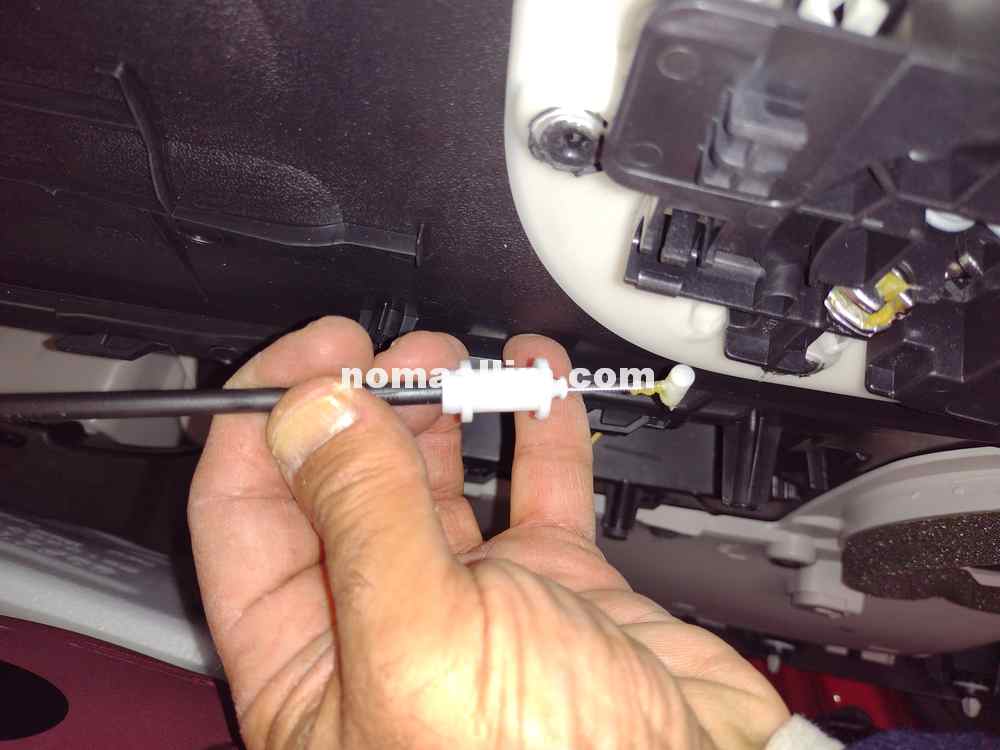
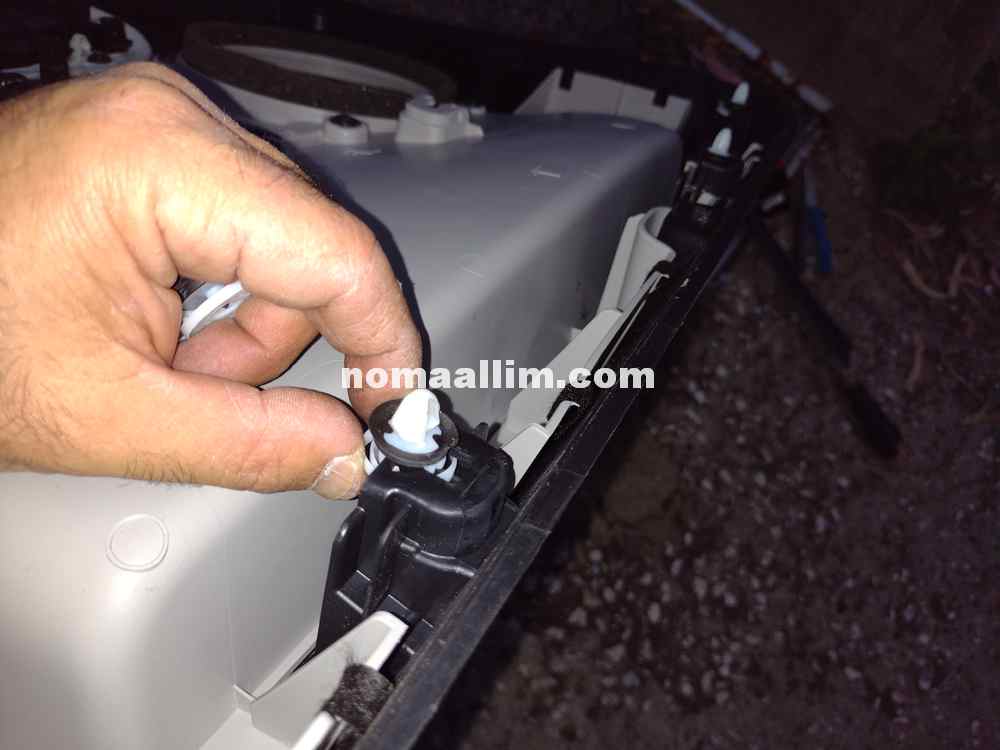
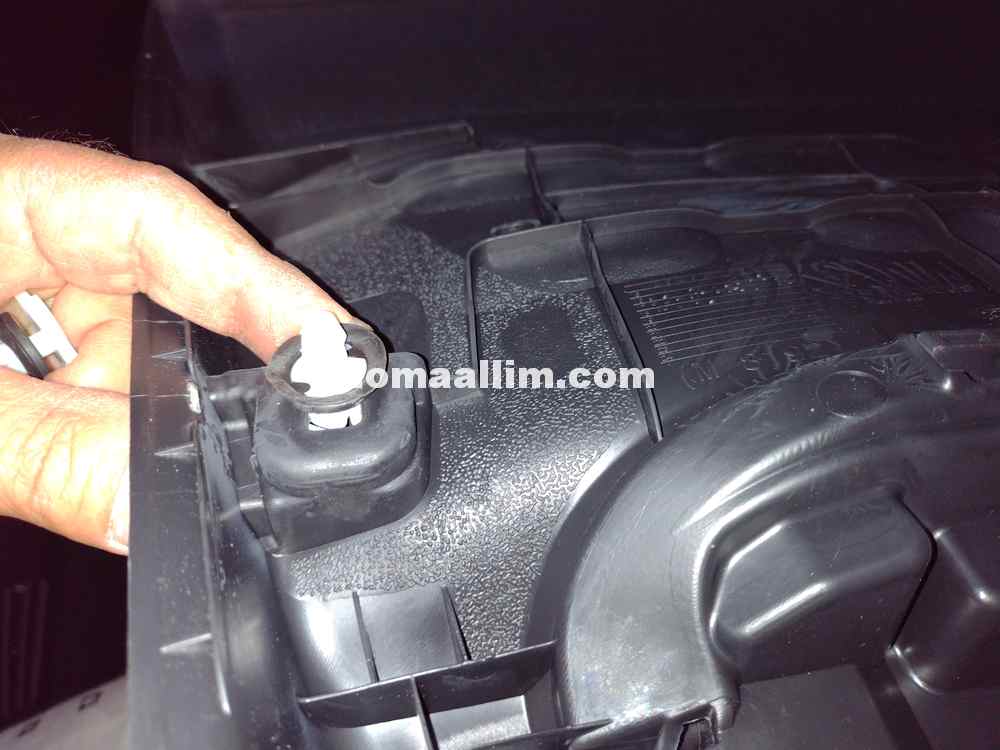
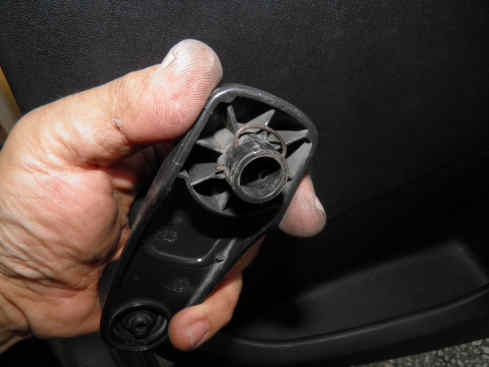
The door panel of this 2019 Citroën C3 requires also the removal of the cable that links to the door handle.
It simply needs to have its end cylinder tilted so the cable can be freed from its holder.
It simply needs to have its end cylinder tilted so the cable can be freed from its holder.
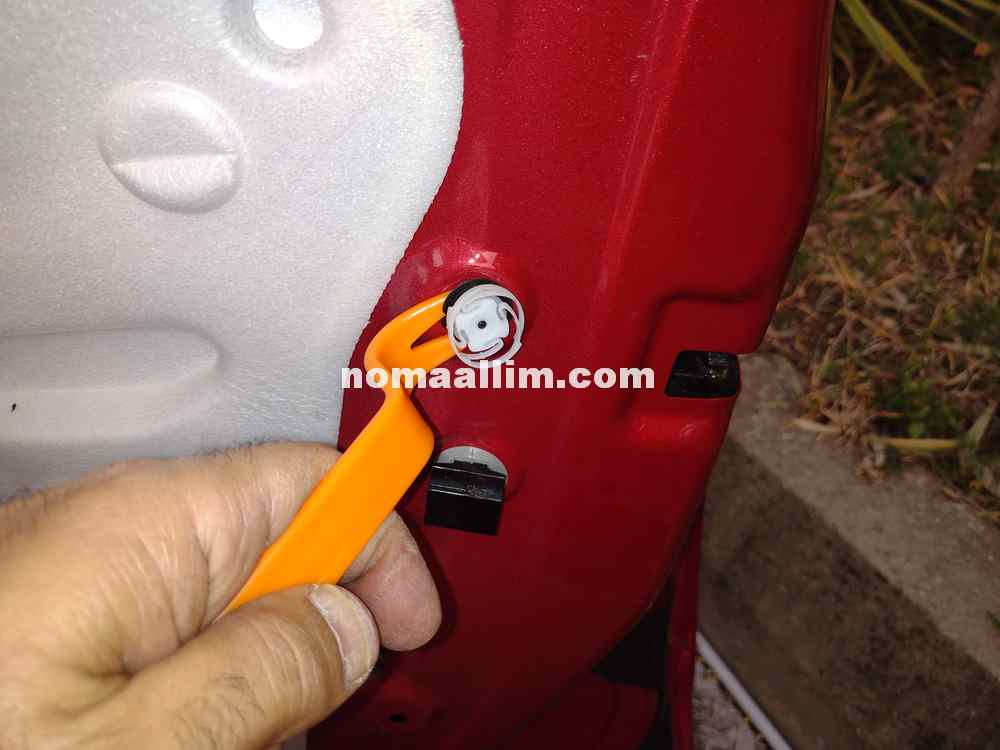
Collecting all car door panel fixing clips
Make sure to look at your door, find all plastic clips that remained fixed to the door and got removed from the door panel instead.
Usually, one third of the clips will remain attached to the door.
You can now easily use the specific door panel removal tool to take out those clips.
Put the clips back to their seats on the car door panel so you can re-assemble the panel as shown below.
Usually, one third of the clips will remain attached to the door.
You can now easily use the specific door panel removal tool to take out those clips.
Put the clips back to their seats on the car door panel so you can re-assemble the panel as shown below.
 |
 |
 |
 |
 |
 |
Refitting a car door panel
Start by meticulously refitting all panel clips in their seats and make sure none is missing.
Then proceed as follows:
- Re-connect the wires and cables
- Insert the molded panel from top in the space between the metal part of the door and the window
- Push down the door panel and press over every fixing clip. Do not use any hammer, press with your hand only.
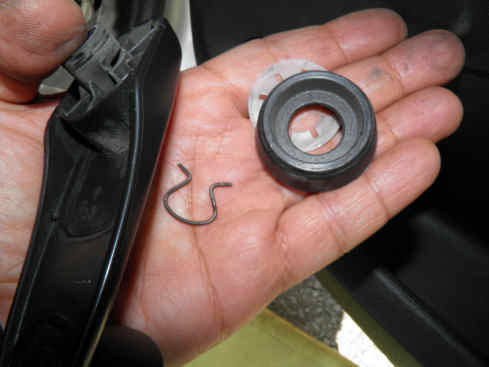
- If your vehicle has manual window lifters, fit the metal spring on the crank handle and press the window lifter handle in its shaft.
Check an test the power windows and the door handle are working prior to continuing witht the car door panel installation, then refit all screws and covers.