COPYRIGHT WARNING:
All pictures and texts in this web page are the property of nomaallim.com. Any use of any part of those contents without the written consent of nomaallim.com shall be subject to legal procedures as per international and local laws in the concerned country. Using the name "nomaallim" or "nomaallim com" or "nomaallim.com" in the text describing the unauthorized copied content shall not constitute an exception and shall be sanctioned in accordance to the effective laws and proceedings.
All pictures and texts in this web page are the property of nomaallim.com. Any use of any part of those contents without the written consent of nomaallim.com shall be subject to legal procedures as per international and local laws in the concerned country. Using the name "nomaallim" or "nomaallim com" or "nomaallim.com" in the text describing the unauthorized copied content shall not constitute an exception and shall be sanctioned in accordance to the effective laws and proceedings.
BEFORE YOU START
DISCLAIMER:
Our pictorials are of informative nature and do illustrate works carried out by ourselves at our own premises for our own use and satisfaction. Readers who envisage to carry out similar works inspired by the below method shall do this at their own risks and liability. |
|
Dismantling the pistons from the engine block (cylinders)
Click on the below button for the previous step for pistons removal from engine
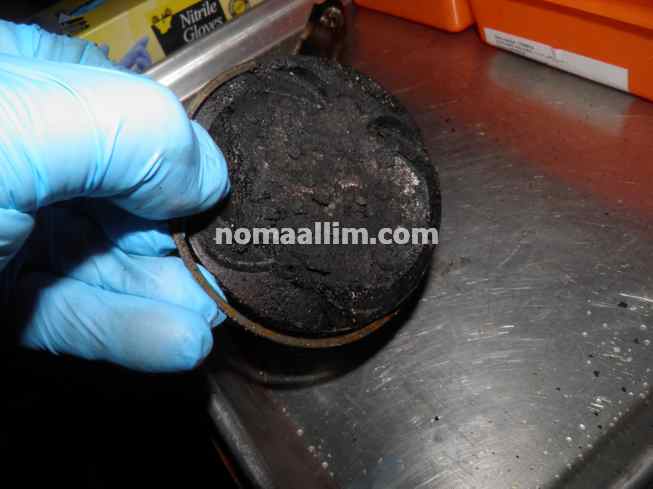
Removing the worn piston rings and brushing the pistons
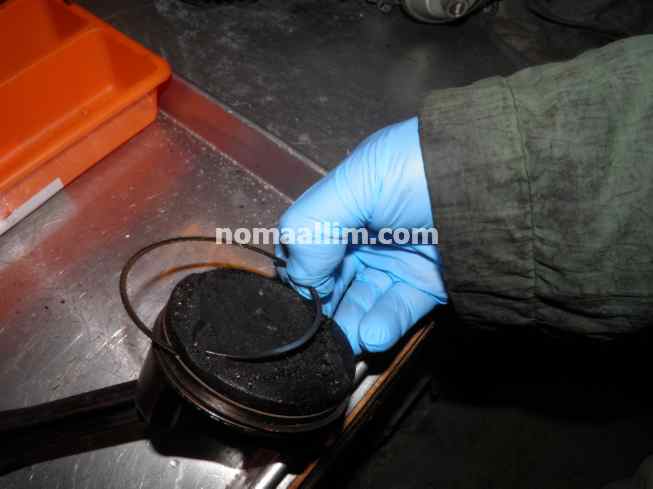
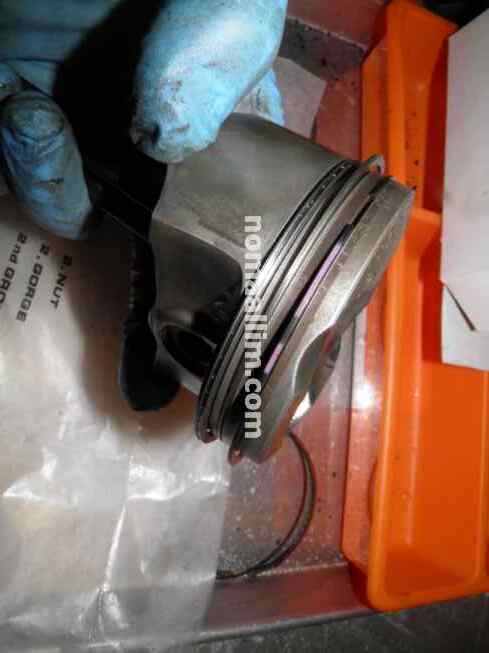
Simply take out the piston rings with your hand by opening them slightly and pulling them out of their groove and the piston.
There are usually three rings per piston in a gasoline engine.
You can try to open them more than needed and until they break in order to test their limit and make sure you won't break one of the new piston rings when refitting.
There are usually three rings per piston in a gasoline engine.
You can try to open them more than needed and until they break in order to test their limit and make sure you won't break one of the new piston rings when refitting.

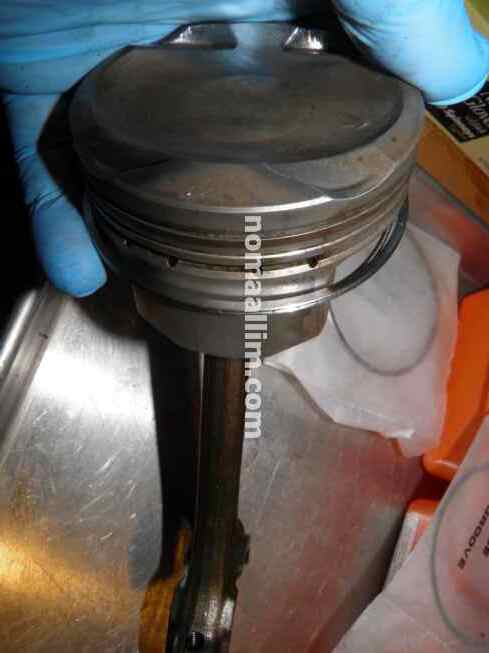
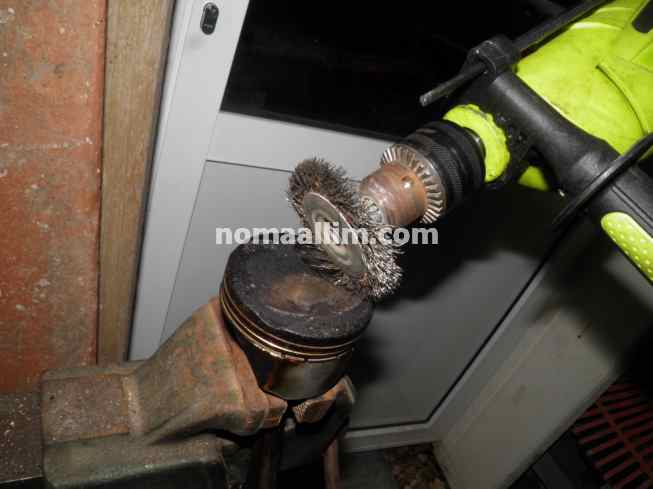
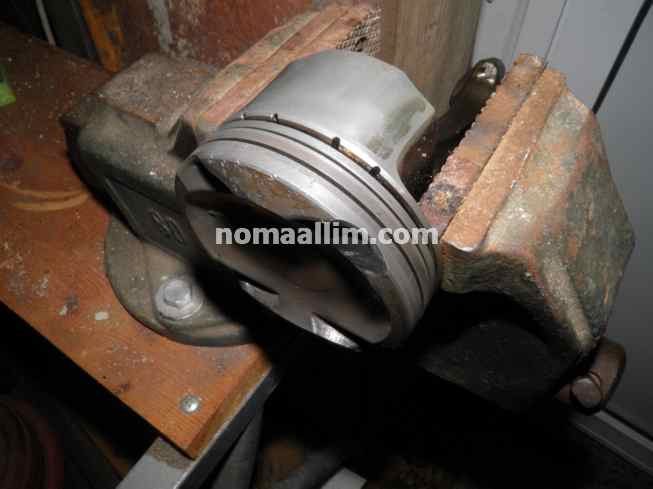
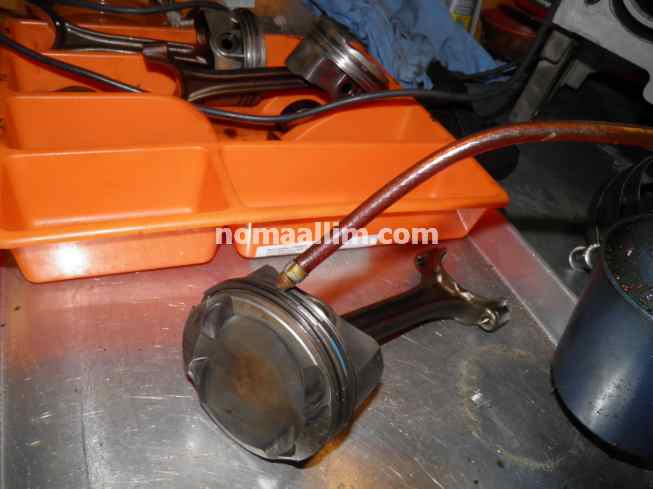
Put the piston in a vice and brush it with a metal brush that fits on a power drill or angle grinder.
Both work and both disc and cup brushes are good, also both steel or brass brushes will do the job.
Brush well the piston surface as shown in the right picture.
Both work and both disc and cup brushes are good, also both steel or brass brushes will do the job.
Brush well the piston surface as shown in the right picture.
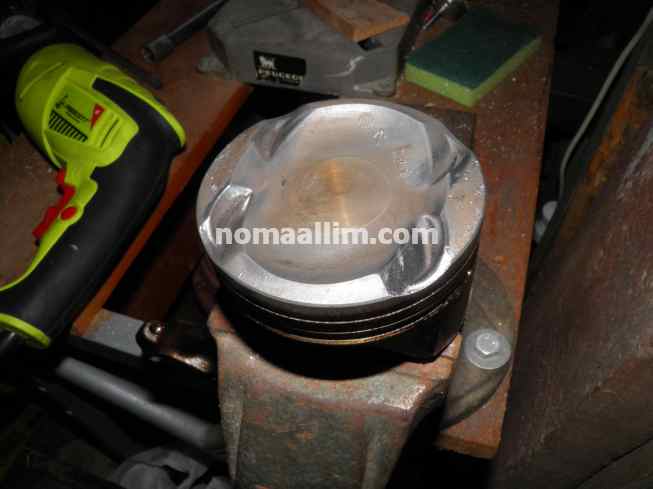
Repeat the same for the piston sides until the whole piston is free of carbon and burnt oil deposits so it comes back to an aluminum color finish.

|
|
|
Fitting new piston rings
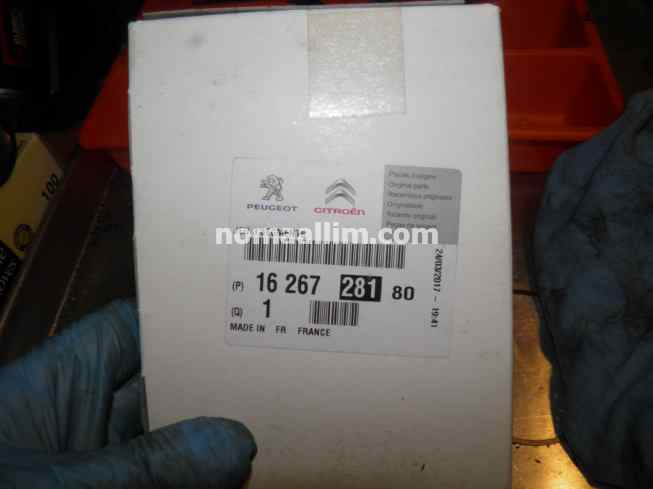
Piston rings are sold in sets of 3 pistons, one set for each piston.
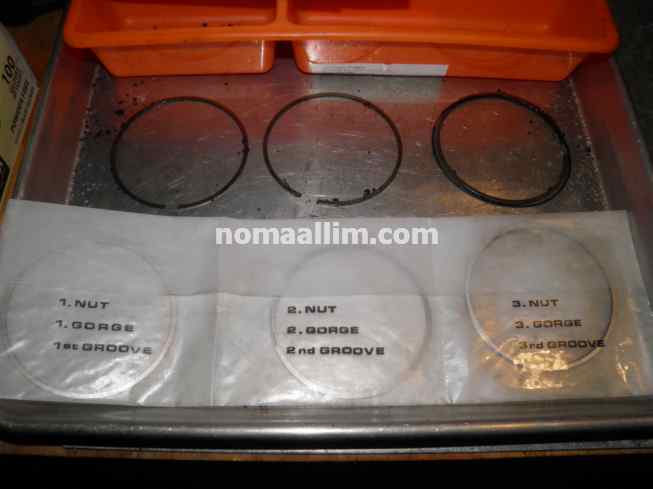
The rings are not identical as you could have noticed when removing the old ones; for this reason, the piston rings are inserted each in a pocket that is clearly marked as 1st, 2nd and 3d groove.
The 1st groove refers to the one to top of the piston while the 3d groove is the one down near the piston rod.
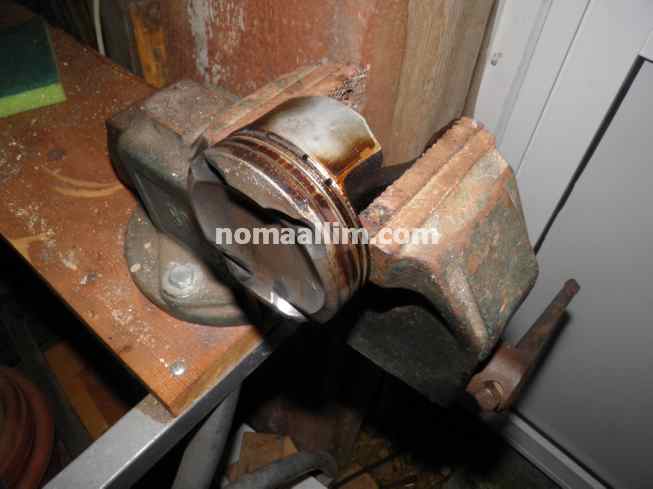
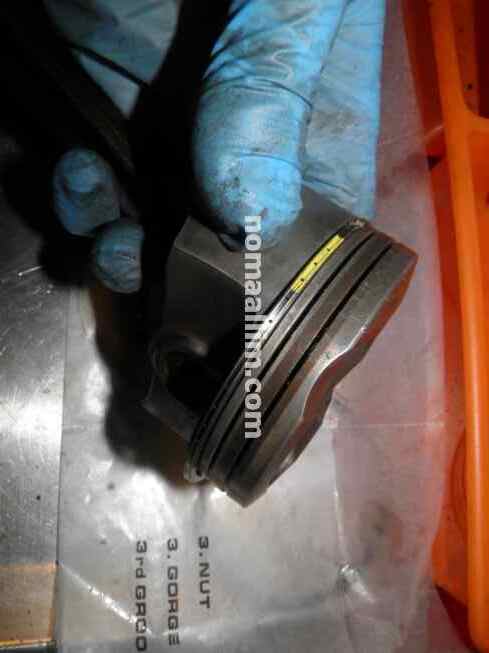
Gently and slightly open each piston ring just enough to make it cross the piston until reaching its groove and as follows:
- The lower piston ring of the 3d groove is better inserted from rod side (piston bottom, picture to the left).
- The piston ring in the middle groove has to be inserted oblique so it doesn't get inserted in the first groove
- The upper piston ring is the easiest to insert and should be fitted last
|
|
|
|
Refitting the pistons in the engine cylinders
Lubricate well the piston rings and grooves.
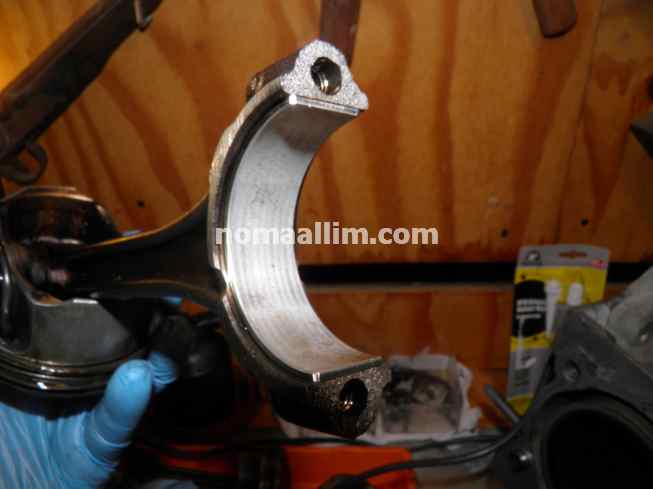
Make sure the piston rod bearing shell is there or fit it in the same position and orientation as it was when removing the piston.
See our pictorial for piston removal and how all parts are to be marked for being refitted in the same place and with the same orientation.
Insert the piston rod with the "UP" marking pointing as it should within the cylinder.
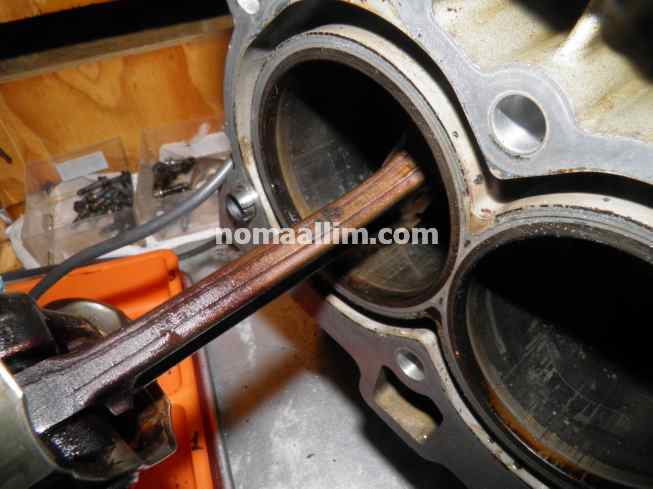
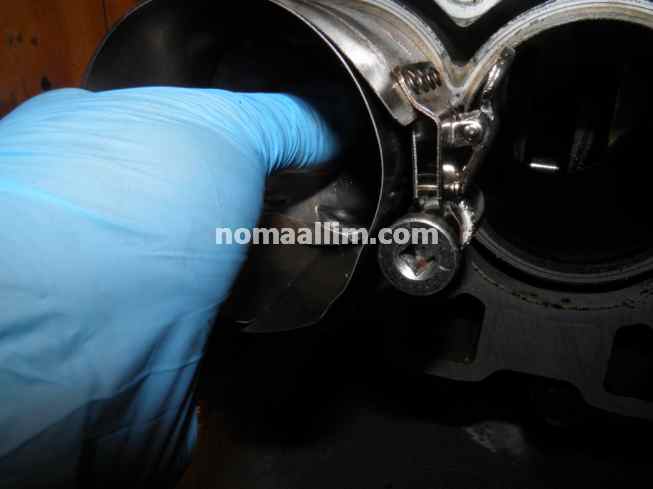
Fit the piston rings compressing tool in a manner that it covers all three piston rings at a time and tighten it until you can no more turn the handle with normal force. Do not over tighten or apply any excessive force on the handle.
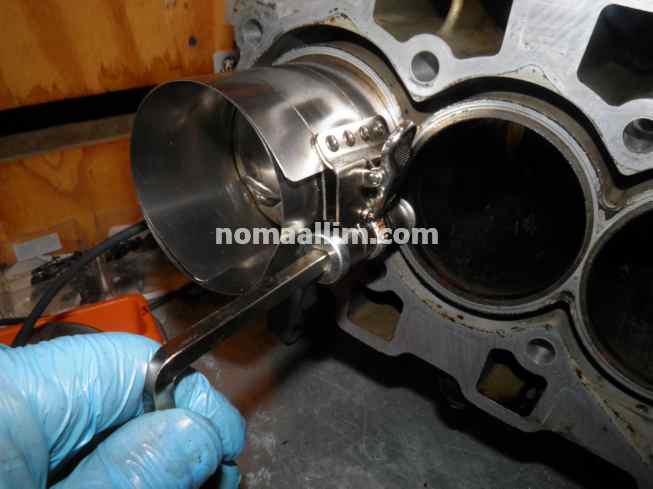
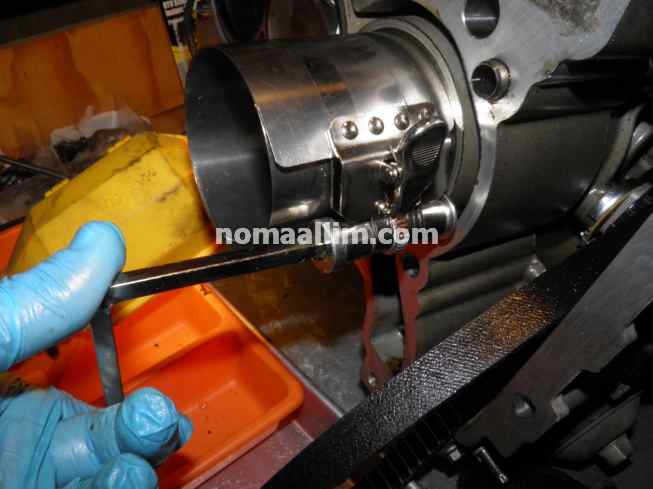
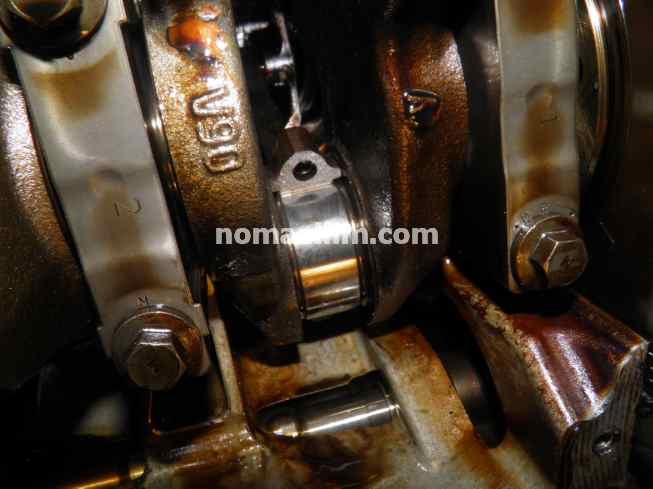
Position the related crankpin of the piston at the lowest position i.e. pointing outwards.
|
|
|
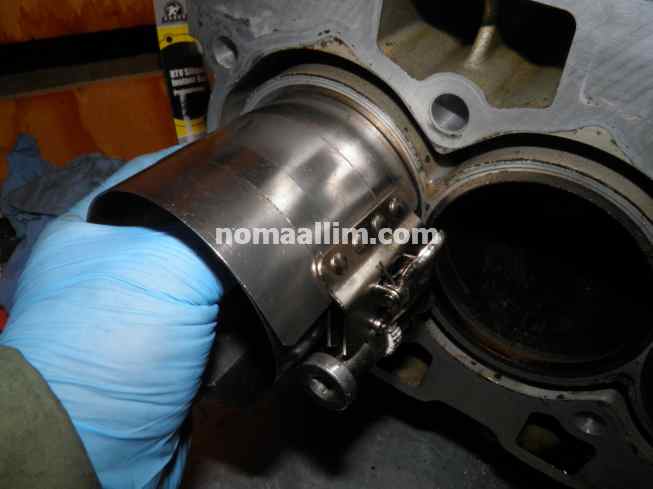
While keeping the piston compression tool in touch with the engine block, push the piston with your fingers until it completely enters the engine cylinder as shown in the right picture.

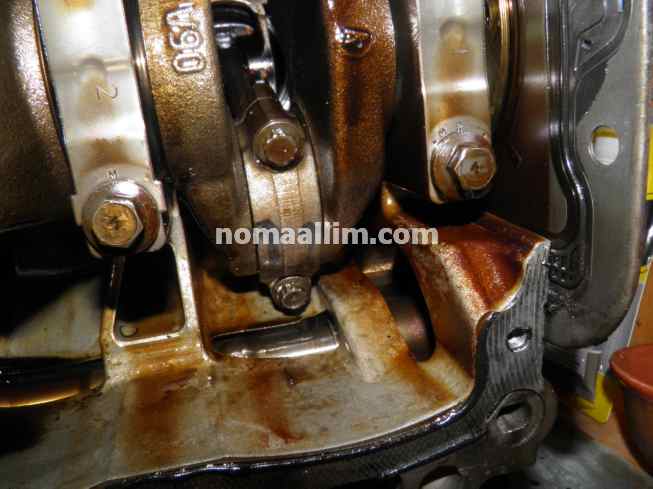
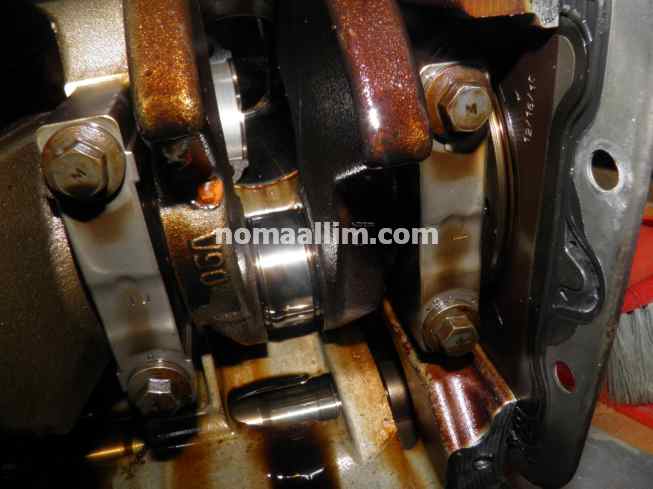
Bring the piston rod in contact with the crankpin and refit the cap.
Also make sure that the bearing shell is there.
Tighten the piston cap bolts to 2 daN then to an angle of 140 deg.
Make sure however to tighten both bolts to 2 daN first, then each to the required angle.
Also make sure that the bearing shell is there.
Tighten the piston cap bolts to 2 daN then to an angle of 140 deg.
Make sure however to tighten both bolts to 2 daN first, then each to the required angle.